Showing posts with label die cut. Show all posts

Monday, 25 June 2012

Woven Ribbon Cardfront - I love ribbon!

As you may have gathered from the name of this blog, I really love ribbon.  If you read my last post (or click here) you know I was lucky enough to be asked to write a tutorial based on this original card.  Of course, to do a tutorial I had to make a new card and this is what I came up with:


I started with the stamp set  "Relax a Bit" from Marks Finest Papers that I won from a Speedy Fox challenge a few weeks back.  I love this stamp set!  I collect teapots so it was the perfect addition to my stamp collection.  I thought that the Authentique 6x6 Gathering collection would go well with this set.  Once I decided on patterns I chose ribbons and card stock to coordinate. 

I cut, scored, and die cut all of the basic pieces, then heat embossed the images I wanted to use on the patterned paper in black.  This is the first time I paper pieced with embossing and I found it really easy to cut everything out as I could almost let the raised image guide my scissors. It also helped me stay in the lines when colouring.  I used my craft knife to cut out the handle of the teapot and the inside of the teabag string.


Once I had all of my elements ready I completed the woven ribbon panel.  I adhered the panel to the card front with Scotch ATG adhesive and glue dots.  Because the ribbon panel is quite heavy it is important to use a strong adhesive.  The die cut piece was foam taped over the top.


I added some faux stitching, adhered the teapot, added some twine, and Prima flowers.  I glued the teabag to the Prima flowers, and foam taped the sentiment at the bottom.  This card took some time to make, but I think it was worth it!


 Since the front had so much going on I kept the inside simple with just a stamped verse.  I love this quote!  This would be a great card for a pick-me-up.


Again, I made this card because Debbie from Friends of Speedy TV asked me to write this tutorial for them.  If  you haven't already, take some time to visit Friends of Speedy TV.  They have a great tutorial section among other fun things.  You won't regret you did!  :)

I used the following  supplies:

Cardstock:  Gina K Pure Luxury 120# Pure Ivory, Stampin' Up!  Very Vanilla.

Stamps:  Mark's Finest Papers Relax a Bit.

Ink:  Versamark Watermark Ink, Stampin' Up! Black Embossing Powder, Memento Tuxedo Black.

Markers:  Bic Mark Its Sunset Orange, Hot Aqua.  Black felt tip marker.

Ribbon:  American Crafts Premium Satin Ribbon.

Embellishments:  Prima Flowers Mellise Nature Garden,  Stampin' Up!  Basic Jewels Rhinestones.

Adhesive:  Scotch ATG, Stampin' Up|!  Sticky Strip, Zots, Quickie Glue Pen, foam squares.

Tools:  Paper trimmer, bone folder, scissors, Cuttlebug, Spellbinders Nestabilities Standard Circles Small, heat tool, Fiskars craft knife.


I am entering this card into the following challenges:
  1. Pause Dream Enjoy - #22 Use your favourite quote or verse.
  2. Papertake Weekly - Bingo! (Ribbon/ Free (Gems)/ Blooms)
  3. Allsorts - Any die will do
  4. Pile it On - Make your own embellishments
  5. Friends of Speedy TV Tutorial Time - Heat Embossing

Saturday, 16 June 2012

Christmas Cards #1 & 2

I've finally gotten a chance to blog a bit so I thought I would share the first of my Christmas cards.  I know it seems early but I figure the earlier I start the better.  We'll see if this worked out in December, lol.


I started with the patterned paper.  Since I'm not quite in a Christmas-y mood yet I chose the patterns that where the least Christmas-y, lol.  I made multiples of these and I didn't have quite enough of the ornament pattern, so I chose the snowflake pattern as well.

Once I chose coordinating cardstock, I made card bases that were 4.5" square so they fit in an A2 envelope to avoid extra postage. I wanted to do something a bit different so I decided to make a cut-out card.  I used my circle dies to cut circles in the centres of the card fronts and the layers, and corner rounded all components.  I adhered the patterned panel to the white, added twine, added some button brads, and adhered the panel to the card front.  I was going to leave the white border plain but decided it needed more so I added some black faux-stitching with the aid of a ruler.

My favourite tool when making Christmas and holiday cards is my snowflake punch, so of course I pulled that out of its hibernation.  I sprayed some white cardstock with shades of  frosty looking spray mists and when it was dry I  punched away.  I adhered three snowflakes to the bottom corner of each card, added some rhinestones and the card front was done.

For the center I just added a square of white and stamped the sentiment in the middle with Versamark then heat embossed with silver.  Quick and easy!

I love how these cards turned out!


I used the following supplies:

Cardstock:  Stampin' Up! Baja Breeze, Crumb Cake, Whisper White.  Echo Park Season's Greetings 6x6 Paper Pad.

Stamp Set:  Stampin' Up! Christmas Punch

Ink: Versamark Watermark Ink, Stampin' Up! Embossing Powder Silver

Mists:  Tattered Angels Glimmer Mist Frost, Glacier

Embellishments:  We R Memory Keepers Baker's Twine, generic rhinestones from stash.

Adhesive:  Scotch ATG

Tools:  Paper trimmer, bone folder, scissors, Cuttlebug, Spellbinders Nestabilities Standard circles large and small, black felt tip pen.


I will enter this into the following challenges:
  1. The Pretty Little Ribbon - Lots of Layers
  2. Deep Ocean - Stitching faux or real
  3. Simon Says Stamp and Show - Anything Goes
  4. The Paper Shelter - Anything Goes
  5. Moving Along with the Times - Lets get krafty
  6. My Mums Craft Shop - Clean and simple
  7. Daring Cardmakers - A hole in one

Sunday, 3 June 2012

Royal Celebrations

Welcome to post #50!  When I started this blog 50 posts seemed like an awful big number, lol.  :)  My 50th post deserves a celebration of some sort, don't you think?  Since it is the Queen's Diamond Jubilee this weekend I was inspired to make this card:


I started with a lovely paper pad from Authentique - I love these colours!  Totally not something I would have paired on my own but so pretty.  And then i decided to work with a Lost & Found Two stamp set from My Mind's Eye.  Honestly when I got the set I thought to myself that I may never use the crown stamps.  I'm glad I was wrong!

I chose some card stock to go with the paper pad, and since I wanted to make more crumpled flowers I chose several sheet that I liked.  I punched the bird and cage with my tag punch out of one sheet, and cut various sizes of circles out of the remaining of that sheet and the rest of the sheets I had chosen. I had decided already to go with various sizes of circles instead of just one size this time.  I sprayed the circles with water, crumpled them up and set them aside.


I cut and scored my card base, and cut another piece of gray to layer on top that I embossed with my Cuttlebug.  I then cut all of the sizes of paper I wanted and inked them all with either cream or gray ink.  I adhered the embossed piece to the card front with foam squares, and matted the argyle print with yellow and cream.  I added some gray ribbon, some yellow bakers twine to this panel and tied bows.  I had attached the tags to the twine before tying, but secured them down with more foam squares.  The panel was adhered to the embossed piece with more foam squares.

For the sentiment I decided I wanted to layer the stamps, so I first stamped the doily in gray, and sponged a bit of cream ink over the center to help the sentiment stand out.  After using my embossing buddy I embossed the sentiment in black over the doily and embossed the crown images in silver.  I was going to add some glitter at this point, but I decided in the end it wasn't necessary.  I adhered the image panel to a gray mat, added some mini brads and adhered this with foam squares over the ribbon.


At this point I went back to my crumpled circles and carefully opened them up.  Because the paper is thicker than what I usually use for this technique some of the pieces were still damp so I finished the drying with my heat gun.  I've found a tip when doing this - I put all of the pieces in a heat proof ramekin and then point my heat tool in the dish, shielding the top with my hand.  This helps the bits from flying all over my table and the walls of the dish reflect some of the heat so that the pieces dry faster.  Just be careful  because its easy to burn a stray finger, lol.


I assembled the flowers with a white button brad this time, and adhered a rhinestone to the center of each brad.  The flowers were inked with some gray, and I adhered them to the card front.  This card is very layery (the technical term, lol)!


The center was decorated with a matted piece of cream stamped with my favourite birthday sentiment, and a scrap of patterned paper. 


I love this card, the images, the patterns, and the colours.  My favourite part though is the flowers.  I love these flowers so much I think I may do a post just on those. I love making them and I love how they look, not to mention you never have to worry about not having embellishments to specifically match your project.  Stay tuned, such a post may be coming in the future!

I used the following products:

Cardstock:  Stampin' Up! Basic Gray, Very Vanilla,  Crushed Curry.  Authentique 6x6 Collection: Blissful.

Stamps:  Stampin' Up!  On Your Birthday.  My Mind's Eye Lost & Found Two Rosy "everything" stamp set.

Ink:  Color Box Fluid Chalk Ink Charcoal, Alabaster.  Stampin' Up! Going Gray. Memories Black.  Versamark Watermark Ink.  Stampin' Up! Embossing Powder Black, Silver.

Ribbon:  We R Memory Keepers Bakers Twine Lemonade, gray satin ribbon from stash.

Embellishments:  Recollections brads, Stampin' Up!  Basic Jewels Rhinestones.

Adhesives:  Scotch ATG, Zots, Foam squares.

Tools:  Paper trimmer, scissors, Cuttlebug, Spellbinders Nestablities Standard Circles Large and Small, Cuttlebug Scrollwork embossing folder, We R Memory Keeper brad setter, sponge, Stamp a ma jig.


I will enter this card into the following challenges:
  1. Deep Ocean - Swirls 
  2. Crafty Cardmakers - Distress it 
  3. Party Time Tuesday - Anything goes 
  4. The Paper Shelter - Vintage or Shabby Chic
  5. The Cuttlebug Spot - Fit for a Queen
  6. Really Reasonable Ribbon - Flowers and Ribbon
  7. Fussy and Fancy Friday - Swirls and Flourishes
  8. Charisma Cardz  - Bling
  9. Simon Says Stamp - Anything Goes
  10. Lets Ink It Up -  Use your favourite embellishments (handmade paper flowers)


Friday, 25 May 2012

So Happy to be Canadian

This card was inspired by this weeks challenge over at Papertake Weekly.  Since it is getting close to the Queen's Jubilee, and also the Olympics, their idea was to use either your national colours or the colours of the UK.  I thought this works out well since Prince Charles and his wife Camilla just finished a visit to Canada this week, and they even visited my province. For this reason I decided to go with Canadian colours red and white.


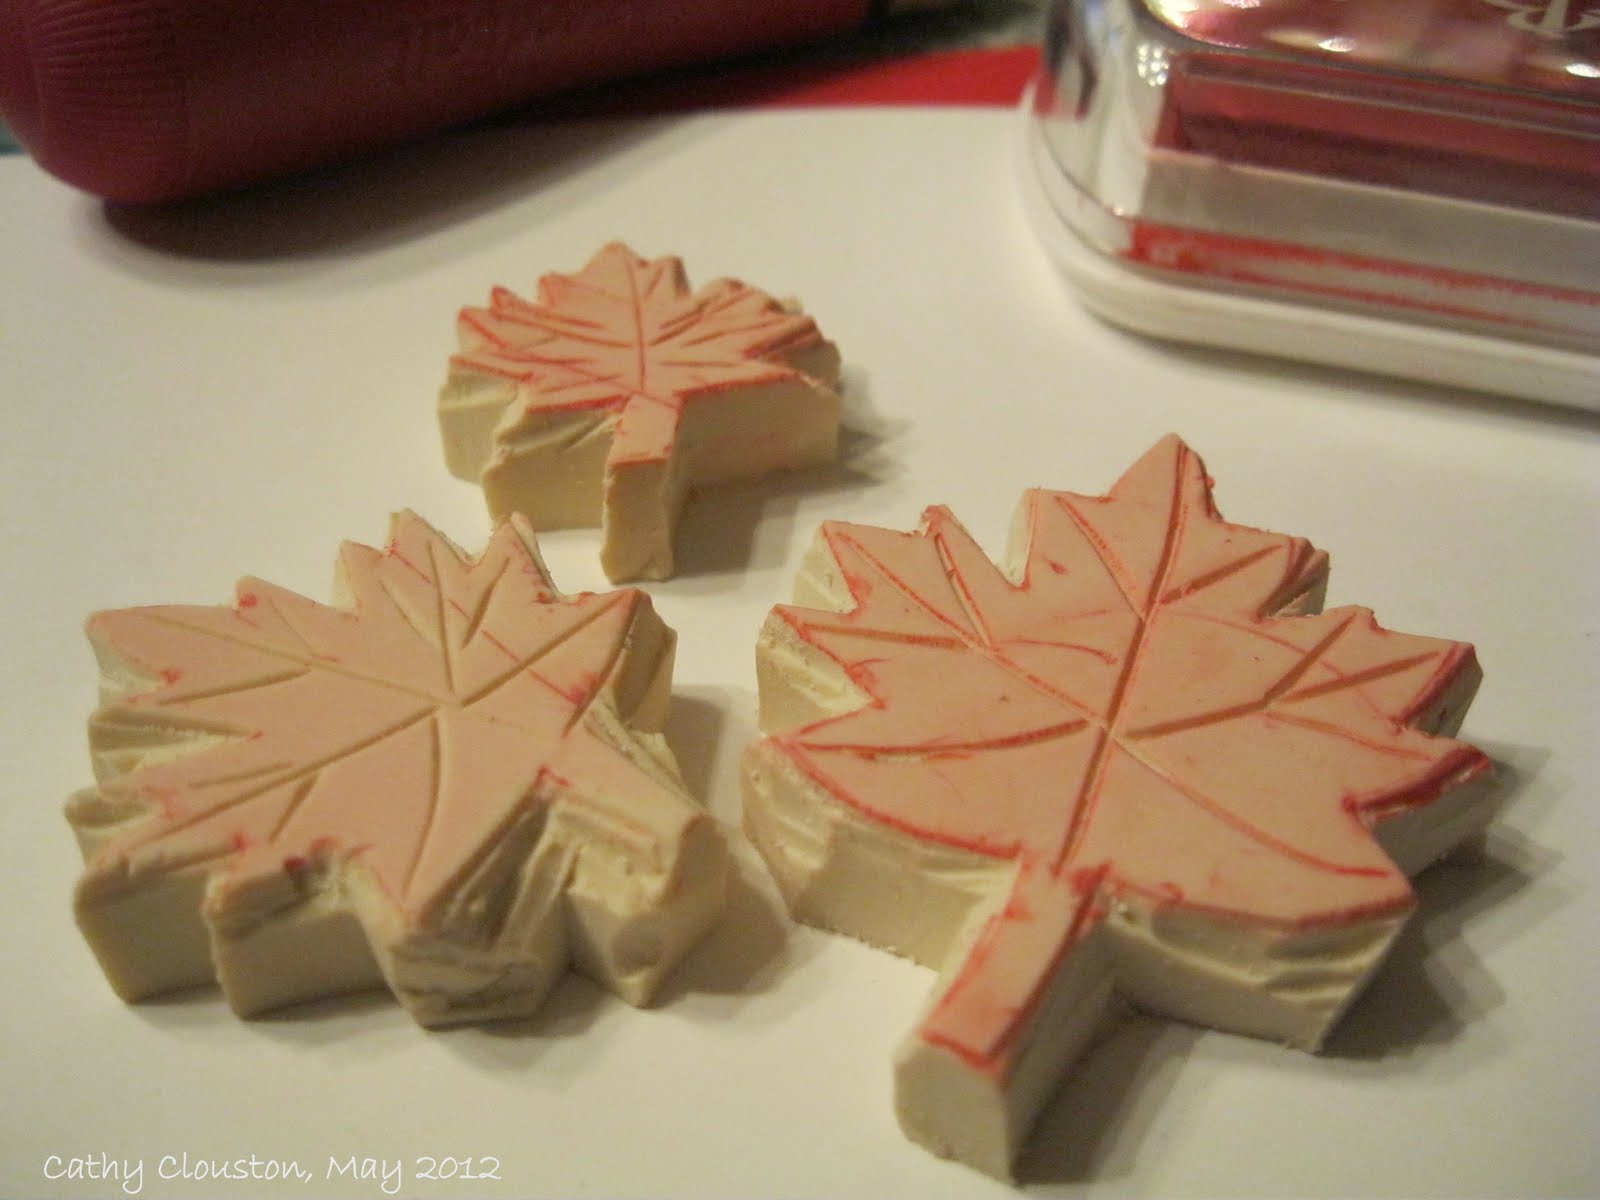
Once I decided on red and white I thought I should probably use a maple leaf image as well, but after searching through my stamps I realized I didn't have one.  And I call myself Canadian!  So I decided to carve my own.  I made three sizes, but only two made it on to this project.  Thats OK, Canada Day is coming soon so I can use the larger one then.


Since my last few cards were birthday cards I decided to make a thank you card this time. I started with a red cardstock base, cut and folded to the A2 size.  I chose some Bazzill dictionary print (which I love!!), and although I usually mat patterns I decided not to for this one as I like the contrast of the gray hue against the red.  I used a distress tool around the edges of the pattern (lightly as the paper is very  thin) and adhered it to the card base.  I added a piece of black ribbon around the middle of the card, making sure the ends were adhered underneath where the main panel would go so that they don't show on the inside of the card.   A second piece of ribbon was tied around the first piece to make the bow.

I decided to make some handmade scrunchy flowers since the thin dictionary paper works so well with this technique. You can read about the first ones I made here.  I used four circles for each flower, and  since I didn't have any jewel brads left I just used simple mini-brads for the flower centers, to which I adhered rhinestones later.  Once put together I sponged the 'petals' with red ink, and sprayed the flowers with red, white, and gold shimmer sprays for sparkle. Adhering the jewels was the last step.


I cut the main focal panel out of white cardstock and stamped a swirly flourish stamp several times on one side.  I stamped three leaves (one medium, two small) on the other side of the panel, turning the stamps each time for interest, and allowing the images to go off the edge.  I chose the sentiment from one of my new My Minds Eye sets, and I thought it worked because it is the same font that is on the dictionary paper.  I chose to stamp it in black to make it stand out from all of the red.  Once the sentiment was added to the center of the panel, I added some Sakura glitter pen to the images, used a distressing tool on all four sides of the panel, and added the flowers with Zots.  The panel was adhered over the ribbon with foam squares.

For the inside of the card I stamped the sentiment on a small piece of white.  The sentiment is actually inside of an oval.  Since the white scrap I used wasn't very big I positioned the stamp so that the sentiment was nestled into the corner and the oval went off the edge of the piece.  Once stamped I added some Sakura glitter pen and distressed the edges with a distressing tool.  I matted the white with more dictionary paper and added this to the inside of the card.


Red and white is not a colour combination I usually turn to, but I'm thinking I should more often.  I also like the idea of keeping things simple by using one bright colour along with black, white, and some neutrals.  This card has given me some ideas for future cards which I am sure you will see soon!  I love how this card turned out, it's patriotic without being obvious about it, and I keep trying to think of someone I need to thank just so I can give it to them!  :)

I would like to enter this card into the following challenges:
  1. Lets Ink It Up - Bling
  2. Creative Craft Challenges - Distressing
  3. Party Time Tuesdays - Vintage or Shabby Chic
  4. Deep Ocean - Swirls
  5. Creative Card Crew - Dimension
  6. Papertake Weekly - True Colours
  7. Ribbon Carousel - Fancy Flowers

I used the following supplies:

Cardstock: Stampin' Up! Real Red, Whisper White, Bazzill Basics Antique Dictionary Page.

Stamps:  My Mind's Eye Fine & Dandy True Blue Stamps, Lost & Found Two Breeze Dream, Lost & Found Two Rosy Everything.  Hand carved maple leaves.

Ink:  Color Box Fluid Chalk Ink Lipstick Red.  Memories Black.  Smooch Spritz Cherry Ice, Shimmerz Paints Shimmerings Goldie Lox, Babies Breath. Sakura Gelly Roll Clear Star pen.

Embellishments:  Recollections Mini Brads, Stampin' Up Jewels Basic Rhinestones, black satin ribbon from stash.

Adhesives:  Tombo Mono Permanent Adhesive Runner, Zots, foam squares.

Tools:  Paper trimmer, scissors, Tonic distressing tool, Cuttlebug, Spellbinders Nestabilities Standard Circles Small, We R Memory Keepers brad setter, bone folder.

Tuesday, 22 May 2012

A Woodsy Birthday

While I occasionally work from sketches I usually start with either papers or stamps.  This time, however, I really wanted to try out  the following sketch Craft Your Passion has as their most current challenge:


I really like the layout of this sketch, and I have a masculine birthday coming up so I used the sketch to make the following card:


Once I decided on layout and theme, I looked for papers that I thought would work best.  I decided on My Minds Eye Miss Caroline Collection Dilly Dally 6x6 pad.  I liked the colours and the wood grain, and thought it would work with a woodsy theme.  Once I decided on patterns I choose coordinating cardstock and a Bo Bunny stamp set that would work well.

I decided on gray for the base,, and black as an accent.  I thought I would try out a technique that I had seen but not used before.  On the black piece I decided to use as the focal of the card I stamped my image with white craft ink.  After heat setting the ink I coloured over it with pencil crayons.  I was going to leave the centre of the tree uncoloured, but as I was going for 'tree at night' effect so I decided to colour the inside of the tree with green as well.  The green on the inside of the tree isn't completely visible but I think it blends in a bit better.

I thought it would be fun to use the flashlight from the set, so I cut some yellow from the same paper pad in a triangle that would fit the bottom of the focal point piece.  I temporarily adhered the yellow to the black piece and stamped the 'Happy Birthday' sentiment in Versamark over both pieces.  The section of sentiment over black I heat embossed in white, and the section over yellow I heat embossed in black.  Once the corners were rounded and the edges sponged I foam taped the triangle over the tree.

I wanted to add more detail to the background so I sponged the edges of each pattern with black and adhered them to the black accent piece.  I die cut some rick rack squares from gray and sponged them with white to make them look more distressed.  Once adhered somewhat randomly I added black hemp twine around the middle.  The focal card was adhered with foam squares to the background,  the little flashlight was foam taped in place, and the background was adhered to the card base.  


To follow with the sketch I found some buttons that would coordinate and knotted some brown thread through the centres of each.  I adhered these buttons with Zots to the background and I was done.

This card was fun to put together and I really like the result.  I should work from sketch challenges more often!

I would like to enter this card into the following challenges:
  1. Craft Your Passion - Sketch Challenge
  2. Catered Crop - Rickety Rack Recipe Swap
  3. Creative Craft Challenges - Distressing.
  4. Moving Along With the Times - Keeping it Real.
  5. The Pink Elephant - Buttons Galore.
  6. Simon Says Stamp and Show - Summer Holiday.
  7. Really Reasonable Ribbon - Father's day or Masculine with Ribbon or Trim.
  8. Creative Card Crew - Dimension.

I used the following supplies:

Cardstock:  Stampin' Up!  Basic Gray, Basic Black.  My Minds Eye Miss Caroline Dilly Dally 6x6 pad.

Stamps:  Stampin' Up! On Your Birthday, Bo Bunny Roughin' It.

Ink:  Stampin' Up!  Whisper White, Versamark Watermark Ink, Memories Black.

Embossing Powder:  Stampin' Up!  Basic Black, Martha Stewart Bright White.

Pencil Crayons:  Crayola Green, Brown, Gray.

Other Embellishments:  Buttons, thread, hemp twine all from stash.

Adhesive:  Tombow Mono Permanent Adhesive Runner, foam squares, Quickie Glue pen, Zots. 

Tools:  Cuttlebug, Quick Kutz Nesting Rick Rack Squares, scissors, paper trimmer, bone folder, We R Memory Keepers Corner Chomper. 

Wednesday, 9 May 2012

Flowery Friends with Ribbons

For this card I started with ribbons, lots of ribbons!  I have little wooden stands in my craft space with spools of Prima ribbon on them.  I look at them every day, and it occurred to me that I should see how many I could use on one card. :)


I started with a standard size card base made of kraft, and I cut another piece of  cardstock about 1/2 an inch smaller to give enough room to work with.  I chose several colours of ribbons ensuring they were all the same width and cut lengths a bit longer than the long side of the small piece of card.   These strips were adhered to the back of the short side of the card with glue dots.  I attached shorter ribbons to the back of the long side of the card, and wove them with the longer strips of ribbon.  Once done, all ends were attached with glue dots to the back of the card.  This piece was very thick by then so I decided to use more glue dots to attach it to the card front to ensure it was well adhered.


I cut another piece of kraft just slightly smaller than the card front, bigger than the woven piece, and die cut a large circle from it.  I embossed the edge of the circle with the die, and once done distressed the outside edge of the panel with a distressing tool.  A white gel pen was used to add dash lines around the edge of the circle, and the outside edge of the panel.  The sentiment was heat embossed in white.


In order to make the panel look as lush as the ribbon section, I added the last of the lovely silky Champagne ribbon from Ribbon Carousel, and some Prima flowers in soft coordinating colours. The panel was adhered to the ribbon piece with foam squares.


I really splurged on this card.  It was really fun to make and turned out to be so pretty!  :)

I would like to enter this card into the following challenges:
  1. Really Reasonable Ribbon - Mother's Day or feminine plus ribbon.
  2. Stampin' for the Weekend - Layer Upon Layer
  3. Speedy Fox - Use 3 of something.
  4. Deep Ocean Challenge - What a Wonderful Woman

I used the following supplies:

Cardstock:  Stampin' Up! Crumb Cake.

Stamps:  Pocket Silhouettes.

Ink:  Versamark Watermark ink pad, Stampin' Up! White Embossing powder, Sakura White Gelly Roll pen.

Embellishments:  Prima Marketing ribbon, Ribbon Carousel Champagne Silky Crushed ribbon, Prima Camille Almanac flowers.

Adhesive:  Glue Dots, foam squares.

Sunday, 29 April 2012

In a word 'Love'

For this card I wanted to try a technique that I had never tried before which is faux metal.  I watched Kristina Werner do this in one of her you tube videos:


For my card I thought it would be fun to use a new alphabet set I got from Michaels to make metal looking tags that spelled out a word.  Here is what I came up with:


I thought I would go for a look that is more grungy than usual, so I used a Tim Holtz embossing folder on a piece of kraft cardstock.  I made another crumpled paper flower out of the same script paper I used before, this time with 9 circles.  I inked the edges of the flower in gray to coordinate with everything.  A sparkly brad and some prima flowers added just enough sparkle.


Once I followed Kristina's technique with the alphabet stamp set I mentioned I used my nestabilities circles to cut the letters out out, and my Crop-a-dile to punch a hole in each. I attached them to the card front with black hemp twine and foam squares.  I love how they turned out, I even love the impression left behind by the dies.  My husband was even impressed (at least thats what he told me, lol).


On the inside of the card I used the same shades of cardstock as on the front and inked them to match and stamped a nice sentiment.


I think any loved one would enjoy receiving this card.  :)


I would like to enter this into the following challenges:
  1.  Simon Says Stamp and Show - Show your favourite word
  2. Fussy and Fancy Friday - Punches and dies
  3. Deep Ocean Challenge - Use punches and dies
  4. Ribbon Carousel Challenge - Anything goes
  5. Simon Says challenge - Anything goes
  6. Moving Along With the Times - Garden or Flowers

I used the following supplies:

Cardstock:  Stampin' Up!  Basic Gray, Whisper White, Crumb cake.  Bazzill Basics Antique Script.

Stamps:  Stampin' Up!  Petite Pairs, Recollections Rubber Stamp Set (alphabet)

Ink:  Color Box Fluid Chalk Ink Charcoal, Stampin' Up!  Going Gray.  Versamark Watermark ink.  Stampin' Up! Silver embossing powder. 

Adhesive:  Tombow Mono Permanent Adhesive Runner, Glue Dots, foam squares.

Embellishments:  Prima Flowers Melisse Nature Garden, Creative Charms brads, black hemp twine from stash.

Tools:  Paper trimmer, scissors, bone folder, tweezers, heat tool, Cuttlebug, Spellbinders Nestablities Standard Circles Small and Large, Sizzix Tim Holtz Texture fade Cracked,  Ranger Inkssentials blending tool, We R Memory Keepers brad setter, Crop-A-Dile

Friday, 27 April 2012

Butterfly birthday wishes

Since my big card making sprint (and buying sprint I must admit)  at Christmas time I've been trying to resist buying new things since I already have a lot of stuff that needs to get used.  In March, however, I did my taxes and since I was lucky enough to get a bit of a refund I decided to restock some things, and splurge on a few other things.  I ordered a bunch of stuff from a few different places a few weeks ago and it all came in around the same time, so I got to play!  Here is the first of many creations to come:


The light is funny in this picture, it kind of looks like I used my flash even though I didn't but hopefully you get the idea.  I keep trying to experiment with different places, times of day, and lighting to get the best picture.  I don't think I've come across the best combination yet but I'll keep trying!

I started with a 6.5 x 6.5 paper pad from Kaiser Craft that I saw Kristina Werner use in one of her videos.  It's so pretty with soft colours, and lovely imagery.  I chose the sheet with  a pale blue background and line drawings of hydrangeas (I think?).  I paired it with a sheet of script paper (I seem to be attracted to anything with type or writing on it lately), and some Stampin' Up! Crumb Cake cardstock.  Crumb Cake is my absolute favourite shade of kraft!

I sponged the patterned papers with charcoal ink, and the white circle with creamy brown ink to coordinate with the kraft.  I used both of my two new Stampin' Up! sets by choosing an image from one, and a sentiment from the other, and heat embossing them in silver.  I decided to use a piece of beautiful ribbon that I purchased with my gift certificate won from Ribbon Carousel several weeks ago.  The ribbon was a bit wider than I needed so I pleated the ribbon with the help of some glue dots, then twisting it a bit before adhering to the back.  To conserve the special ribbon, the knot is a sort of faux- tie that I added after the long piece was adhered.


By the way, I was really impressed with Ribbon Carousel's prices, their shipping costs are really reasonable (always a concern when ordering from Canada) and everything came bundled neatly and in cute little patterned packets.  I actually saved the packaging to use later, lol!  I will definitely be ordering from them again!

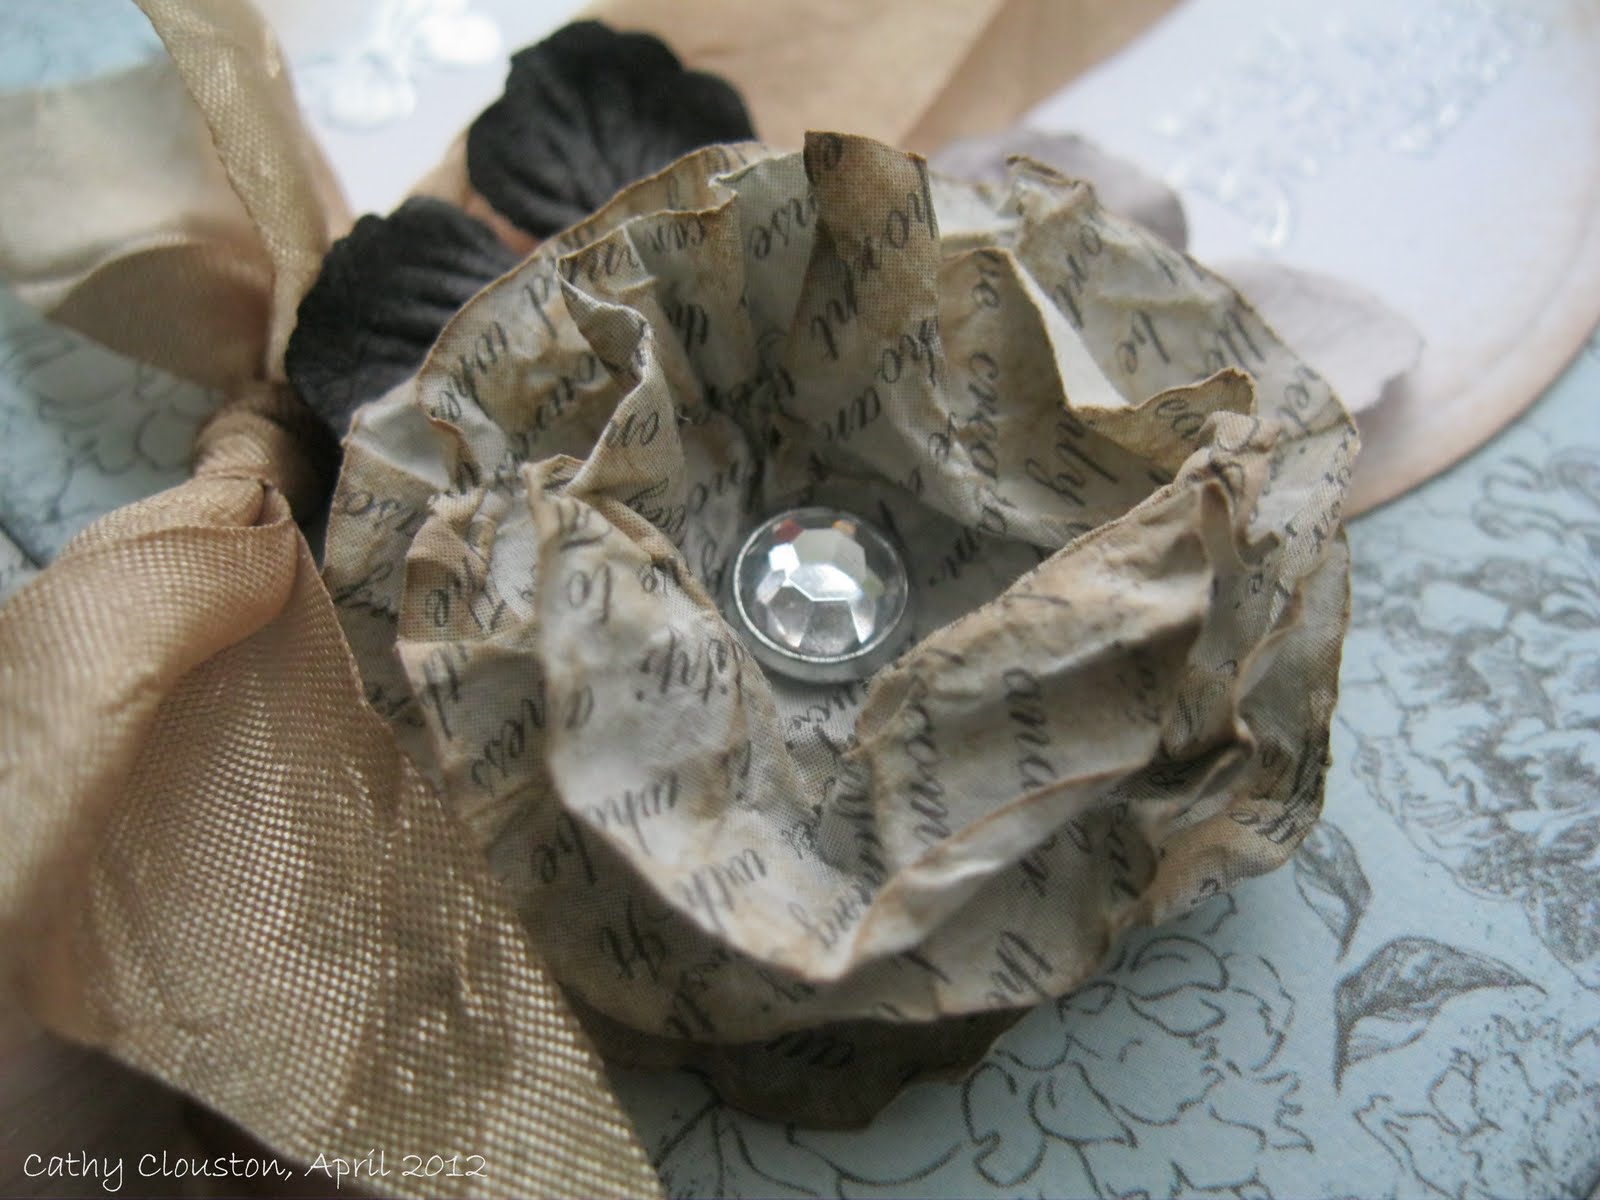
I decided on embellishments last, and as I really liked the script pattern I decided to make a paper flower out of it.  I wanted to make a different type of flower than I had before, so I used a technique I have seen Christine Urias use on a Scraptime video.  I have been watching her videos for a while, and since there are over 700 I couldn't find the one showing this technique in order to link here, but I highly suggest looking at her website www.scraptime.ca. She has covered so many things that I am sure you will learn something new!
To make this flower you just need to punch or die cut several circles.  Spray the circles with water and crumple them up.  They look almost like spit balls at this point but not nearly as gross, lol.   Once the little balls dry (or you can dry them with a heat tool), you carefully un-crumple them, stack several, poke a hole in the middle, add a brad, and voila - you have a flower!  I only needed to use three circles to make my flower, although I seem to remember Christine using 6 in her video.  Since I couldn't find the original video I could be making that number up, but I'm sure you could stack as many circles as you wanted to  make your flower as full as you would like.


I used a gem studded brad in the middle of my flower for sparkle, and inked the edges of the petals with more creamy brown ink.  I added a couple of small Prima flowers (also purchased at Ribbon Carousel), and although a lot was going on I felt like the card needed something more, so I added some faux stitching at the top and bottom with my white gel pen.  I really like the look of stitching so I think I may have to search for my sewing machine in the basement soon, but for the time being my gel pen works great for this.

On the inside of the card, I adhered a couple of strips of the patterns inked in charcoal, and a piece of white inked with creamy brown.  I added the companion sentiment to the sentiment on the front by heat embossing it in silver. All done!


I love how pretty this card is!  Now, what to play with next?  Hmmmm......


I will enter this card into the following challenges:
  1. Catered Crop - Get krafty. 
  2. Fussy and Fancy Friday - Punches and Dies 
  3. Pile it On -  Sparkle and Shine
  4. Party Time Tuesdays - Anything Goes + Kraft
  5. Creative Card Crew -  Ribbon
  6. Ladybug Crafts Ink- Birthday
  7. Deep Ocean Challenge - Use punches/dies
  8. Ribbon Carousel Challenge - Anything Goes
  9. Simon Says Stamp - Anything Goes
  10. Moving Along with the Times - Gardening or Flowers

I used the following supplies:

Cardstock:  Stampin' Up! Crumb Cake, Whisper White.  Bazzill Basics Antique Script.  Kaiser Craft Bonjour 6.5 Paper Pad.

Stamps:  Stampin' Up! Petite Pairs, Kindness Matters.

Ink:  Color Box Fluid Chalk Ink Creamy Brown, Charcoal.  Versamark Watermark Ink pad. Stampin' Up! Silver Embossing Powder.

Embellishments: Ribbon Carousel Champagne Silky Crushed ribbon, Prima Flowers Camille Almanac, Creative Charms brads.

Adhesive:  Mini Glue Dots, Tombow Mono Permanent Adhesive Runner.

Tools:  Cuttlebug, Spellbinders Nestabilities Standard Circles Large, paper trimmer, bone folder, scissors, tweezers, heat tool, Stampin' Up! embossing buddy, sponge We R Memory Keepers brad setting tool.


Sunday, 22 April 2012

Believe in yourself

For the first time I placed an order with Gina K designs recently, and it came in last week. I was really excited to get the stuff and I had to play with it right away.

While my first love is Stampin' Up! cardstock, I find their white and cream cardstocks to be a bit flimsy for card bases, so I ordered some 120# cardstock from Gina K in those colours.  I had also ordered the Spellbinders Small Standard circles Nestabilites to go with my Large set.  I placed a large enough order to get the free "Believe in yourself" stamp set so here I used all three.


I started with the base weight white, and decided to use patterned paper from one of my favourite My Mind's Eye 6x6 pads.  I thought black and white with a bit of red would be fun, so after layering the card front I heat embossed the sentiment and added black and red ribbon. 

I stamped the butterfly in red, then die cut the image to ensure I had the right size circle.  I die cut a slightly larger circle from the patterned paper to mat the image.  I decided the butterfly needed to be glittery so I coloured the blank spaces with my Sakura glitter pen and foam taped the circles over the ribbon and I was done. 

 Can you believe I made two cards in a row without any extra inking?  lol :)


I would like to enter this card into the following challenges:
  1. Really Reasonable Ribbon Challenge:  Black and white with accent colour 
  2. Pretty Little Ribbon:  To die for 
  3. Stampin' for the Weekend:  Sparkle and Shine 
  4. Simon Says Stamp & Show: Anything Goes 
  5. Craft Your Passion:  Die cuts and punches 
  6. The Paper Shelter:  Wings and things 
  7. Fussy and Fancy Friday: Punches and Dies 
  8. Pile it On: Sparkle and Shine
 
I used the following supplies:

Cardstock:   Gina K Designs Pure Luxury Heavy Base Weight 120# Pure white, Stampin' Up! Basic Black, Whisper White, My Mind's Eye Meadowlark 6x6 Designer Paper Pad.

Stamps:  Gina K Designs Believe in Yourself.

Ink:  Color Box Fluid Chalk ink Lipstick Red, Versamark Watermark ink pad.

Embossing powder:  Stampin' Up! Basic Black.

Pen:  Sakura Gelly Roll Clear Star

Ribbon:  Red and Black from my stash.

Adhesive:  Tombow Mono Permanent Adhesive Runner, foam squares.

Dies:  Spellbinders Nestabilities Standard Circles Small and Large.

Tools:  Paper Trimmer, Cuttlebug, scissors, Stampin' Up! heat tool, embossing buddy.

Sunday, 8 April 2012

Hoppy Easter!

Happy Easter everyone! I've had an enjoyable weekend so far, and an extra long one since I had Good Friday off of work, and the way my days off fell this week I don't have to go back to work until Tuesday. I have been taking advantage of my time off and as a result I have made five cards so far with plans to make more. To make things easier I will post each one separately, and since it is Easter Sunday (if only the early hours) here is a new Easter card I made:


My Cuttlebug got a good work out with this one!  I have been hoarding a bunch of Cottage Cutz dies I got from Scrapbook Steals around Christmas time, and I came across the picket fence die a few days ago when i was looking for something else.  I immediately had this idea, and I am impressed at how it worked out.

The card was pretty easy, although time consuming.  I die cut all of the components except the bunny that I cut by hand, and the clouds that I cut freehand.

To give the clouds interest I cut a white sheet of patterned paper into cloud shapes slightly bigger than the plain white ones and distressed the edges with a distressing tool to make the clouds look a bit fluffy.


The sun was cut with two different dies, the middle was a regular circle die, and the rays of the sun come from a star die.  I cut two of the stars and then cut them apart so that the points of the star could be glued to the circle to make it look like a sun.  I added some glitter pen to make the sun shimmer, and once the bunny was shaded and his eggs coloured I added some glitter pen to him too. You know I couldn't resist!


I used a leftover strip of kraft for the sidewalk and used a gray Copic and a blender pen to make lines on the sidewalk.  Once that was done and I figured out where to put everything I glued it all into place.  Since I didn't ink anything (can you believe it?) assembly went pretty quickly, and I kept the inside pretty simple.


I love my Cuttlebug, this card was so much fun.


I would like to enter this card into the following challenges:
  1. Creative Card Crew - Spring
  2. Crafty Cardmakers - Easter
  3. Twisted Tuesday Challenges - Add Clouds Not Stamped
  4. Papertake Weekly - Anything Goes
  5. Everybody Art - Easter
  6. Lets Ink it Up - Distressing
  7. Basic Gray - Easter
  8. Allsorts - Colour Bingo (Pink, Yellow, Blue)
  9. Simon Says Stamp - Use Your Favourite Tool
  10. Colour Throwdown - Tempting Turquoise, Dusty Durango, Pear Pizazz, Pumpkin Pie
  11. The Paper Shelter - Anything Goes with Easter in Mind

The following supplies were used to make this card:

Cardstock:  Stampin' Up! Sahara Sand, Baja Breeze, Whisper White, Old Olive, Garden Green, Crumb Cake, Soft Suede, Summer Sun, Pumpkin Pie.  Basic Grey Basics White 6x6 paper pad.

Stamps:  Craft Smart stamp from Micheals.

Ink: Memories Black.

Markers:  Bic Mark Its Tuxedo Black, Yellow Blaze, Pink Flamingo, Polynesian Purple.  Copic W3 Warm Grey.  Sakura Gelly Roll Clear Star.  Prismacolor Colorless Blender.

Adhesive:  Snake Tape Anaconda, Viper, Scotch Quick Dry, foam squares.

Dies:  Cottage Cutz Grass Border, Picket Fence Mini, Simple Tree Mini.  Quickutz Star Icon. Spellbinders Nestabilities Standard Circles Large.

Tools:  Cuttlebug, paper trimmer, scissors, Tonic Studios Tim Holtz paper distresser.

Tuesday, 27 March 2012

Easter

Remember the St. Patrick's day card I made a couple of weeks ago?  If not you can see the post here, but at the time I mentioned I had several additional ideas for the technique I used.  When I saw the this sketch:


 at Freshly Made Sketches, I thought it was perfect because it was similar to one of the ideas that I had.  This is what I came up with:


Unfortunately I didn't finish my card in time to enter the challenge, but I still really like how this card turned out.

I started out with the cute bunny stamp that I got from one of the $1.50 bins at Michaels, and figured out which of my circle dies would fit it.  I chose to make the circles on the side the next size circle down, and I chose to use Jillibean Soup's Blossom soup collection for the lower layer. I used some SU Certainly Celery for the card base.

 I love the pink sheet with the type on it, so when I placed the die in order to cut I made sure that the bolded statement showing was one that I liked.  I then chose several other springy sheets and coloured the bunny to coordinate.   I added the top layer with some foam tape so the cirles look like windows.

Me being me I couldn't leave things alone, so I added some Sakura glitter pen, and as an afterthought I cut out a couple of butterflies from one of the sheets and added it with foam squares so the butterflies looked like they had just landed on the card.  Once I added some bakers twine the card was finished!


Since I didn't have an Easter sentiment stamp I decided to write "Happy Easter" on the inside, and I added some circles die cut from the papers used on the front.  I like how it turned out, but I'm not completely happy with my writing so I really think I need to practice on some calligraphy. :)


Although I missed the Freshly Made Sketches challenge, I was still able to join in on the following challenges:

  1. Creative Stamp Friends - Spring
  2. Stampin' For the Weekend - Anything Goes
  3. Papertake Weekly - BINGO:  Die Cuts, Free (Twine), Glitter
  4. Moving Along With the Times - Easter Wishes
  5. The Pink Elephant - Butterflies
  6. The Pretty Little Ribbon - Spring Colours

Here are the supplies I used this time:

Cardstock:  Stampin' Up Certainly Celery, Whisper White.  Jillibean Soup Blossom Soup 6x6 pad.

Stamp:  Craft Smart from Micheals (no name).

Ink:   Memories Black.

Markers:  Bic Mark It Oceanview Blue, Yellow Blaze, Margarita Green, Pink Flamingo, Tuxedo Black.  Sakura Gelly Roll Clear Stardust. Copic W3.  Prismacolour Colourless Blender.

Twine:  We R Memory Keepers Sew Easy Bakers Twine Primary Lemonade.

Adhesives:  Tombow Mono Adhesive Runner Permanent, Scotch Quick Dry, foam squares.

Tools:  Paper trimmer, scissors, Cuttlebug, Spellbinders Nestabilities Standard Circles Large, We R Memory Keepers Corner Chomper.

Tuesday, 20 March 2012

A Cup of Tea for Mom

This latest card seemed to take forever to make because I didn't know where I was going with it, but I love it!

Since so many challenge blogs are having Mother's Day challenges due to the UK holiday, I thought it might be fun to get a Mother's Day card done early (Mother's Day is not until May in North America).  One thing that is pretty consistent in both my Mom's and my husband's Mom's kitchens is if there isn't already a pot of tea on the stove there will be one shortly.  For this reason I started with the Kitch collection of stamps from The Girls' Paperie and used the teapot as a focal point.


I wanted to make something soft and pretty so I thought a combination of cream, brown, and pink would be pretty.  I also decided to haul out some of Pink Paislee's Mistables paper since I haven't played with it since before Christmas and I was in an inky kind of mood.

I first cut the mistables to the size I wanted then used Ranger's Inksentials blending tool to add several colours of Colorbox chalk ink.  I love that stuff!  Once that was done I sprayed a variety of mists on it to add a bit of interest and sparkle.  I was using Shimmerz Paints brand, which is very translucent, so the effect of using them is very subtle, but it is very pretty.


I decided to use a strip of Basic Grey patterned paper along the middle, which I also embossed with a dots folder and inked the edges.  I stamped the teapot on a circle of cream cardstock which had been die cut and embossed with a Nestabilites circle, then inked with the pink and brown ink before the die was removed.  I really like the effect.  Once I whip stitched the strip of patterned paper at one end, and added some ribbon and twine, I added the circle with some foam squares.

I thought some butterflies would look pretty in the mix, but I don't have a small enough butterfly stamp, or punch.  I do have some small butterfly stencils however, so I used the Ranger tool to blend pink and brown ink over the stencil onto kraft cardstock.  I cut the butterflies out, and decided they needed something more, so I added some Sakura glitter pen.  After adhering them with glue dots, and popping their wings up on foam squares, I thought they still looked bare so I added some pink gems.


While at this point there was quite a bit going on on the card I still felt like it needed more so I decided to make some paper flowers.  I didn't come up with this on my own, I saw it somewhere but I can't recall where.  I wish I could so I could give credit!  Anyway, these were super easy.

I started by die cutting several circles (each flower has three) from the plain cream and the patterned kraft.  I inked the edges of each and pierced the middle with a piercing tool to use as a guide, and also to make adding the brad easier later.  I then just cut slits going from the outside edge almost to the middle pierced hole.

Once all circles were cut in this manner I assembled them with a brad and with the flower placed between my finger and the edge of my bone folder I curled the edges a bit. Once they were adhered in place I bent the top layers up and manipulated the petals until they looked like I wanted them too.  They turned out beautifully so I will definitely be using this technique again, I already have an idea - I just have to find the time to execute it!


I didn't have a sentiment stamp to use for the inside so I hand wrote a sentiment included in the back of Spring 2012 Stampers' Sampler Take Ten (one of my favourites).    I love this saying:


I've decided to enter this card in the following challenges:
  1. Allsorts Challenge Blog - Three in a row.
  2. Catered Crop - Recipie swap in stitches.
  3. Lets Ink It Up - Show us your flowers
  4. The Pretty Little Ribbon Shop - Spring colours.
  5. Pile it On - Up in the Air
  6. Moving Along With the Times - Special lady 
  7. Basic Grey Challenge - Mother's Day/ Girlie 
  8. The Ribbon Carousel - Baker's Twine 
  9. Deep Ocean Challenge - Butterflies 
  10. Creative Card Crew - Vintage 
  11. Papertake Weekly - For the girls or Mum
  12. The Pink Elephant - Get krafty
  13. Creative Stamp Friends - Spring
  14. Stampin' for the Weekend - Shabby chic photo Inspiration  

  15.  Cardabilities - Sketch #51 

 The Supplies I used are as follows:

Cardstock:  Stampin' Up! Very Vanilla.  Recollections Kraft.  Basic Grey Basics Kraft 6x6 Paper Pad.  Pink Paislee Mistables.

Stamps:  The Girls' Paperie Kitch clear stamps.

Ink:  Colorbox Fluid Chalk Ink Chestnut Roan, Rouge, Lipstick Red, Creamy Brown, Alabaster.  Shimmerz Paints Baby's Breath, Cotton Candy, Heavy Metal, Plum Pudding.

Markers:  Stampin' Up! Stampin' Write Markers Chocolate Chip.  Sakura Gelly Roll pen Clear Stardust.

Adhesive:  Tombow Mono Adhesive Runner permanent, Scotch Quick Dry, Glue Dots, Skor Tape, foam squares.

Embellishments:  Creative Charm Vintage brads, We R Memory Keepers Sew Easy Fancy Floss Baker's Twine Cream Soda, American Crafts satin ribbon, pink gems from stash, cream thread from stash.

Tools:  Cuttlebug, Spellbinders Nestabilities Standard Circles Large, Cuttlebug embossing folder Seeing Spots, paper trimmer, scissors, bone folder, paper piercer, sewing needle, Tim Holtz ruler (for piercing before sewing), Plaid Folk Art Peel & Stick painting stencils.