Since my big card making sprint (and buying sprint I must admit) at Christmas time I've been trying to resist buying new things since I already have a lot of stuff that needs to get used. In March, however, I did my taxes and since I was lucky enough to get a bit of a refund I decided to restock some things, and splurge on a few other things. I ordered a bunch of stuff from a few different places a few weeks ago and it all came in around the same time, so I got to play! Here is the first of many creations to come:
The light is funny in this picture, it kind of looks like I used my flash even though I didn't but hopefully you get the idea. I keep trying to experiment with different places, times of day, and lighting to get the best picture. I don't think I've come across the best combination yet but I'll keep trying!
I started with a 6.5 x 6.5 paper pad from Kaiser Craft that I saw Kristina Werner use in one of her videos. It's so pretty with soft colours, and lovely imagery. I chose the sheet with a pale blue background and line drawings of hydrangeas (I think?). I paired it with a sheet of script paper (I seem to be attracted to anything with type or writing on it lately), and some Stampin' Up! Crumb Cake cardstock. Crumb Cake is my absolute favourite shade of kraft!
I sponged the patterned papers with charcoal ink, and the white circle with creamy brown ink to coordinate with the kraft. I used both of my two new Stampin' Up! sets by choosing an image from one, and a sentiment from the other, and heat embossing them in silver. I decided to use a piece of beautiful ribbon that I purchased with my gift certificate won from Ribbon Carousel several weeks ago. The ribbon was a bit wider than I needed so I pleated the ribbon with the help of some glue dots, then twisting it a bit before adhering to the back. To conserve the special ribbon, the knot is a sort of faux- tie that I added after the long piece was adhered.
By the way, I was really impressed with Ribbon Carousel's prices, their shipping costs are really reasonable (always a concern when ordering from Canada) and everything came bundled neatly and in cute little patterned packets. I actually saved the packaging to use later, lol! I will definitely be ordering from them again!
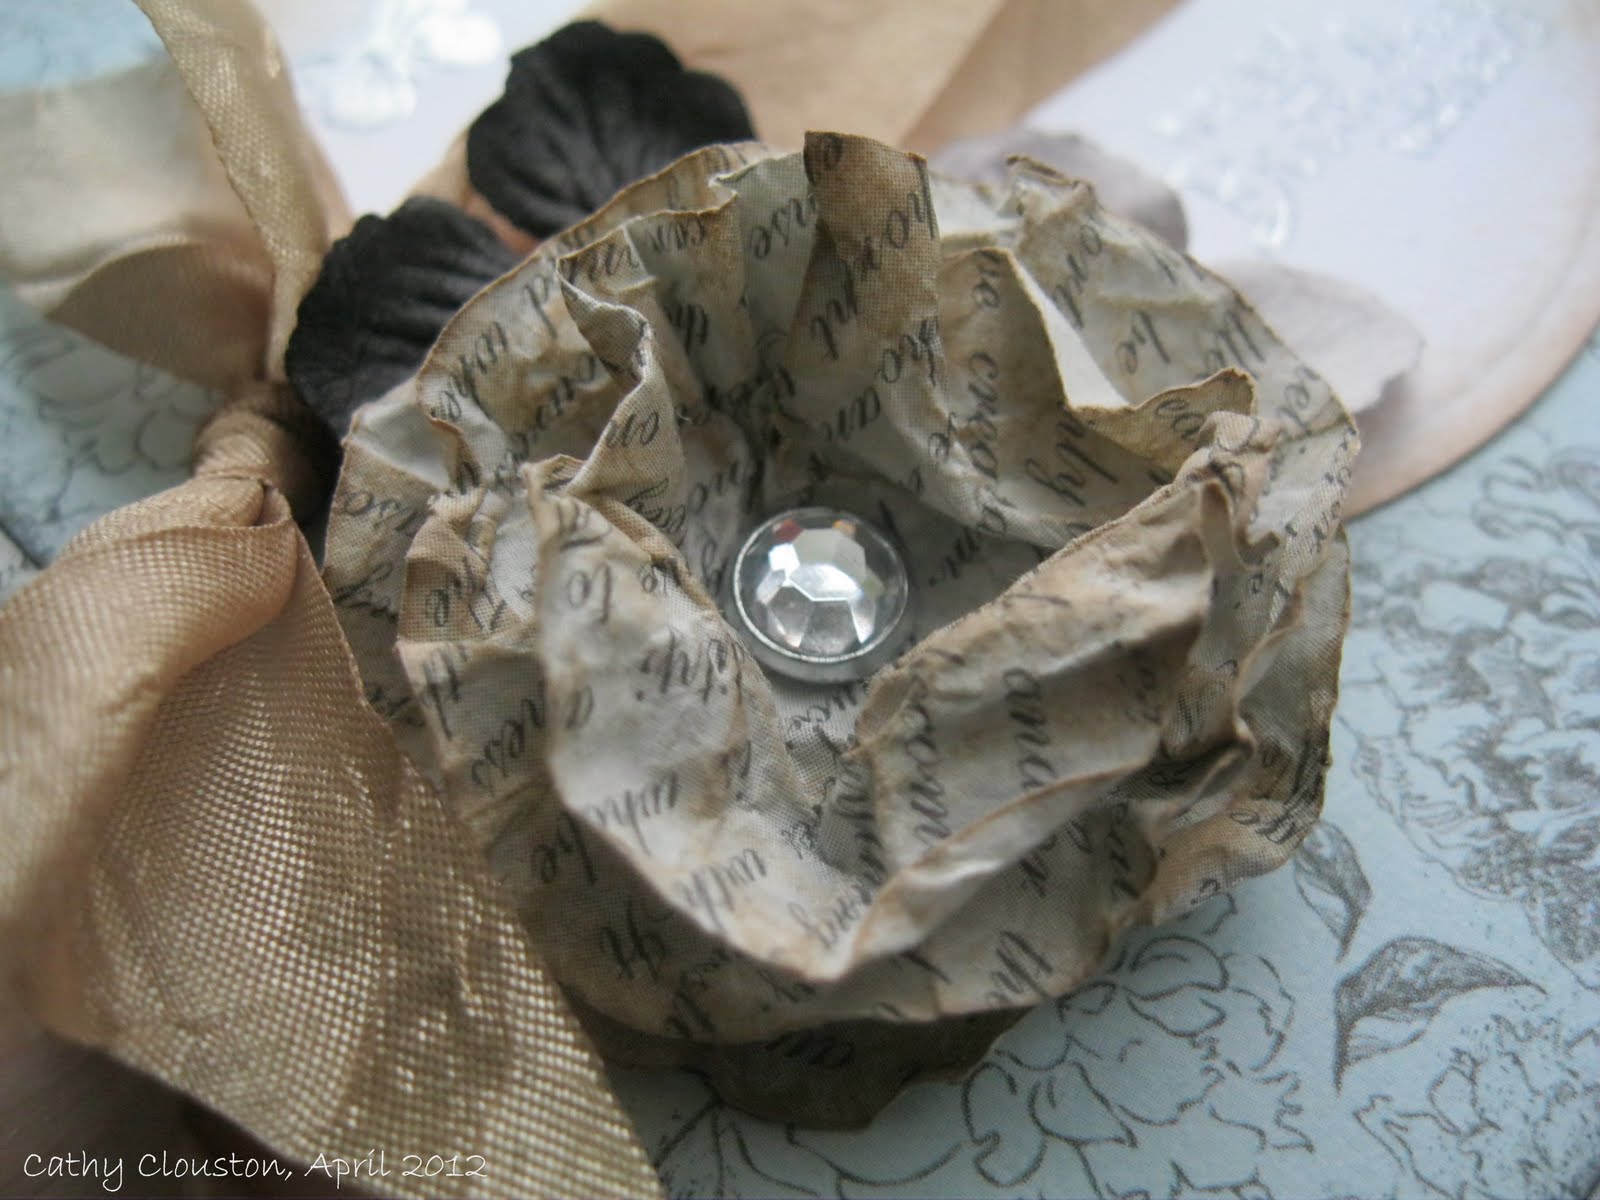
I decided on embellishments last, and as I really liked the script pattern I decided to make a paper flower out of it. I wanted to make a different type of flower than I had before, so I used a technique I have seen Christine Urias use on a Scraptime video. I have been watching her videos for a while, and since there are over 700 I couldn't find the one showing this technique in order to link here, but I highly suggest looking at her website
www.scraptime.ca. She has covered so many things that I am sure you will learn something new!
To make this flower you just need to punch or die cut several circles. Spray the circles with water and crumple them up. They look almost like spit balls at this point but not nearly as gross, lol. Once the little balls dry (or you can dry them with a heat tool), you carefully un-crumple them, stack several, poke a hole in the middle, add a brad, and voila - you have a flower! I only needed to use three circles to make my flower, although I seem to remember Christine using 6 in her video. Since I couldn't find the original video I could be making that number up, but I'm sure you could stack as many circles as you wanted to make your flower as full as you would like.

I used a gem studded brad in the middle of my flower for sparkle, and inked the edges of the petals with more creamy brown ink. I added a couple of small Prima flowers (also purchased at Ribbon Carousel), and although a lot was going on I felt like the card needed something more, so I added some faux stitching at the top and bottom with my white gel pen. I really like the look of stitching so I think I may have to search for my sewing machine in the basement soon, but for the time being my gel pen works great for this.
On the inside of the card, I adhered a couple of strips of the patterns inked in charcoal, and a piece of white inked with creamy brown. I added the companion sentiment to the sentiment on the front by heat embossing it in silver. All done!
I love how pretty this card is! Now, what to play with next? Hmmmm......
I will enter this card into the following challenges:
- Catered Crop - Get krafty.
- Fussy and Fancy Friday - Punches and Dies
- Pile it On - Sparkle and Shine
- Party Time Tuesdays - Anything Goes + Kraft
- Creative Card Crew - Ribbon
- Ladybug Crafts Ink- Birthday
- Deep Ocean Challenge - Use punches/dies
- Ribbon Carousel Challenge - Anything Goes
- Simon Says Stamp - Anything Goes
- Moving Along with the Times - Gardening or Flowers
I used the following supplies:
Cardstock: Stampin' Up! Crumb Cake, Whisper White. Bazzill Basics Antique Script. Kaiser Craft Bonjour 6.5 Paper Pad.
Stamps: Stampin' Up! Petite Pairs, Kindness Matters.
Ink: Color Box Fluid Chalk Ink Creamy Brown, Charcoal. Versamark Watermark Ink pad. Stampin' Up! Silver Embossing Powder.
Embellishments: Ribbon Carousel Champagne Silky Crushed ribbon, Prima Flowers Camille Almanac, Creative Charms brads.
Adhesive: Mini Glue Dots, Tombow Mono Permanent Adhesive Runner.
Tools: Cuttlebug, Spellbinders Nestabilities Standard Circles Large, paper trimmer, bone folder, scissors, tweezers, heat tool, Stampin' Up! embossing buddy, sponge We R Memory Keepers brad setting tool.