Showing posts with label birthday card. Show all posts

Sunday, 3 June 2012

Royal Celebrations

Welcome to post #50!  When I started this blog 50 posts seemed like an awful big number, lol.  :)  My 50th post deserves a celebration of some sort, don't you think?  Since it is the Queen's Diamond Jubilee this weekend I was inspired to make this card:


I started with a lovely paper pad from Authentique - I love these colours!  Totally not something I would have paired on my own but so pretty.  And then i decided to work with a Lost & Found Two stamp set from My Mind's Eye.  Honestly when I got the set I thought to myself that I may never use the crown stamps.  I'm glad I was wrong!

I chose some card stock to go with the paper pad, and since I wanted to make more crumpled flowers I chose several sheet that I liked.  I punched the bird and cage with my tag punch out of one sheet, and cut various sizes of circles out of the remaining of that sheet and the rest of the sheets I had chosen. I had decided already to go with various sizes of circles instead of just one size this time.  I sprayed the circles with water, crumpled them up and set them aside.


I cut and scored my card base, and cut another piece of gray to layer on top that I embossed with my Cuttlebug.  I then cut all of the sizes of paper I wanted and inked them all with either cream or gray ink.  I adhered the embossed piece to the card front with foam squares, and matted the argyle print with yellow and cream.  I added some gray ribbon, some yellow bakers twine to this panel and tied bows.  I had attached the tags to the twine before tying, but secured them down with more foam squares.  The panel was adhered to the embossed piece with more foam squares.

For the sentiment I decided I wanted to layer the stamps, so I first stamped the doily in gray, and sponged a bit of cream ink over the center to help the sentiment stand out.  After using my embossing buddy I embossed the sentiment in black over the doily and embossed the crown images in silver.  I was going to add some glitter at this point, but I decided in the end it wasn't necessary.  I adhered the image panel to a gray mat, added some mini brads and adhered this with foam squares over the ribbon.


At this point I went back to my crumpled circles and carefully opened them up.  Because the paper is thicker than what I usually use for this technique some of the pieces were still damp so I finished the drying with my heat gun.  I've found a tip when doing this - I put all of the pieces in a heat proof ramekin and then point my heat tool in the dish, shielding the top with my hand.  This helps the bits from flying all over my table and the walls of the dish reflect some of the heat so that the pieces dry faster.  Just be careful  because its easy to burn a stray finger, lol.


I assembled the flowers with a white button brad this time, and adhered a rhinestone to the center of each brad.  The flowers were inked with some gray, and I adhered them to the card front.  This card is very layery (the technical term, lol)!


The center was decorated with a matted piece of cream stamped with my favourite birthday sentiment, and a scrap of patterned paper. 


I love this card, the images, the patterns, and the colours.  My favourite part though is the flowers.  I love these flowers so much I think I may do a post just on those. I love making them and I love how they look, not to mention you never have to worry about not having embellishments to specifically match your project.  Stay tuned, such a post may be coming in the future!

I used the following products:

Cardstock:  Stampin' Up! Basic Gray, Very Vanilla,  Crushed Curry.  Authentique 6x6 Collection: Blissful.

Stamps:  Stampin' Up!  On Your Birthday.  My Mind's Eye Lost & Found Two Rosy "everything" stamp set.

Ink:  Color Box Fluid Chalk Ink Charcoal, Alabaster.  Stampin' Up! Going Gray. Memories Black.  Versamark Watermark Ink.  Stampin' Up! Embossing Powder Black, Silver.

Ribbon:  We R Memory Keepers Bakers Twine Lemonade, gray satin ribbon from stash.

Embellishments:  Recollections brads, Stampin' Up!  Basic Jewels Rhinestones.

Adhesives:  Scotch ATG, Zots, Foam squares.

Tools:  Paper trimmer, scissors, Cuttlebug, Spellbinders Nestablities Standard Circles Large and Small, Cuttlebug Scrollwork embossing folder, We R Memory Keeper brad setter, sponge, Stamp a ma jig.


I will enter this card into the following challenges:
  1. Deep Ocean - Swirls 
  2. Crafty Cardmakers - Distress it 
  3. Party Time Tuesday - Anything goes 
  4. The Paper Shelter - Vintage or Shabby Chic
  5. The Cuttlebug Spot - Fit for a Queen
  6. Really Reasonable Ribbon - Flowers and Ribbon
  7. Fussy and Fancy Friday - Swirls and Flourishes
  8. Charisma Cardz  - Bling
  9. Simon Says Stamp - Anything Goes
  10. Lets Ink It Up -  Use your favourite embellishments (handmade paper flowers)


Tuesday, 29 May 2012

Roses Under Shattered Glass

Last week I went to Micheals and saw some Hampton Arts Ditto stamps that were on sale.  They were so cute I bought two of them, and I am using one of them today. 

I was inspired by two things, the Shattered Glass technique on Speedy TV which I had never tried before, and the colour scheme was inspired by The Pink Elephant photo inspiration challenge.


This is what I came up with:


I first stamped my image on water colour paper with Staz On ink, then coloured the image using a water brush and Stampin' Up! Markers.  Once dry I applied the Versamark ink pad directly to the paper, edge to edge, then heat embossed with clear embossing powder. I repeated this step five more times and placed the image in the freezer.  After several minutes I removed the image from the freezer and bent the paper several times to cause cracks.  I found I had to put it back into the freezer several times until I had the amount of cracking that I wanted.

To make the piece more vintage looking I applied creamy brown ink over the surface of the embossing and then wiped it off with damp paper towel.  I first tried this with a blending tool but found that not enough ink was getting in the cracks, so I found applying th ink pad directly to the paper worked much better.


I chose a red card base, and coordinating paper.  I dry embossed the background with my Cuttlebug, then used the ink blending tool to apply creamy brown ink around the edges, both for a vintage look and to make the embossing stand out.  I used the same colour to ink the edges of the pattern paper.  I matted the image with the pattern, added some burlap and ribbon to the background piece, adhered the background piece to the card base, then foam taped the image over the ribbon.  Adding rhinestones was the last step.

For the inside I inked the edges of a piece of cream and adhered it with some scraps of pattern.  Once I stamped the sentiment my card was finished.


This card was quite time consuming but it was really fun. The creams in the end result turned out darker than I had intended but I really like how vintage it looks.   It reminds me of a tiny old cracked varnished wall hanging that my Great Aunt had in her house when I was a kid.  I can see myself doing this technique more often so I may have to invest in some Ultra Thick Embossing powder.  :)


I used the following products:

Cardstock:  Stampin' Up! Real Red, Very Vanilla, Lily Bee Design harvest Market 6x6  Tiny Tablet.

Stamps:  Hampton Art Ditto stamp, Stampin' Up! On Your Birthday set.

Ink:  Staz On Jet Black, Versamark Watermark ink, Color Box Fluid Chalk Ink Creamy Brown, Martha Stewart Gloss Embossing Powder. Stampin' Up! Stampin' Write Markers Real Red and Old Olive.

Embellishments:  Really Reasonable Ribbon Natural Burlap, pink satin ribbon from stash, Stampin' Up! Basic Jewels Rhinestones.

Adhesive: Scotch Advance Tape Glider adhesive, Zots, foam squares.

Tools:  Paper trimmer, scissors, bone folder, Cuttlebug, Cuttlebug Embossing Folder A2 Scrollwork, Ranger Craft Sheet, Stamp-a-ma-jig, Stampin' Up! Large Water Brush, Ranger Blending tool, Stampin' Up! heat tool.


I am entering this card into the following challenges:
  1. Deep Ocean -  Swirls
  2. Creative Card Crew - Dimension 
  3. Speedy Fox Challenge - Heat Emboss Your Main Image
  4. Allsorts - Birthday to someone special 
  5. The Pink Elephant - Photo inspiration 
  6. Crafty Cardmakers - Distress it 
  7. Party Time Tuesday - Anything Goes 
  8. Friends of Speedy TV - Try a new and different technique  

Tuesday, 22 May 2012

A Woodsy Birthday

While I occasionally work from sketches I usually start with either papers or stamps.  This time, however, I really wanted to try out  the following sketch Craft Your Passion has as their most current challenge:


I really like the layout of this sketch, and I have a masculine birthday coming up so I used the sketch to make the following card:


Once I decided on layout and theme, I looked for papers that I thought would work best.  I decided on My Minds Eye Miss Caroline Collection Dilly Dally 6x6 pad.  I liked the colours and the wood grain, and thought it would work with a woodsy theme.  Once I decided on patterns I choose coordinating cardstock and a Bo Bunny stamp set that would work well.

I decided on gray for the base,, and black as an accent.  I thought I would try out a technique that I had seen but not used before.  On the black piece I decided to use as the focal of the card I stamped my image with white craft ink.  After heat setting the ink I coloured over it with pencil crayons.  I was going to leave the centre of the tree uncoloured, but as I was going for 'tree at night' effect so I decided to colour the inside of the tree with green as well.  The green on the inside of the tree isn't completely visible but I think it blends in a bit better.

I thought it would be fun to use the flashlight from the set, so I cut some yellow from the same paper pad in a triangle that would fit the bottom of the focal point piece.  I temporarily adhered the yellow to the black piece and stamped the 'Happy Birthday' sentiment in Versamark over both pieces.  The section of sentiment over black I heat embossed in white, and the section over yellow I heat embossed in black.  Once the corners were rounded and the edges sponged I foam taped the triangle over the tree.

I wanted to add more detail to the background so I sponged the edges of each pattern with black and adhered them to the black accent piece.  I die cut some rick rack squares from gray and sponged them with white to make them look more distressed.  Once adhered somewhat randomly I added black hemp twine around the middle.  The focal card was adhered with foam squares to the background,  the little flashlight was foam taped in place, and the background was adhered to the card base.  


To follow with the sketch I found some buttons that would coordinate and knotted some brown thread through the centres of each.  I adhered these buttons with Zots to the background and I was done.

This card was fun to put together and I really like the result.  I should work from sketch challenges more often!

I would like to enter this card into the following challenges:
  1. Craft Your Passion - Sketch Challenge
  2. Catered Crop - Rickety Rack Recipe Swap
  3. Creative Craft Challenges - Distressing.
  4. Moving Along With the Times - Keeping it Real.
  5. The Pink Elephant - Buttons Galore.
  6. Simon Says Stamp and Show - Summer Holiday.
  7. Really Reasonable Ribbon - Father's day or Masculine with Ribbon or Trim.
  8. Creative Card Crew - Dimension.

I used the following supplies:

Cardstock:  Stampin' Up!  Basic Gray, Basic Black.  My Minds Eye Miss Caroline Dilly Dally 6x6 pad.

Stamps:  Stampin' Up! On Your Birthday, Bo Bunny Roughin' It.

Ink:  Stampin' Up!  Whisper White, Versamark Watermark Ink, Memories Black.

Embossing Powder:  Stampin' Up!  Basic Black, Martha Stewart Bright White.

Pencil Crayons:  Crayola Green, Brown, Gray.

Other Embellishments:  Buttons, thread, hemp twine all from stash.

Adhesive:  Tombow Mono Permanent Adhesive Runner, foam squares, Quickie Glue pen, Zots. 

Tools:  Cuttlebug, Quick Kutz Nesting Rick Rack Squares, scissors, paper trimmer, bone folder, We R Memory Keepers Corner Chomper. 

Monday, 21 May 2012

A Birthday with Patterns Galore.

One of my favourite colours is green, and when I saw the Pile it On challenge this week - mix your pattern scales - I thought of the perfect green patterns I could use for this.


I love these patterns, and I have wanted to use them for a while but I didn't have the right idea for them until today.  These are Jillibean Soup patterns, and I love how graphic and bright they are.  I decided to use a kraft base, and since I can never leave well enough alone I decided to round all of the corners on all papers and ink the edges with brown.

I embossed the sentiment on a small piece of kraft, banner cut the end, and inked the edges of this piece as well.  I had chosen this lovely piece of green seam binding to coordinate and was just going to put that around the middle, but felt it was not enough, so I added some kraft washi tape with printed text underneath the ribbon. I added the sentiment with some foam tape, and adhered some coordinating Prima flowers with Zots.

I still felt as though something was missing so I added some different sized self-adhesive pearls, and placed them as if they were sprinkled over the sentiment.  Lately that is one of my favourite things to do.  :)


For the inside of the card I corner rounded some leftover scraps, inked them in the same brown ink, and embossed the matching sentiment in the same white.


I really love how this card turned out and I hope my friend I had in mind while making it will enjoy receiving it!

I would like to enter this card into the following challenges:

  1.  Creative Craft Challenges - Distressing.
  2. The Paper Shelter - Birthday Cards with Sentiment.
  3. Moving Along with the Times - Keep it Real/ No Fantasy Figures.
  4. Pile it On - Patterns, Mix your Scales.


I used the following supplies:

Cardstock:  Stampin' Up! Crumb Cake, Jillibean Soup Summer Squash Soup, Blossom Soup 6x6 mini pad.

Stamps:  Stampin' Up!  Petite Pairs

Ink:  Color Box Fluid Chalk Ink Chestnut Roan, Versamark Watermark Ink pad, Martha Stewart Bright White embossing powder.

Embellishments:  Ribbon Carousel Moss Green vintage Seam Biding, Washi tape purchased from Le Box Boutique, Prima Flowers Camille Almanac, Stampin' Up! Jewels Basic Pearls.

Adhesives:  Tombow Mono Permanent Runner, Zots, foam squares.

Tools:  Paper trimmer, scissors, We R Memory Keepers Corner Chomper, sponge.


Saturday, 5 May 2012

Jewelry for your birthday...

Sometimes I know exactly what I want to make, and even if what I end up with doesn't look exactly like what I had in mind, it always has kernels of my original idea.  that is definitely not what happened with this card.  :)


I started with a piece of kraft cardstock and some natural twill ribbon.  I spotted some metal sheets in my sash and decided to try embossing them in my Cuttlebug.  Wat a result1  I love the effect, it reminds me of old fashioned tin ceiling tiles  As such I thought I would age it a bit by sponging on some black Staz-on.

Once this was done i thought I would play with some more ribbon and Glubers.  You can read about my original Gluber flower here.  I chose red, pink and black this time, for no other reason that thats what struck my fancy at the time.  I used various Gluber sizes and added rhinestones to the centre, then kept adding and kept adding!  I'm usually stingy with rhinestones, but this time I felt like splurging. 


Once done I decided the kraft cardstock and twill ribbon I had originally chose wouldn't go with the direction I was heading in.  I chose some black cardstock instead, and instead of adding more ribbon I decided to heat emboss the sentiment on a strip of black cardstock.  I trimmed the end with banner points, and adhered the piece with foam squares.  I of course had to add more rhinestones.  :)

This card turned out so blingy that it almost looks like jewelry!  What do you think?

I would like to enter this card in the following challenges:
  1. Creative Card Crew - Ribbon 
  2. Catered Crop - B for Bodacious 
  3. Creative Craft Challenges - Anything Goes 
  4.  Craft your Passion - Lots of texture
  5. Party time Tuesdays - Two or more ribbons
  6. Really Reasonable Ribbon - Mother's Day or Feminine plus ribbon
  7. Papertake Weekly - Anything Goes
  8. Simon Says Stamp challenge - Anything birthday goes
  9. The Cuttlebug Spot - Flowers for Mom
  10. Lets Ink it Up - Bling
  11. Speedy Fox Challenge - Use 3 of Something

I used the following supplies:

Cardstock:   Stampin' Up!  Basic Black

Stamps:  Stampin' Up! Petite Pairs.

Ink:  Staz-On Jet Back, Versamark Watermark Ink pad

Metal:  Quick Kuttz Metal Sheets, Stampin' Up!  Silver Embossing Powder.

Other embellishments:  Ribbons from my Stash,Micheals Rhinestone stickers.

Adhesive:  Cosmo Cricket Glubers, Tombo Mono permanent adhesive runner, foam squares.

Tools:  Paper trimmer, scissors, Cuttlebug, Cuttlebug embossing folder from Paperlace II set, We R Memory Keepers Corner Chomper, Sponge.


Friday, 27 April 2012

Butterfly birthday wishes

Since my big card making sprint (and buying sprint I must admit)  at Christmas time I've been trying to resist buying new things since I already have a lot of stuff that needs to get used.  In March, however, I did my taxes and since I was lucky enough to get a bit of a refund I decided to restock some things, and splurge on a few other things.  I ordered a bunch of stuff from a few different places a few weeks ago and it all came in around the same time, so I got to play!  Here is the first of many creations to come:


The light is funny in this picture, it kind of looks like I used my flash even though I didn't but hopefully you get the idea.  I keep trying to experiment with different places, times of day, and lighting to get the best picture.  I don't think I've come across the best combination yet but I'll keep trying!

I started with a 6.5 x 6.5 paper pad from Kaiser Craft that I saw Kristina Werner use in one of her videos.  It's so pretty with soft colours, and lovely imagery.  I chose the sheet with  a pale blue background and line drawings of hydrangeas (I think?).  I paired it with a sheet of script paper (I seem to be attracted to anything with type or writing on it lately), and some Stampin' Up! Crumb Cake cardstock.  Crumb Cake is my absolute favourite shade of kraft!

I sponged the patterned papers with charcoal ink, and the white circle with creamy brown ink to coordinate with the kraft.  I used both of my two new Stampin' Up! sets by choosing an image from one, and a sentiment from the other, and heat embossing them in silver.  I decided to use a piece of beautiful ribbon that I purchased with my gift certificate won from Ribbon Carousel several weeks ago.  The ribbon was a bit wider than I needed so I pleated the ribbon with the help of some glue dots, then twisting it a bit before adhering to the back.  To conserve the special ribbon, the knot is a sort of faux- tie that I added after the long piece was adhered.


By the way, I was really impressed with Ribbon Carousel's prices, their shipping costs are really reasonable (always a concern when ordering from Canada) and everything came bundled neatly and in cute little patterned packets.  I actually saved the packaging to use later, lol!  I will definitely be ordering from them again!

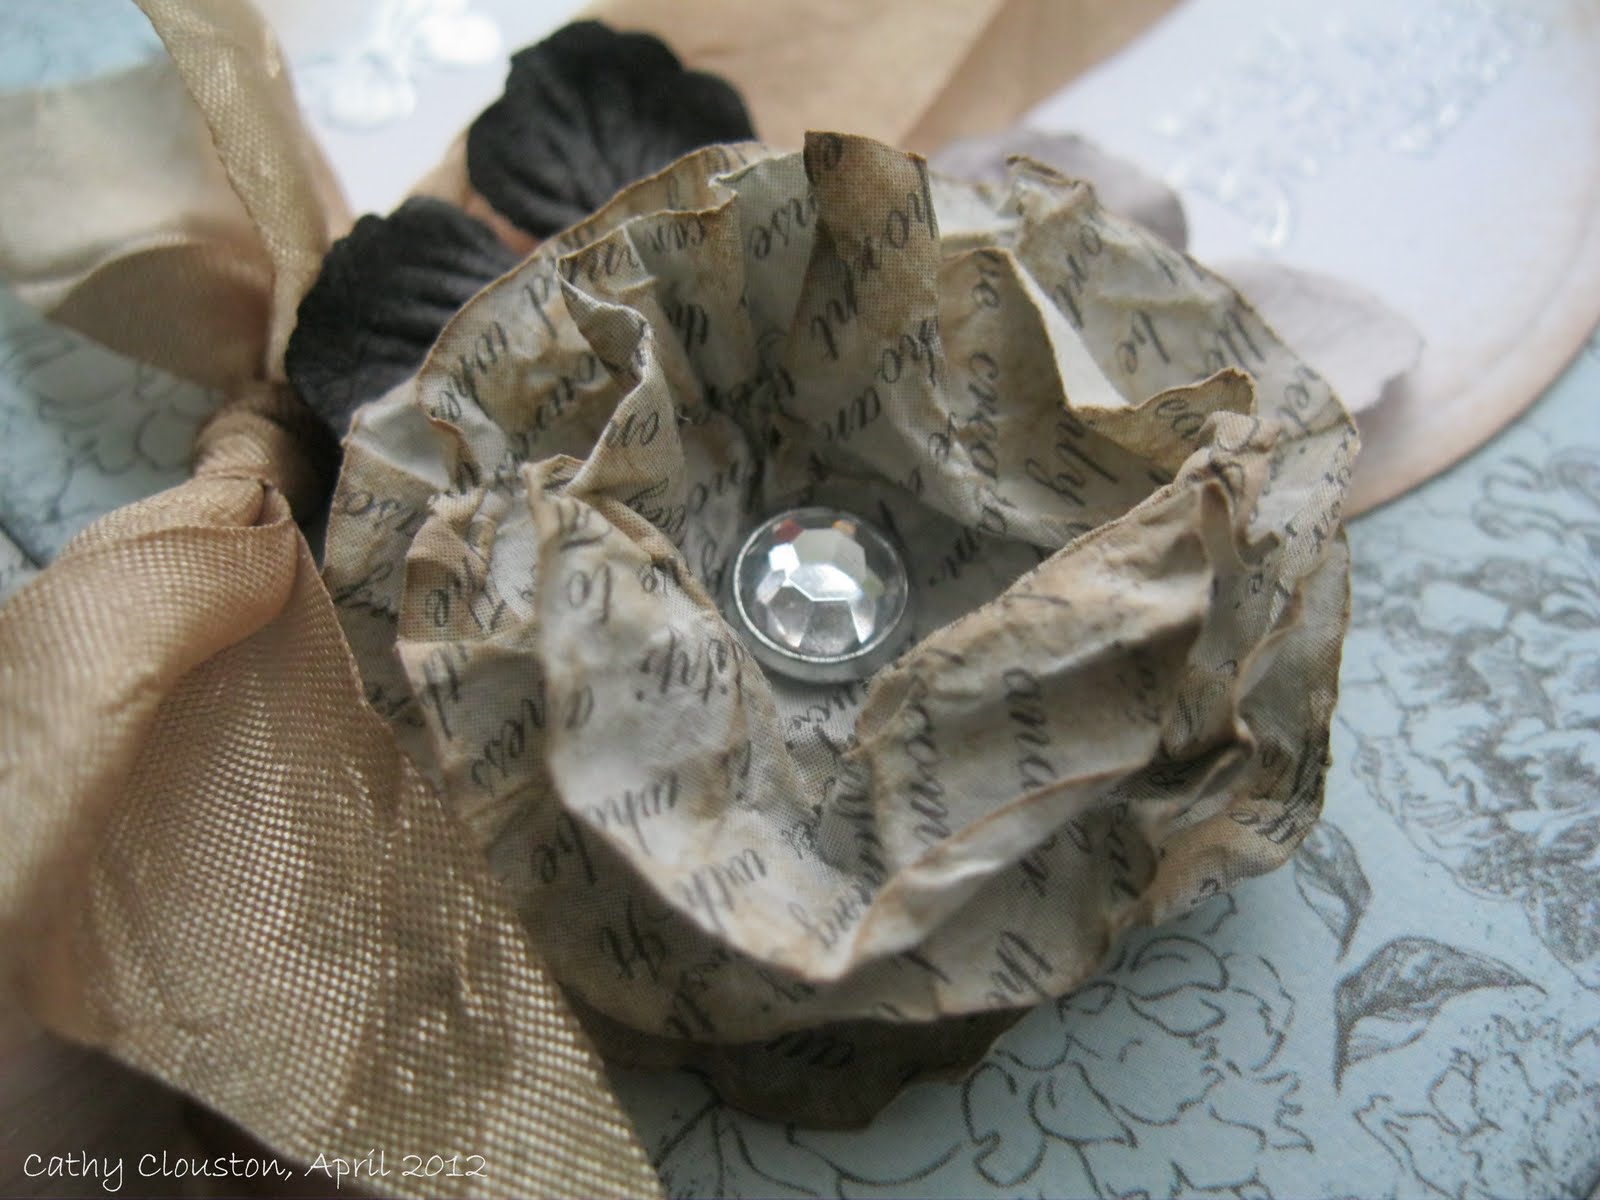
I decided on embellishments last, and as I really liked the script pattern I decided to make a paper flower out of it.  I wanted to make a different type of flower than I had before, so I used a technique I have seen Christine Urias use on a Scraptime video.  I have been watching her videos for a while, and since there are over 700 I couldn't find the one showing this technique in order to link here, but I highly suggest looking at her website www.scraptime.ca. She has covered so many things that I am sure you will learn something new!
To make this flower you just need to punch or die cut several circles.  Spray the circles with water and crumple them up.  They look almost like spit balls at this point but not nearly as gross, lol.   Once the little balls dry (or you can dry them with a heat tool), you carefully un-crumple them, stack several, poke a hole in the middle, add a brad, and voila - you have a flower!  I only needed to use three circles to make my flower, although I seem to remember Christine using 6 in her video.  Since I couldn't find the original video I could be making that number up, but I'm sure you could stack as many circles as you wanted to  make your flower as full as you would like.


I used a gem studded brad in the middle of my flower for sparkle, and inked the edges of the petals with more creamy brown ink.  I added a couple of small Prima flowers (also purchased at Ribbon Carousel), and although a lot was going on I felt like the card needed something more, so I added some faux stitching at the top and bottom with my white gel pen.  I really like the look of stitching so I think I may have to search for my sewing machine in the basement soon, but for the time being my gel pen works great for this.

On the inside of the card, I adhered a couple of strips of the patterns inked in charcoal, and a piece of white inked with creamy brown.  I added the companion sentiment to the sentiment on the front by heat embossing it in silver. All done!


I love how pretty this card is!  Now, what to play with next?  Hmmmm......


I will enter this card into the following challenges:
  1. Catered Crop - Get krafty. 
  2. Fussy and Fancy Friday - Punches and Dies 
  3. Pile it On -  Sparkle and Shine
  4. Party Time Tuesdays - Anything Goes + Kraft
  5. Creative Card Crew -  Ribbon
  6. Ladybug Crafts Ink- Birthday
  7. Deep Ocean Challenge - Use punches/dies
  8. Ribbon Carousel Challenge - Anything Goes
  9. Simon Says Stamp - Anything Goes
  10. Moving Along with the Times - Gardening or Flowers

I used the following supplies:

Cardstock:  Stampin' Up! Crumb Cake, Whisper White.  Bazzill Basics Antique Script.  Kaiser Craft Bonjour 6.5 Paper Pad.

Stamps:  Stampin' Up! Petite Pairs, Kindness Matters.

Ink:  Color Box Fluid Chalk Ink Creamy Brown, Charcoal.  Versamark Watermark Ink pad. Stampin' Up! Silver Embossing Powder.

Embellishments: Ribbon Carousel Champagne Silky Crushed ribbon, Prima Flowers Camille Almanac, Creative Charms brads.

Adhesive:  Mini Glue Dots, Tombow Mono Permanent Adhesive Runner.

Tools:  Cuttlebug, Spellbinders Nestabilities Standard Circles Large, paper trimmer, bone folder, scissors, tweezers, heat tool, Stampin' Up! embossing buddy, sponge We R Memory Keepers brad setting tool.


Sunday, 22 April 2012

A birthday up in the air.

While I haven't been posting lately, I have been crafting a bit and this will be the first of two posts tonight.


Yet another belated birthday card, hopefully the last one for a while.  I love this patterned paper from American Crafts, and since the person I was making the card for likes planes, I thought of a great way to use it.

I have a really cute Recollections stamp set from Michaels with no name made up of various vehicles.  I stamped the plane from the set in brown ink and used my Bic Mark Its to colour the image.  

Once I cut out the image I chose some cardstock to coordinate with the pattern and layered them together.  I adhered the plane with foam tape and decided to put the sentiment on a strip of leftover white cardstock.  I cut the right side with a 'v' and matted the white with some kraft.  I felt it looked bare so I added some mini brads along the edge, and adhered some buttons threaded with hemp twine.

To finish I used a Stampin' Up marker in the same colour as the ink to make a swirly dash line behind the plane to suggest the route the plane had taken.  I think this was a fun touch, and I really like how it turned out!

On the inside, I adhered some white cardstock with a strip of the cloud pattern.  Once I stamped the sentiment I stamped another plane and added more dash lines.  This card is definitely one of my favourites!  :)


I would like to enter this card in the following challenges:
  1. Catered Crop:  The Get Krafty Recipe Swap
  2. Everybody Art:  Card for a man.
  3. The Paper Shelter:  Wings and Things

I used the following supplies:

Cardstock:  Stampin' Up!  Whisper White, Recollections kraft, American Crafts Hello Sunshine Dandy.

Stamps:  Recollections rubber stamp set, Stampin' Up! On Your Birthday, Bitty Birthday.

Ink:  Stampin' Up!  Chocolate Chip.

Markers:  Stampin' Up! Stampin' Write Chocolate Chip, Bic Mark Its Oceanview Blue, Rambunctious Red, Cloud Nine Grey.

Adhesive:  Tombow Mono Permanent Adhesive runner, foam squares, Glue Dots.

Embellishments:  Recollections mini brads, buttons and hemp twine from my stash.

Tools:  Paper trimmer, scissors, bone folder, We R Memory Keepers Corner Chomper.

Sunday, 8 April 2012

More Belated Birthday Wishes

With the second birthday card I started with the background.


I used the waxed paper technique, which I have heard of but never seen demonstrated before until I saw the technique on a Stamp TV video.


I thought this technique looked really fun so I started with some white cardstock and went to work.  Once ironed with the waxed paper I was surprised at how smooth the cardstock still was.  I had expected it to have some texture to it, but it doesn't at all.

I chose some Colorbox chalk inks that I thought would work well together - two shades of brown and one of pink.  I didn't add all of the inks directly to the paper like in the video.  Instead I added the light brown direct to paper, then added the dark brown and pink with a Ranger blending tool. I found this a bit easier since the chalk ink pads are so juicy, with the blending tool I could add the ink where I wanted it more easily. I love these inks because they are so colourful and soft looking at the same time. I think the background almost looks like old plaster. Here is a close up:


Once the background was done it was time to choose stamps and coordinating patterned paper.  I had the Graphic 45 stamp picked out, and as I was searching through my patterned paper stash I came across this sheet with postmarks all over it from Fancy Pants Designs.  I thought the colours and pattern would be perfect.

I stamped the image in the darker brown on white cardstock, and sponged the edges with both shades of brown. Once the image and background were mounted on black, I mounted the image on a larger square of the pattern which had also been sponged with the darker brown.  I added some Prima ribbon and twine to the background panel, then foam taped the image over the ribbon.  The whole panel was adhered to a base of kraft and the card front was complete.  I considered adding glitter or gems, but in the end I decided there was so much ink and sponging that it wasn't necessary.

I finished the inside with a panel of white sponged with the same two shades of brown, and a couple of scraps from the other papers.


The sentiment actually consists of two stamps.  The little "(a little late!)" stamp certainly comes in handy, and it is small enough to add to cards that are already finished if I ever need to.

I really love how the entire card turned out.  I will definitely use the waxed paper technique again. :)

I would like to enter my card into the following challenges:
  1. Deep Ocean - Use More Than One Stamp
  2. Papertake Weekly - Anything Goes
  3. Pile it On - All About 's'

I used the following supplies:

Cardstock:  Stampin' Up! Whisper White, Basic Black.  Recollections Kraft.  Fancy Pants Designs Its the Little Things 6x6 Paper Pad.  Waxed paper - grocery store brand.

Stamps:  Stampin' Up! On Your Birthday, Bitty Birthday.  Hampton Art Graphic 45 Paris Postage.

Ink:  Colorbox Fluid Chalk ink Chestnut Roan, Creamy Brown, Rouge.

Ribbon:  Prima Ribbon, hemp twine from stash.

Adhesive:  Tombow Mono Adhesive Runner Permanent, Foam Squares

Tools:  Paper trimmer, scissors, household iron, Ranger Non-stick Craft Sheet, Ranger Inksentials Blending Tool, foam applicators, sponge, bone folder.

Spring Birthday Greetings (a little late)

My husband were talking the other day and we realized we had just missed a whole bunch of family birthdays.  March is a big month in our family for birthdays, and as you may have noticed we are more than a week into April.  Whoops!  You'd think as the resident card maker I'd be better at keeping track of these things but unfortunately I'm not.  Well, its not too late!  This is when I get to use my 'belated' birthday stamps - which unfortunately get more use then I would like to admit, lol.


When trying to decide what I wanted to do I realized that purple is my favourite colour but I rarely use it as a base colour when making cards. For this reason I chose the base colour first - Rich Razzleberry from Stampin' Up!, then searched through my stash for patterned paper to coordinate. I thought Lily Bee Design's Head over Heels collection worked the best, and since I couldn't decide which sheets to use I thought I would use little bits of a bunch of them.

I started by using some scraps I already had, then cut more randomly sized strips.  I tore the ends of each, then adhered them to a piece of kraft cardstock matted on cream.  I took care not to adhere the ends, so once they were attached I could manipulate the ends of the scraps, tearing and curling until they were how I wanted.

I didn't size the strips lengthwise before adhering, instead once they were glued down I flipped the card front over and trimmed the ends to ensure the line at the top was even.  I added some ribbon and some twine, and adhered the sentiment over the strands with foam squares.  I couldn't resist inking the edges of the sentiment to make it stand out.

On the inside I cut a panel of cream, stamped a belated birthday message, inked the edges, and added two more strips.  Since I stamped the message in the corner there is still lots of room to write.


This card was really easy and quick.  The bright spring-y colours make for a cheerful card, and I love how the patterned strips kind of look like peeling wallpaper.  This card is really fun and demonstrates a good way to use up leftover scraps, and a good way to avoid making decisions!


I would like to enter this card into the following challenges:
  1. The Pink Elephant - Clean and Simple
  2. Craft Your Passion - Dots and Stripes, either or both
  3. Ladybug Crafts Ink - Spots an Stripes
  4. Papertake Weekly - Anything Goes
  5. Ribbon Carousel Challenge - Spring
  6. Allsorts - Colour Bingo - Ribbon, Stripes, Purple
  7. Pile It on - All About 's'

I used the following supplies:

Cardstock:  Stampin' Up!  Rich Razzleberry, Very Vanilla.  Recollections Kraft.  Lily Bee Design Head over Heels 6x6 Tiny Tablet.

Ink:  Memories Black.

Stamps:  Stampin' Up!  On your Birthday

Ribbon:  Hemp twine and purple satin ribbon from stash.

Adhesive:  Snake Tape Viper

Tools:  Paper trimmer, scissors, bone folder.

Monday, 12 March 2012

Eat Cake!

This is the second card that I made for my husband for his birthday, this time from me.  I thought this one turned out to be cute:


I used the same patterned paper that I used for the card from my son, only this time I chose a couple of fun patterns.  Once I chose the cardstock, I stamped the images and decided to colour the image using my Bic Mark Its.  Again I couldn't resist adding some Sakura glitter pen, and this time I added some matching brads.


I haven't set any eyelets for awhile, so I kind of went to town with my Crop-a-dile.  I really like the sewing effect with the ribbon.


To add colour to the inside I used my Cuttlebug to cut the smallest circle from my die set.  I inked them and adhered them randomly.  Overall this was a really a fun card to make! And I think my husband enjoyed me making something for him for a change, lol. :)

I've decided to enter this card into the following challenges:
  1. Catered Crop - Ravenous for Ribon Quickfire
  2. Daring Cardmakers - Tessellation
  3. Color Throwdown - Ridinghood Red, Pumpkin Spice, Chocolate Chip, Baja Breeze
  4. Creative Craft Challenges - Boys Will be Boys
  5. Papertake Weekly - Anything Goes
  6. Craft Your Passion - 100th Challenge Celebration - Anything Goes
  7. The Pink Elephant - Lets See Those Layers

I've used the following supplies:

Cardstock:  Stampin' Up Baja Breeze, Crumb Cake, Chocolate Chip.  Crate Paper Toybox collection 6x6 pad.

Stamp Sets:  Stampin' Up!  Bitty Birthday, Inviting.  KI Memories Party Icons.

Ink:  Colorbox Fluid Chalk Ink Chestnut Roan, Creamy Brown.  Memories Black.

Markers and Pens:  Bic Mark It! blue Skies Blue, Ky Lime, Margarita Green, Woodsy Brown, Honey Brown, Rambunctious Red, Oceanview Blue, Summer Melon.  Sakura Gelly Roll Clear Stardust Pen.

Embellishments:  Recollections Eyelets, Crate Paper Toybox Collection Sew Brads, hemp twine from stash, red ribbon from stash. 

Adhesives:  Tombo Mono Adhesive Runner permanent, foam squares.

Tools:  Paper Trimmer, scissors,  We R Memory Keepers Corner Chomper, Crop-a-dile, Cuttlebug.


Sunday, 11 March 2012

Number One Dad

Today is my husband's birthday, and instead of making one card for both me and my son to give I decided to make one for each of us.  This is the card I made to be from Zach:


I started with the patterned paper, which is a 6x6 pad from Crate Paper called Toy Box.  I've been saving this as it reminds me of '70s-'80s ish kid stuff.  My husband and I were both born in the late '70s with older siblings, so we had lots of books and toys handed down.  Thats why I thought this paper would be perfect for his birthday. :)  Once I chose coordinating card stock, I stamped the images, added eyelets and ribbon, and assembled everything.

BTW, my husband's name is not Jimmy.  The background paper looks like a stack of books, and I didn't notice until I photographed the card that the way the pattern was cut makes it seems like the card says "No. 1 Dad Jimmy", lol.  Oh well, I explained to my husband when he opened it and we had a bit of a laugh about it. 


Even though the card was for my husband who is not as into glitter as I am, I couldn't resist adding some Clear Stardust Sakura pen to the images.  I love these Sakura pens!


I used my smallest Nestabilities circle to cut circles from some of the leftover patterned paper and used them to decorate the inside of the card.  I really liked how it turned out.  All set for our son to add a bit of scribble before giving to daddy!  :)

I've decided to enter this card in the following challenges:

  1. Catered Crop - Ravenous for Ribbon Quickfire
  2. Daring Cardmakers - Tessellation
  3. Color Throwdown - Ridinghood Red, Pumpkin Pie, Chocolate Chip, Baja Breeze
  4. Creative Craft Challenges - Boys will be boys
  5. Papertake Weekly - Anything Goes
  6. Craft Your Passion - 100th Challenge Celebration - Anything Goes
  7. The Pink Elephant - Lets See Those Layers

These are the supplies I used:

Cardstock:  Stampin' Up!  Chocolate Chip, Crumb Cake, Baja Breeze.  Crate Paper Toybox Collection 6x6 pad.

Ink:  Colorbox Fluid Chalk Ink Chestnut Roan, Creamy Brown.

Markers and Pens:  Stampin' Up! Stampin' Write Markers Real Red, Chocolate Chip, Tempting Turquoise.  Sakura Gelly Roll Clear Stardust pen.

Stamps:  Stampin' Up! Eight Great Greetings, On Your Birthday.  My Mind's Eye Stella & Rose Acrylic Stamps.

Dies:  Spellbinders Nestabilities Large Standard Circles.

Embellishments:  Recollections Eyelets, hemp twine from stash, red ribbon from stash.

Tools:  Paper trimmer, scissors, We R Memory Keepers Corner Chomper, Crop-a-dile,  Cuttlebug.

Adhesive:  Tombow Mono Adhesive Runner permanent, foam squares.

Monday, 5 March 2012

More You Tube Inspiration

One of the You Tube channels I visit often is Stamp TV which features videos with instruction by Gina Krupsky of Gina K Designs.  I was going through past videos the other day, seeing if there was anything I missed, when I came across her video on sponging a layer.  I've seen this technique before, but for some reason it stuck in my head this time and I wanted to try it.


I loved Gina`s colour scheme so mine is quite similar,  but I don't have the same stamps so I used what I had.  I'm really pleased with the result.  I followed her process almost exactly, except I couldn't resist adding some Sakura glitter pen to the center of the flowers.


Since I hadn't added any layers to the front of the card, I didn't want to add layers to the center of the card like I usually do, so instead I stamped with a birthday sentiment, and some smaller flowers from the same set the big flowers came from.


I love how this card turned out.  Considering all of the stamping, inking, and colouring it was a pretty quick card to put together so I think I will try this again soon with some different colour schemes and shades of card stock. 

Here is the video that inspired this card:


I'm entering this card to the following challenges:
  1. Catered Crop - Use Ribbon
  2. Deep Ocean Challenge Blog - Spring
  3. Stampin' for the Weekend - Bingo - Ribbon, Glitter, Flowers
  4. Simon Says Stampin Challenge Blog - Anything Goes

The supplies I used are as follows:

Cardstock:  Stampin' Up!  Whisper White.  

Stamps:  Stampin' Up! On Your Birthday.  KI Memories Enchanting Icons.

Ink:  Staz On Jet Black, Colorbox Fluid Chalk Ink Olive Pastel.

Markers:  Stampin' Up! Stampin' Write markers Bravo Burgundy, Summer Sun, Cameo Coral.  Sakura Gelly Roll Clear Stardust.

Ribbon:  Burgundy ribbon from my stash.

Adhesive:  Skor Tape.

Tools:  Stamp-a-ma-jig, Ranger Inksentials blending tool.

Friday, 2 March 2012

Perfect Pinwheels

I mentioned in my last post that I visit You Tube on occasion and I found yet another video that inspired today's card.  About the time that CHA was going on I saw several videos featuring pinwheel dies that of course I was lusting over, but when I saw the Simon Says Stamp video that shows how you can make simple pinwheels without any dies I immediately started thinking about what I could do with them!


As usual I started out with the pattern  papers -- this time using several sheets from My Mind's Eye Fine and Dandy Girl collection.  After Selecting coordinating card stock, ribbon, and ink, I set out to make the pinwheels. They were really easy!  If you like this look I definitely recommend watching the video I have linked below.  Of the two methods described I used the glue dot method.


In addition to these being so easy and fast to complete, I like that you can make these pinwheels any size you like.  I made mine with card stock cut at 2" square.

After the pinwheels were assembled cutting the card stock, inking the edges, stamping images, and putting everything together went pretty quickly.  I decided to make a gate-fold card and I stamped the inside with a cute bird image from the coordinating stamp set Fine and Dandy Tickled Pink.  This card is so cute!


I love this card!  Ive decided to enter it in several challenges:
  1.   Simon Says Stamp Challenge Blog -- Anything Goes
  2.   Pile it On -- Fun Folds 
  3.   Allsorts Challenge Blog -- Anything Goes 
  4.   Pretty Little Ribbon Shop Blog -- Anything Goes

Supplies used are as follows:

Cardstock:  Stampin' Up!  Chocolate Chip, Whisper White, textured Melon Mambo.  My Mind's Eye Fine and Dandy Girl 6x6 pad.

Stamps:   My Mind's Eye Fine and Dandy Tickled Pink, My Mind's Eye Fine and Dandy True Blue, Ki Memories Party Icons.

Ink:  Stampin' Up! Chocolate Chip.

Embellishments:  American Crafts satin ribbon, Recollections brads, buttons from my stash.

Adhesives:  Tombow Mono permanent adhesive runner, Skor Tape, Glue Dots, foam squares.

Other tools:  Paper trimmer, scissors, We R Memory Keepers Corner Chomper, artist sponge.