Showing posts with label background. Show all posts

Sunday, 27 May 2012

Welcome baby! Boy or Girl?

I've been saving this post for a while.  I made these cards for my best friend's new baby, and since I made them before the baby's arrival I didn't know whether to make pink or blue.  The solution?  Make both!


 I started with a base of cream Gina K 120# cardstock, and since this would be a baby card I decided I wanted to keep everything light and fresh looking.  I decided to layer with some Stampin' Up! Very Vanilla that had been embossed in my Cuttlebug.  The creams from the two companies are a very close match.


Once I chose some pretty pink and blue satins, and some lovely Prima ribbons to coordinate I decided to stamp my image and sentiment with dark brown ink.  The little ducks were coloured with coordinating markers. The focal image and sentiment was punched with a square label shape and foam taped over the knotted ribbon.


At this point I figured the card was finished, but as I looked at it I felt it needed more.  I had just gotten a package of pearls with my latest Stampin' Up! order so I decided to use them here.  To mimic  bubbles I decided to use various sizes and place them as if they were floating over the card.  I love these pearls!


I kept things simple on the inside with just a simple sentiment and another duck image, this time not coloured in. 

I love how this turned out.  Wondering which one I gave to my friend?  Pink!  As per usual my prediction was wrong, but thats OK because the baby is beautiful!!  :)


I would like to enter these cards in the following challenges:
  1. Fussy and Fancy Friday - New Baby
  2. Creative Card Crew - Dimension
  3. Ladybug Crafts Ink - Something With Wings
  4. The Paper Shelter - Bling it On
  5. Moving Along with the Times - Celebrate with no birthdays.
  6. Charisma Cardz - No flowers allowed

I used the following supplies:

Cardstock:  Gina K Designs 120# Pure Luxury Pure Ivory, Stampin' Up Very Vanilla.

Stamps:  Stampin' Up! Petite Pairs, Year Round Fun II

Ink:  Stampin' Up! Chocolate Chip.

Markers:  Bic Mark Its Summer Melon, Pink Flamingo, Oceanview Blue.

Ribbon:  Prima Marketing (velvet grosgrain), satin ribbon from my stash.

Pearls:  Stampin' Up! Jewels Basic Pearls.

Adhesive:  Tombow Mono Multi Liquid Glue, foam squares, Glue Dots.

Tools:  Paper trimmer, bone folder, We R Memory Keepers Corner Chomper, Cuttlebug, Cuttlebug Moroccan Screen Embossing Folder.

Wednesday, 9 May 2012

Flowery Friends with Ribbons

For this card I started with ribbons, lots of ribbons!  I have little wooden stands in my craft space with spools of Prima ribbon on them.  I look at them every day, and it occurred to me that I should see how many I could use on one card. :)


I started with a standard size card base made of kraft, and I cut another piece of  cardstock about 1/2 an inch smaller to give enough room to work with.  I chose several colours of ribbons ensuring they were all the same width and cut lengths a bit longer than the long side of the small piece of card.   These strips were adhered to the back of the short side of the card with glue dots.  I attached shorter ribbons to the back of the long side of the card, and wove them with the longer strips of ribbon.  Once done, all ends were attached with glue dots to the back of the card.  This piece was very thick by then so I decided to use more glue dots to attach it to the card front to ensure it was well adhered.


I cut another piece of kraft just slightly smaller than the card front, bigger than the woven piece, and die cut a large circle from it.  I embossed the edge of the circle with the die, and once done distressed the outside edge of the panel with a distressing tool.  A white gel pen was used to add dash lines around the edge of the circle, and the outside edge of the panel.  The sentiment was heat embossed in white.


In order to make the panel look as lush as the ribbon section, I added the last of the lovely silky Champagne ribbon from Ribbon Carousel, and some Prima flowers in soft coordinating colours. The panel was adhered to the ribbon piece with foam squares.


I really splurged on this card.  It was really fun to make and turned out to be so pretty!  :)

I would like to enter this card into the following challenges:
  1. Really Reasonable Ribbon - Mother's Day or feminine plus ribbon.
  2. Stampin' for the Weekend - Layer Upon Layer
  3. Speedy Fox - Use 3 of something.
  4. Deep Ocean Challenge - What a Wonderful Woman

I used the following supplies:

Cardstock:  Stampin' Up! Crumb Cake.

Stamps:  Pocket Silhouettes.

Ink:  Versamark Watermark ink pad, Stampin' Up! White Embossing powder, Sakura White Gelly Roll pen.

Embellishments:  Prima Marketing ribbon, Ribbon Carousel Champagne Silky Crushed ribbon, Prima Camille Almanac flowers.

Adhesive:  Glue Dots, foam squares.

Monkey Business... and a new hobby!

I have a new hobby, and its all thanks to Youtube.  A few months ago I found a very crafty blogger on Youtube called The Frugal Crafter.  She's amazing!  She is primarily a stamper, but covers a wide variety of topics, including the one that piqued my interest - stamp carving.


I've heard of this craft before, and I've even thought about doing it, but it wasn't until seeing this video that I decided I would go out and get the supplies. I love her idea of carving a stamp before buying it, because many times I might get a whole stamp set just for one stamp.  I made my first few attempts a few days ago and came up with this leaf stamp that I really like:


I had started by carving some less simple designs, but they didn't quite turn out how I wanted them, so I decided to try something a bit easier for a beginner like me.  The leaves were a great shape to carve and I like how the stamp turned out, so I decided to use it to make a background for my next card.


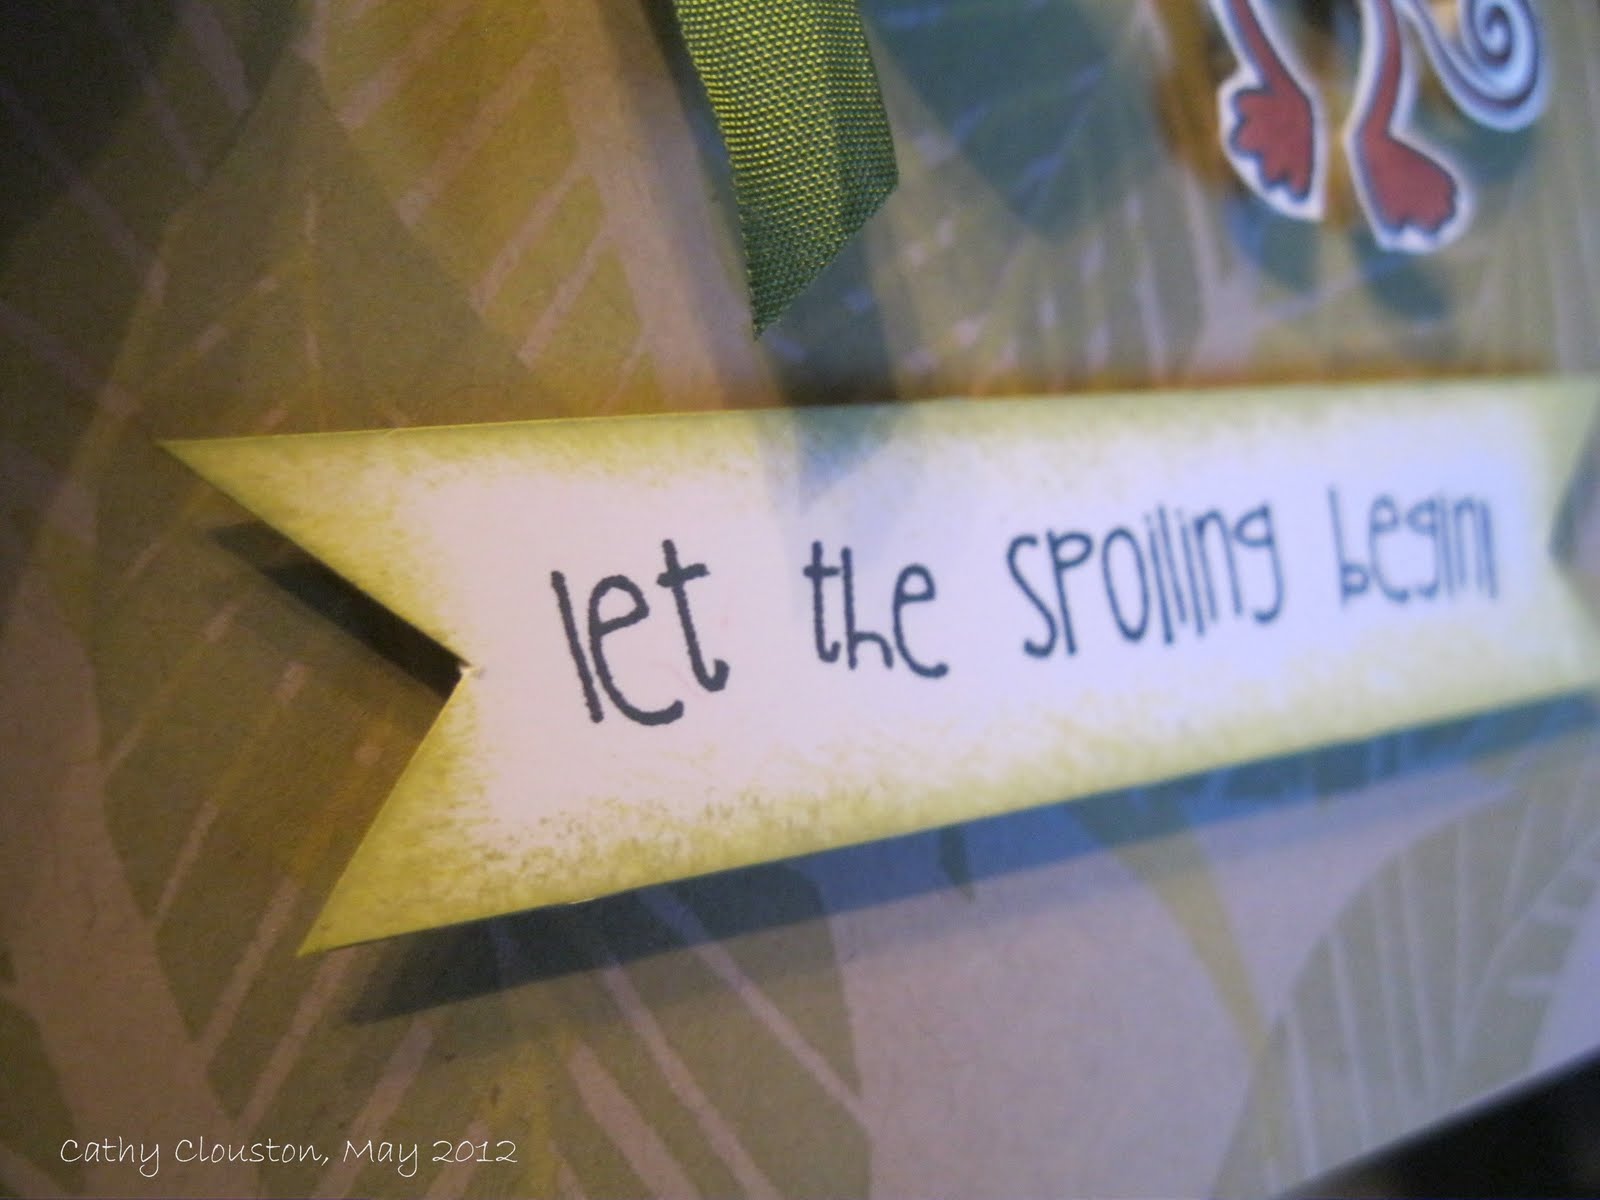
I used two shades of green to stamp the leaves on kraft cardstock.  I stamped the entire sheet so the pattern is on the front and back.  I added some green seam binding, and since the leaves reminded me of banana leaves I thought this monkey stamp would work perfectly.  Once stamped and coloured on white cardstock I cut out the image and adhered it with foam squares.

The sentiment was stamped on a strip of white, and trimmed with banner points on each end.  I sponged it with both shades of green ink. Adhered with more foam tape.


This was a pretty quick and simple card, but I love the effect of the background.  I think this would be a great card for a new baby or a baby shower., or even a kid birthday card.  I definitely see more hand carved stamps in my future!

I will enter this card into the following challenges:
  1. Catered Crop - B is for Bodacious (baby)
  2. Creative Craft Challenges - Anything Goes
  3. Crafty Card Makers - For the boys.
  4. Papertake Weekly - Cute, cute, cute.
  5. Everybody Art - Baby

I used the following supplies:

Cardstock:  Stampin' Up! Crumb Cake.  Gina K Pure Luxury 120# Pure White.

Stamps:  Unity Stamp & Bella Blvd Itty Bitty Let the Spoiling Begin.  Hand carved leaves.

Stamp Carving Supplies:  Speedball Speedy-Cut,  Speedball linoleum cutter set.

Ink: Memento Tuxedo Black, Color Box Fluid Chalk Ink Lime Pastel, Olive Pastel.

Markers:  Bic Mark Its Honey Brown, Tiki Hut Tan.

Ribbon: Ribbon Carousel Moss Green Vintage Seam Binding.

Adhesive:  Tombow Mono Permanent Adhesive Runner, Glue Dots, foam squares.

Other tools:  Paper trimmer, scissors, sponge.


Saturday, 5 May 2012

Jewelry for your birthday...

Sometimes I know exactly what I want to make, and even if what I end up with doesn't look exactly like what I had in mind, it always has kernels of my original idea.  that is definitely not what happened with this card.  :)


I started with a piece of kraft cardstock and some natural twill ribbon.  I spotted some metal sheets in my sash and decided to try embossing them in my Cuttlebug.  Wat a result1  I love the effect, it reminds me of old fashioned tin ceiling tiles  As such I thought I would age it a bit by sponging on some black Staz-on.

Once this was done i thought I would play with some more ribbon and Glubers.  You can read about my original Gluber flower here.  I chose red, pink and black this time, for no other reason that thats what struck my fancy at the time.  I used various Gluber sizes and added rhinestones to the centre, then kept adding and kept adding!  I'm usually stingy with rhinestones, but this time I felt like splurging. 


Once done I decided the kraft cardstock and twill ribbon I had originally chose wouldn't go with the direction I was heading in.  I chose some black cardstock instead, and instead of adding more ribbon I decided to heat emboss the sentiment on a strip of black cardstock.  I trimmed the end with banner points, and adhered the piece with foam squares.  I of course had to add more rhinestones.  :)

This card turned out so blingy that it almost looks like jewelry!  What do you think?

I would like to enter this card in the following challenges:
  1. Creative Card Crew - Ribbon 
  2. Catered Crop - B for Bodacious 
  3. Creative Craft Challenges - Anything Goes 
  4.  Craft your Passion - Lots of texture
  5. Party time Tuesdays - Two or more ribbons
  6. Really Reasonable Ribbon - Mother's Day or Feminine plus ribbon
  7. Papertake Weekly - Anything Goes
  8. Simon Says Stamp challenge - Anything birthday goes
  9. The Cuttlebug Spot - Flowers for Mom
  10. Lets Ink it Up - Bling
  11. Speedy Fox Challenge - Use 3 of Something

I used the following supplies:

Cardstock:   Stampin' Up!  Basic Black

Stamps:  Stampin' Up! Petite Pairs.

Ink:  Staz-On Jet Back, Versamark Watermark Ink pad

Metal:  Quick Kuttz Metal Sheets, Stampin' Up!  Silver Embossing Powder.

Other embellishments:  Ribbons from my Stash,Micheals Rhinestone stickers.

Adhesive:  Cosmo Cricket Glubers, Tombo Mono permanent adhesive runner, foam squares.

Tools:  Paper trimmer, scissors, Cuttlebug, Cuttlebug embossing folder from Paperlace II set, We R Memory Keepers Corner Chomper, Sponge.


Sunday, 8 April 2012

More Belated Birthday Wishes

With the second birthday card I started with the background.


I used the waxed paper technique, which I have heard of but never seen demonstrated before until I saw the technique on a Stamp TV video.


I thought this technique looked really fun so I started with some white cardstock and went to work.  Once ironed with the waxed paper I was surprised at how smooth the cardstock still was.  I had expected it to have some texture to it, but it doesn't at all.

I chose some Colorbox chalk inks that I thought would work well together - two shades of brown and one of pink.  I didn't add all of the inks directly to the paper like in the video.  Instead I added the light brown direct to paper, then added the dark brown and pink with a Ranger blending tool. I found this a bit easier since the chalk ink pads are so juicy, with the blending tool I could add the ink where I wanted it more easily. I love these inks because they are so colourful and soft looking at the same time. I think the background almost looks like old plaster. Here is a close up:


Once the background was done it was time to choose stamps and coordinating patterned paper.  I had the Graphic 45 stamp picked out, and as I was searching through my patterned paper stash I came across this sheet with postmarks all over it from Fancy Pants Designs.  I thought the colours and pattern would be perfect.

I stamped the image in the darker brown on white cardstock, and sponged the edges with both shades of brown. Once the image and background were mounted on black, I mounted the image on a larger square of the pattern which had also been sponged with the darker brown.  I added some Prima ribbon and twine to the background panel, then foam taped the image over the ribbon.  The whole panel was adhered to a base of kraft and the card front was complete.  I considered adding glitter or gems, but in the end I decided there was so much ink and sponging that it wasn't necessary.

I finished the inside with a panel of white sponged with the same two shades of brown, and a couple of scraps from the other papers.


The sentiment actually consists of two stamps.  The little "(a little late!)" stamp certainly comes in handy, and it is small enough to add to cards that are already finished if I ever need to.

I really love how the entire card turned out.  I will definitely use the waxed paper technique again. :)

I would like to enter my card into the following challenges:
  1. Deep Ocean - Use More Than One Stamp
  2. Papertake Weekly - Anything Goes
  3. Pile it On - All About 's'

I used the following supplies:

Cardstock:  Stampin' Up! Whisper White, Basic Black.  Recollections Kraft.  Fancy Pants Designs Its the Little Things 6x6 Paper Pad.  Waxed paper - grocery store brand.

Stamps:  Stampin' Up! On Your Birthday, Bitty Birthday.  Hampton Art Graphic 45 Paris Postage.

Ink:  Colorbox Fluid Chalk ink Chestnut Roan, Creamy Brown, Rouge.

Ribbon:  Prima Ribbon, hemp twine from stash.

Adhesive:  Tombow Mono Adhesive Runner Permanent, Foam Squares

Tools:  Paper trimmer, scissors, household iron, Ranger Non-stick Craft Sheet, Ranger Inksentials Blending Tool, foam applicators, sponge, bone folder.

Sentimental Birds on a Wire

If you looked out my window you would never know that it was Easter Sunday.  We had a snow storm last night and its still snowing!  It is supposed to turn to rain later today which means the roads aren't going to be great so I think we will leave our travels until tomorrow.  In the meantime here is another card:


I love little black birds and I have been wanting these stamps from the Sweet Stamp Shop for a while, and then Scrapbook steals included it in one of their daily 'steals' a few weeks ago.  I took advantage of the offer, and even after shipping I got a pretty good deal I think!

I wanted to so something fairly quick just to try these stamps out, and I hadn't done one of these water colour backgrounds in a while, so I thought I would try to make one that looked like a spring sunset.  I was a bit out of practice so it didn't turn out exactly as I had expected, but that is part of the fun!

I started with my Ranger craft sheet and coloured various shades of Stampin' Write markers, then spritzed it with water.  I then placed a piece of white cardstock on top and rubbed it into the ink.  I don't think I added enough water because it was a bit more streaky than I expected.  For this reason after it dried a bit I added a bit more ink to my craft sheet, just pale blue this time, with a lot more water.  The extra blue filled in some white spots and the extra water added a bit of splotchyness which I like. 

Once the background was dry (I helped it along with my heat tool) I stamped the birds in black and added the sentiment, then highlighted the love birds and sentiment with glitter pen.  After some ink around the edges, some matting of kraft cardstock, and some baker's twine I adhered the front of the card to my black card base.


I stamped the inside with one of the bird stamps, and added a sentiment at the top of the white panel leaving a large space for a note.  I really like how the sentiment is not even so it looks like an old typewriter.


This card was really quick to make, and the background is fun because you never know what you'll end up with.


I would like to enter this card in the following challenges:
  1. Deep Ocean - Use More Than One Stamp
  2. Papertake Weekly - Anything Goes
  3. Lets Ink It Up - Distressing
  4. Ribbon Carousel Challenge - Spring
  5. Creative Card Crew - Spring
  6. Pile it on - All about 's' 

I used the following supplies:

Cardstock:  Stampin' Up! Basic Black, Whisper White.  Recollections Kraft

Stamps:  Sweet Stamp Shop Sentimental Birds.

Ink: Memories Black.

Markers:  Stampin' Up!  Stampin' Write markers Dusty Durango, Rich Razzleberry, Crushed Curry, Melon Mambo, Bordering Blue, Brocade Blue.  Sakura Gelly roll Clear Star.

Baker's Twine:  Sew Easy Fancy Floss Baker's Twine Lemonade, Lollipop, Lilac

Adhesive:  Snake Tape Garter, Viper.  Scotch Quick Dry.

Tools:  Paper Trimmer, Sponge, Ranger Non-stick Craft Mat, Water Spritzer, Stampin' Up! heat tool.