Showing posts with label hand carved stamp. Show all posts

Friday, 22 June 2012

Mustaches for Father's Day

Hi All!  Tonight I thought I'd share the card I made for our Dads for father's day. I'm late because I didn't want to post this before I mailed them and me being me I mailed them at the very last second.   I was originally going to make a card specific to each, but since they are all current or former 'mustache men', and I loved this card so much, they each got one.


I started with the stamps.  I was looking at stamps online when I was getting ready to make this card and I was thinking that I wished I had a mustache stamp or some patterned paper.  Then I thought, why don't I carve my own stamps?  Problem solved!


The stamps didn't turn out perfectly, but I think that's part of the charm.  Once I had the stamps, I started by choosing the card stock, some coordinating ink, and some Bazzill Basics newsprint paper that I must admit I've been 'saving' for a special occasion, lol.

On a piece of cream card stock I stamped a series of mustaches with the orange and beige inks, using the smaller stamps.  I cut all of the papers down to the size I wanted and inked the edges of everything with either shade of ink.

I stamped the larger mustache in black and cut it out.  I assembled the background panel, including the newsprint, added twine, and adhered it to the card front.  I assembled the smaller panel, added the handwritten tag and some mini brads, and adhered it to the card front with foam squares.  The big mustache was adhered with more foam squares.


For the center I just added an inked piece of cream matted with orange, and one of the smaller mustaches stamped in black in the corner.  Simple and lots of room for hand written sentiments. :)


I used the following supplies:

Cardstock:  Recollections Kraft, Stampin' Up! Dusty Durango, Very Vanilla, Basic Black.  Bazzill Basics Antique Newsprint.

Stamps:  Hand carved mustaches.

Ink:  Color Box Fluid Chalk Ink  Creamy Brown, Tangerine.

Adhesive:  Scotch ATG, foam squares.

Embellishments:  Recollections mini brads, hemp twine from stash.

Tools:  Paper trimmer, bone folder, scissors, sponge, Stampin' Up! Large Tag Punch.


I would like to enter the following challenges:
  1. Pause Dream Enjoy Challenges - Use 3 of something.  (3 mustache stamps, 3 ink colours, and I wrapped the twine 3 times around the card front).
  2. Fussy and Fancy Friday Challenges - Boy Attitude
  3. Simon Says Stamp and Show - A bit of brown

Friday, 25 May 2012

So Happy to be Canadian

This card was inspired by this weeks challenge over at Papertake Weekly.  Since it is getting close to the Queen's Jubilee, and also the Olympics, their idea was to use either your national colours or the colours of the UK.  I thought this works out well since Prince Charles and his wife Camilla just finished a visit to Canada this week, and they even visited my province. For this reason I decided to go with Canadian colours red and white.


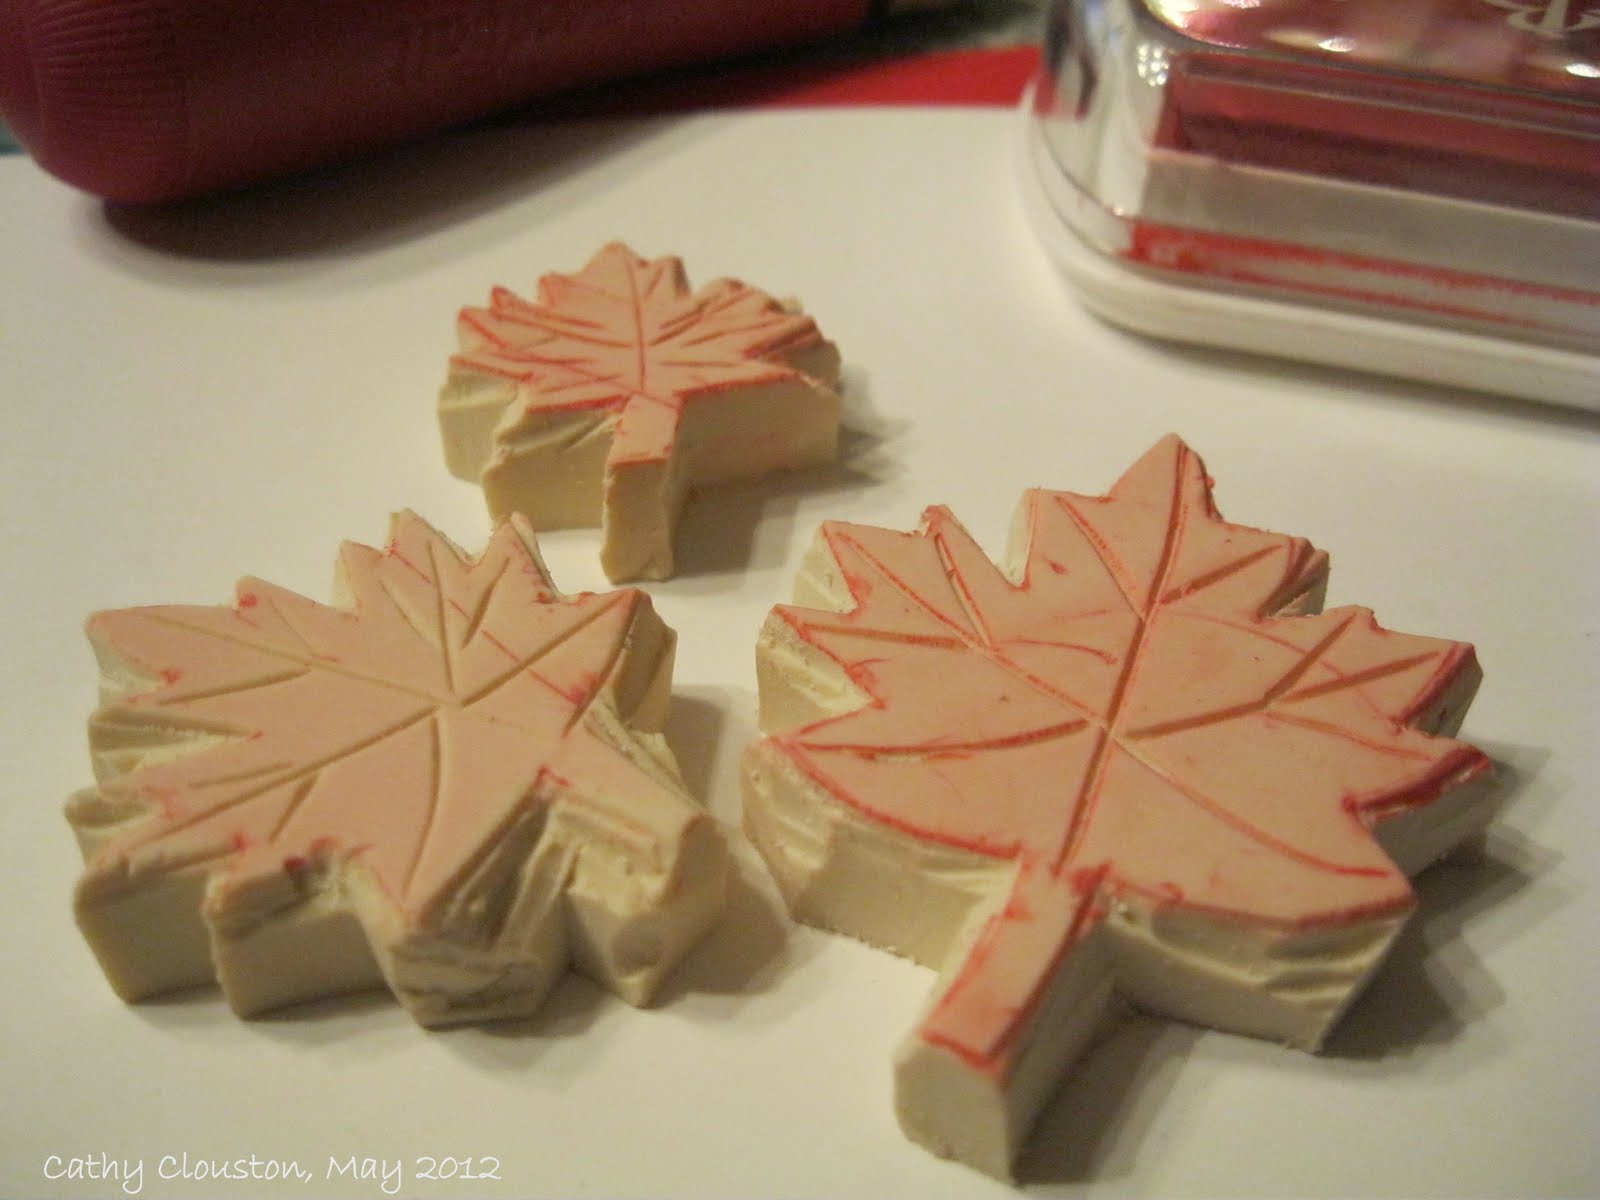
Once I decided on red and white I thought I should probably use a maple leaf image as well, but after searching through my stamps I realized I didn't have one.  And I call myself Canadian!  So I decided to carve my own.  I made three sizes, but only two made it on to this project.  Thats OK, Canada Day is coming soon so I can use the larger one then.


Since my last few cards were birthday cards I decided to make a thank you card this time. I started with a red cardstock base, cut and folded to the A2 size.  I chose some Bazzill dictionary print (which I love!!), and although I usually mat patterns I decided not to for this one as I like the contrast of the gray hue against the red.  I used a distress tool around the edges of the pattern (lightly as the paper is very  thin) and adhered it to the card base.  I added a piece of black ribbon around the middle of the card, making sure the ends were adhered underneath where the main panel would go so that they don't show on the inside of the card.   A second piece of ribbon was tied around the first piece to make the bow.

I decided to make some handmade scrunchy flowers since the thin dictionary paper works so well with this technique. You can read about the first ones I made here.  I used four circles for each flower, and  since I didn't have any jewel brads left I just used simple mini-brads for the flower centers, to which I adhered rhinestones later.  Once put together I sponged the 'petals' with red ink, and sprayed the flowers with red, white, and gold shimmer sprays for sparkle. Adhering the jewels was the last step.


I cut the main focal panel out of white cardstock and stamped a swirly flourish stamp several times on one side.  I stamped three leaves (one medium, two small) on the other side of the panel, turning the stamps each time for interest, and allowing the images to go off the edge.  I chose the sentiment from one of my new My Minds Eye sets, and I thought it worked because it is the same font that is on the dictionary paper.  I chose to stamp it in black to make it stand out from all of the red.  Once the sentiment was added to the center of the panel, I added some Sakura glitter pen to the images, used a distressing tool on all four sides of the panel, and added the flowers with Zots.  The panel was adhered over the ribbon with foam squares.

For the inside of the card I stamped the sentiment on a small piece of white.  The sentiment is actually inside of an oval.  Since the white scrap I used wasn't very big I positioned the stamp so that the sentiment was nestled into the corner and the oval went off the edge of the piece.  Once stamped I added some Sakura glitter pen and distressed the edges with a distressing tool.  I matted the white with more dictionary paper and added this to the inside of the card.


Red and white is not a colour combination I usually turn to, but I'm thinking I should more often.  I also like the idea of keeping things simple by using one bright colour along with black, white, and some neutrals.  This card has given me some ideas for future cards which I am sure you will see soon!  I love how this card turned out, it's patriotic without being obvious about it, and I keep trying to think of someone I need to thank just so I can give it to them!  :)

I would like to enter this card into the following challenges:
  1. Lets Ink It Up - Bling
  2. Creative Craft Challenges - Distressing
  3. Party Time Tuesdays - Vintage or Shabby Chic
  4. Deep Ocean - Swirls
  5. Creative Card Crew - Dimension
  6. Papertake Weekly - True Colours
  7. Ribbon Carousel - Fancy Flowers

I used the following supplies:

Cardstock: Stampin' Up! Real Red, Whisper White, Bazzill Basics Antique Dictionary Page.

Stamps:  My Mind's Eye Fine & Dandy True Blue Stamps, Lost & Found Two Breeze Dream, Lost & Found Two Rosy Everything.  Hand carved maple leaves.

Ink:  Color Box Fluid Chalk Ink Lipstick Red.  Memories Black.  Smooch Spritz Cherry Ice, Shimmerz Paints Shimmerings Goldie Lox, Babies Breath. Sakura Gelly Roll Clear Star pen.

Embellishments:  Recollections Mini Brads, Stampin' Up Jewels Basic Rhinestones, black satin ribbon from stash.

Adhesives:  Tombo Mono Permanent Adhesive Runner, Zots, foam squares.

Tools:  Paper trimmer, scissors, Tonic distressing tool, Cuttlebug, Spellbinders Nestabilities Standard Circles Small, We R Memory Keepers brad setter, bone folder.

Wednesday, 9 May 2012

Monkey Business... and a new hobby!

I have a new hobby, and its all thanks to Youtube.  A few months ago I found a very crafty blogger on Youtube called The Frugal Crafter.  She's amazing!  She is primarily a stamper, but covers a wide variety of topics, including the one that piqued my interest - stamp carving.


I've heard of this craft before, and I've even thought about doing it, but it wasn't until seeing this video that I decided I would go out and get the supplies. I love her idea of carving a stamp before buying it, because many times I might get a whole stamp set just for one stamp.  I made my first few attempts a few days ago and came up with this leaf stamp that I really like:


I had started by carving some less simple designs, but they didn't quite turn out how I wanted them, so I decided to try something a bit easier for a beginner like me.  The leaves were a great shape to carve and I like how the stamp turned out, so I decided to use it to make a background for my next card.


I used two shades of green to stamp the leaves on kraft cardstock.  I stamped the entire sheet so the pattern is on the front and back.  I added some green seam binding, and since the leaves reminded me of banana leaves I thought this monkey stamp would work perfectly.  Once stamped and coloured on white cardstock I cut out the image and adhered it with foam squares.

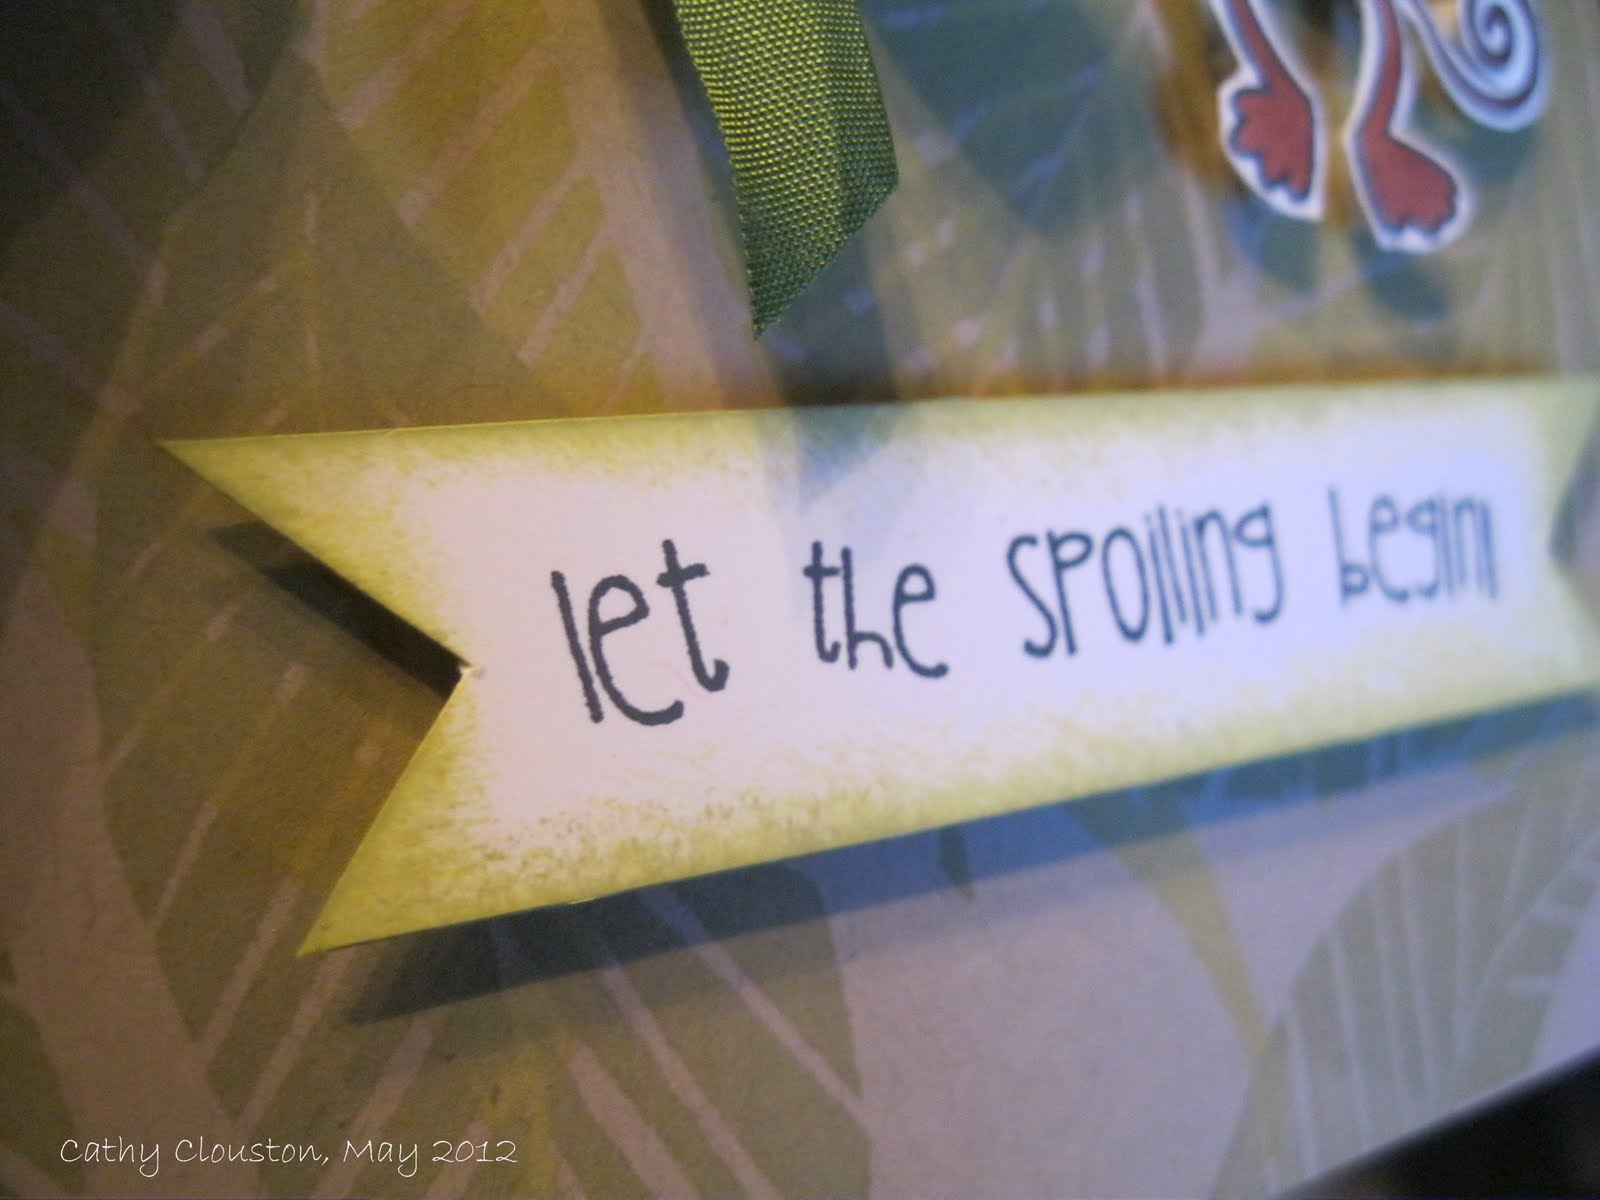
The sentiment was stamped on a strip of white, and trimmed with banner points on each end.  I sponged it with both shades of green ink. Adhered with more foam tape.


This was a pretty quick and simple card, but I love the effect of the background.  I think this would be a great card for a new baby or a baby shower., or even a kid birthday card.  I definitely see more hand carved stamps in my future!

I will enter this card into the following challenges:
  1. Catered Crop - B is for Bodacious (baby)
  2. Creative Craft Challenges - Anything Goes
  3. Crafty Card Makers - For the boys.
  4. Papertake Weekly - Cute, cute, cute.
  5. Everybody Art - Baby

I used the following supplies:

Cardstock:  Stampin' Up! Crumb Cake.  Gina K Pure Luxury 120# Pure White.

Stamps:  Unity Stamp & Bella Blvd Itty Bitty Let the Spoiling Begin.  Hand carved leaves.

Stamp Carving Supplies:  Speedball Speedy-Cut,  Speedball linoleum cutter set.

Ink: Memento Tuxedo Black, Color Box Fluid Chalk Ink Lime Pastel, Olive Pastel.

Markers:  Bic Mark Its Honey Brown, Tiki Hut Tan.

Ribbon: Ribbon Carousel Moss Green Vintage Seam Binding.

Adhesive:  Tombow Mono Permanent Adhesive Runner, Glue Dots, foam squares.

Other tools:  Paper trimmer, scissors, sponge.