Showing posts with label Stampin' Up. Show all posts

Sunday, 1 July 2012

Oh Canada!

Happy Canada Day everyone!  We will be joining in with our city's Canada Day celebrations a little later but in the meantime I came up with this card:


I obviously got some inspiration from the Canadian flag, but I started with the maple leaves.  You'll never believe where they came from! One of the teams at work was having a bake sale for charity and where selling these cute little Canada Day cupcakes and they were decorated with these felt maple leaves.  As I was admiring how cute it was I realized that it was a felt sticker.  Only a small bit of the stem had touched the icing, so I wiped it off and it was good as new!

When I peeled the felt off of the backing I realized it was just clear acetate, and since it was already in the shape if a maple leaf I decided to use it too and coloured it with a red alcohol marker.  Perfect Canada Day embellishments!


Once I had my embellishments I chose cardstock (went with the easy choice of red and white)  and pulled out my Cuttlebug.  I used some new embossing folders I got from Scrapbook Steals, roughed the edges of both panels with a distressing tool.  I added ribbon to the red panel, and added the maple leaves to the white panel.  As a last minute thought I decided to add the heart button with some more white ribbon.  The button came from a pound bag of buttons I bought years and years ago that I never think to use but since I thought the card needed something I thought a button might work.  Once the white panel was assembled I foam taped it over the ribbon.

I didn't want this card to be completely without sentiment, so I added a simple white panel with distressed edges to the middle of the card and added a simple 'thanks sentiment'.


Making this card was fun to make - patriotic with just a touch of fun.  :).   And now I better go get ready to join in the celebrations.  I can't wait to see my son's reactions to the fireworks this year!

Happy Canada Day everyone!!


I used the following products:

Cardstock::  Stampin' Up! Real Red, Whisper White.

Stamps:  Stampin' Up!  Kindess Matters

Ink:  Memento Tuxedo Black.

Marker:  Bic Mark Its Rambunctious Red.

Embellishments: Button from stash, white satin ribbon from stash, maple leaf decoration  from a cupcake.

Adhesive:  Scotch ATG, foam tape.

Tools:  Paper trimmer, bone folder, scissors, Cuttlebug, Lifestyle Crafts Embossing folders Bloom set, Tim Holtz distressing tool.


I am entering into the following challenges:
  1. Party Time Tuesdays - Anything Goes 
  2. Charisma Cardz - Anything Goes
  3. Simon Says Stamp - Sporty and/or Patriotic
  4. Use it Tuesday - Be a Patriot  (button from stash, ribbon from stash, maple leaf cupcake decoration)
  5. Hiding in My Craftroom - Freestyle


Monday, 25 June 2012

Sparkly Butterflies - Craft Your Passion Challenge #116

So here it is, my fourth and final week as guest designer at Craft Your Passion Challenges.  I've really enjoyed this opportunity, and I'm so thankful to Craft Your Passion for having me!

This week the challenge is Things with Wings, and is being sponsored by Stitchy Bear Digital Stamps.  I got to chose a digital image to work with, and I love this Floppy Latte Design called Butterflies in the Grass.


Once my image was chosen I had the idea to use three colours of washi tape.  I decided on which colours I wanted to use, I thought three bright colours would be pretty and summery.  I printed the image on cream cardstock, heat set the image, and coloured it to match the shades of tape. I corner rounded the image and inked the edges with green.

I chose a cream cardstock base, and kraft to layer  After corner rounding the bottom of both pieces, I added green ink to both the card base and the layering piece.  At this point I adhered strips of tape, using two strips of each colour, layering them slightly when pressing them down. I made sure that when tearing the ends they were jagged for a bit of interest.

Matching shades of satin ribbon was layered over the washi tape and knotted.  This was a cheater knot, as I cut the longer piece just long enough to zot each end to the back, then tied a separate smaller piece to make the knot.  I like doing it this way because you save ribbon, and it is much easier to get the knot to lie the way you want it to.  I secured the knot in place with a Zot.

Once the ribbon was adhered I foam taped the image in place.  I added Sakura glitter pen to the lighter areas of the butterflies, and also outlined each butterfly.  I decided that this wasn't enough though, and finished the image off with some rhinestones.

I decided to make this a thank you card so inside I added some strips of tape, and a small corner rounded piece of kraft with the sentiment stamped on it in black.  I added a few more rhinestones to finish it off.

I used the following products:

Cardstock:  Stampin' Up! Very Vanilla, Crumb Cake.  Gina K Designs Pure Luxury 120# Pure Ivory.

Stamps:  Stitchy Bear Butterflies In the Grass.  Stampin' Up! Kindness Matters.

Markers:  Stampin' Up!  Stampin' Write Markers Certainly Celery, Orchid Opulence, Bashful Bue, not Quite Navy, Rose Red, Summer Sun, Regal Rose.  Sakura Gelly Roll Clear Stardust.

Ink:  Color Box Fluid Chalk Ink Olive Pastel.  Memories Black.

Embellishments:  My Minds Eye Indie Chic Paper Tape, American Crafts Statin Ribbon, Stampin' Up! Basic Jewels Rhinestones.

Adhesives:  Tombow Mono Permanent Adhesive Runner, Zots, foam squares.

Other Tools:  Paper trimmer, scissors, bone folder,  We R Memory Keepers Corner Chomper, artist sponge.


I'm entering into the following challenges:
  1. Deep Ocean - Welcome Summer
  2. Creative Card Crew - Easy as 1, 2, 3 - 1 image, 2 butterflies, 3 ribbons and washi tapes 
  3. Ladybug Crafts Ink - Double Trouble 
  4. Charisma Cardz - Summer

Sunday, 17 June 2012

Daddy's Day


Happy Father's day to all the dads out there!  I made this Father's Day card a while ago but I didn't want my husband to catch sight of it too early!


Can you believe that there is no stamping here?  That almost never happens!  I had gotten some Authentique paper bundles a month or more ago from Scrapbook Steals, but  I almost hid it away because the papers are so luxurious I didn't want to ruin them.  After I went through some of the cute die cuts and sentiments that came with the pack I changed my mind!

I started by choosing which die cuts, sentiments, and letter stickers I wanted to use, then chose some coordinating patterned papers and card stock.  I used my sanding block to remove all of the little tags that remain when you punch out die cuts.  Once all of the paper elements were cut I corner rounded everything except the sentiment.  I banner cut the ends of the sentiment, then inked everything, including the letter stickers with navy ink.  I adhered the background papers, added some hemp twine in a haphazard way and adhered this panel to the card front.

Once I matted the main image I foam taped it over the hemp twine, and decided the bow needed something.  I pulled out my heart punch and adhered coordinating hearts over the knot. The letter stickers were arranged where I wanted them and I foam taped the sentiment just below.


For the center of the card I added white cardstock, some patterned scraps, and some patterned hearts.  I added the word stickers in a haphazard way because the card was to be from my son and I thought it looked more fun that way.

I love how this turned out.  It was definitely out of my comfort zone because I didn't use any stamps.  Using this coordinating pack of goodies, however, made it so much easer to pull off.  Definitely something I will come back to in the future!

I used the following items:

Cardstock: Stampin" Up! Night of Navy, Whisper White.  Authentique 6x6 Bundle Collection Loyal.

Ink:  Stampin' Up! Night of Navy.

Embellishments:  Authentique Diction word stickers, Petite Type Circles, Expressions from Gathering Collection, Icons from Miracle Boy Collection..

Adhesive:  Scotch ATG, foam squares, Quickie Glue Pen.

Tools:  Paper trimmer, bone folder, scissors, We R Memory Keepers Corner Chomper, Sponge, Recollections heart punch, Tim Holtz sanding block.


I am entering the following challenges:
  1. The Pink Elephant - Masculine
  2. Friends of Speedy TV - Father's Day
  3. Charisma Cardz - Male Cards
  4. Fussy and Fancy Friday - Boy Attitude
  5. Use it Tuesday - All about Dad  (Authentique paper bundle)

A Fancy Cup of Tea

I won a new stamp set a few weeks ago from the Speedy Fox Challenge - you can see my original card that won here - called "Relax a Bit:".  Its really cute with a teapot and a teacup, which is great because I collect teapots. :)  I wasn't sure what  to do with it at first so I just sat down with the set, some inks and papers, and this is the card I came up with:


It is not the colour scheme I usually go for, but I think it turned out ok.  I started with a My Minds Eye 6x6 pad and chose some pinks patterns, and som patterns with some teal shades. I decided to use the gingham pattern as the background and made all of the other decisoins from there. 

Once everthing was trimmed and die cut to size I stamped the images I watned in white and die cut them with my Spellbinders circles.  I also embossed the circles with the tan Spellbinders mat and inked all components with brown inks.  I adhered the background papers and added twine, then matted the stamped images and adhered them with foam tape for dimentsion.  This panel was adhered to the card front.  The circles went over the edge a bit so I trimmed with my sissors, and I decided that the card needed a bit more sparkle.  I added some rhinestones to the images and the sparkly multifacited gems I had gotten at Micheals on sale.  All done!

This was a fun card to make because I didn't really have an end result in mind so I just played with it until I was done.  I think it is a fun result! 

I used the following supplies:

Cardstock: Stampin' Up!  Crumb Cake, Whisper White.  My Minds Eye Miss Caroline Dolled Up 6x6 pad.

Stamps:  Mark's Finest Papers Relax a Bit

Ink:  Color Box Fluid Chalk Ink Chestnut Roan, Creamy Brown

Embellishments:  We R Memory Keepers Baker's Twine, Recollections Gemstone Stickers, rhinestones from stash.

Adhesives:  Scotch ATG, foam squares.

Tools:  Paper trimmer, scissors, bone folder, Cuttlebug, Spellbinders Nestabilities Standard Circles Small and Large, sponge.


I am entering into the following challenges:
  1.  Simon Says Stamp and Show - Anything Goes 
  2. The Paper Shelter - Anything Goes 
  3. Moving Along with the Times - Lets Get Krafty 

Monday, 11 June 2012

Pretty Hummingbirds - Craft Your Passion Challenge #114

Hi everyone!  I can't believe its been a whole week since I posted last.  I've been crafting, just haven't had a chance to post so stay tuned for that sometime this week.  In the meantime, its time for my second challenge as guest design team member with Craft Your Passion Challenges.   The theme for challenge #114 is Anything Goes which is always fun.  The challenge is being sponsored by My Heart Pieces so I got to choose one of their lovely images for my card.


I started with the image called "Flower".  I love the birds and I thought it might work well with the papers in  Kaiser Craft's 6.5x6.5  pad called "Bonjour". The papers have lots of pastel and creamy shades, and are have lots of imagery that I find really soft and pretty.

I decided to colour the image before choosing the exact patterns to use.  I kept the colours light and toned down the brightness by using a touch of gray. I chose the three patterns that I thought worked best with the image.  I particularly liked the brown background as the cream postmarks are actually embossed on the paper.


I chose some green for the card base, and some kraft to mat the patterns.  I inked the edges of the brown pattern and the kraft with brown ink, and tore the top edge of the green and pink patterns.  The patterns were adhered to the kraft and I added some hemp twine and cream seam binding. Once the image was adhered with foam squares over the ribbon, I thought I was going to be finished but I felt something else was needed.  I decided to add some rhinestones to the centers of the flowers.  All done!


For the inside, I decided not to use a sentiment but I still thought it deserved some decoration, so I added an inked piece of cream cardstock, a couple of die cuts from the paper pad, and some torn scraps.


I love these colours together.  I think anyone would love to receive a note inside this card, don't you?


I used the following products:

Cardstock:  Stampin' Up! Certainly Celery, Crumb Cake, Very Vanilla.  Gina K Designs Pure Luxury 120# Pure Ivory.  Kaiser Craft 6.5" Paper Pad Bonjour.

Stamp:  My Heart Pieces Flower.

Markers:  Bic Mark Its Margarita Green, Oceanview Blue, Peach Parfait.  Copic R20, W3, 0.

Ink:  Color Box Fluid Chalk Ink Chestnut Roan.

Embellishments:  Ribbon Carousel Croquette Beige Vintage Seam Binding, natural hemp twine from my stash. Stampin' Up! Basic Jewels Rhinestones.

Adhesive:  Scotch Advance Tape Glider adhesive, Zots, foam squares.

Tools:  Paper trimmer, scissors, We R Memory Keepers Corner Chomper, Tim Holtz Tonic distressing tool.


I am entering this card into the following challenges:
  1. Really Reasonable Ribbon - Flowers and Ribbon 
  2. The Pretty Little Ribbon - Lots of Layers 
  3. Papertake Weekly - Anything Goes 
  4. The Paper Shelter - Going Dottie 
  5. Allsorts - Ice Cream Colours 
  6. Simon Says Stamp - Diamond Jubilee

Sunday, 3 June 2012

Royal Celebrations

Welcome to post #50!  When I started this blog 50 posts seemed like an awful big number, lol.  :)  My 50th post deserves a celebration of some sort, don't you think?  Since it is the Queen's Diamond Jubilee this weekend I was inspired to make this card:


I started with a lovely paper pad from Authentique - I love these colours!  Totally not something I would have paired on my own but so pretty.  And then i decided to work with a Lost & Found Two stamp set from My Mind's Eye.  Honestly when I got the set I thought to myself that I may never use the crown stamps.  I'm glad I was wrong!

I chose some card stock to go with the paper pad, and since I wanted to make more crumpled flowers I chose several sheet that I liked.  I punched the bird and cage with my tag punch out of one sheet, and cut various sizes of circles out of the remaining of that sheet and the rest of the sheets I had chosen. I had decided already to go with various sizes of circles instead of just one size this time.  I sprayed the circles with water, crumpled them up and set them aside.


I cut and scored my card base, and cut another piece of gray to layer on top that I embossed with my Cuttlebug.  I then cut all of the sizes of paper I wanted and inked them all with either cream or gray ink.  I adhered the embossed piece to the card front with foam squares, and matted the argyle print with yellow and cream.  I added some gray ribbon, some yellow bakers twine to this panel and tied bows.  I had attached the tags to the twine before tying, but secured them down with more foam squares.  The panel was adhered to the embossed piece with more foam squares.

For the sentiment I decided I wanted to layer the stamps, so I first stamped the doily in gray, and sponged a bit of cream ink over the center to help the sentiment stand out.  After using my embossing buddy I embossed the sentiment in black over the doily and embossed the crown images in silver.  I was going to add some glitter at this point, but I decided in the end it wasn't necessary.  I adhered the image panel to a gray mat, added some mini brads and adhered this with foam squares over the ribbon.


At this point I went back to my crumpled circles and carefully opened them up.  Because the paper is thicker than what I usually use for this technique some of the pieces were still damp so I finished the drying with my heat gun.  I've found a tip when doing this - I put all of the pieces in a heat proof ramekin and then point my heat tool in the dish, shielding the top with my hand.  This helps the bits from flying all over my table and the walls of the dish reflect some of the heat so that the pieces dry faster.  Just be careful  because its easy to burn a stray finger, lol.


I assembled the flowers with a white button brad this time, and adhered a rhinestone to the center of each brad.  The flowers were inked with some gray, and I adhered them to the card front.  This card is very layery (the technical term, lol)!


The center was decorated with a matted piece of cream stamped with my favourite birthday sentiment, and a scrap of patterned paper. 


I love this card, the images, the patterns, and the colours.  My favourite part though is the flowers.  I love these flowers so much I think I may do a post just on those. I love making them and I love how they look, not to mention you never have to worry about not having embellishments to specifically match your project.  Stay tuned, such a post may be coming in the future!

I used the following products:

Cardstock:  Stampin' Up! Basic Gray, Very Vanilla,  Crushed Curry.  Authentique 6x6 Collection: Blissful.

Stamps:  Stampin' Up!  On Your Birthday.  My Mind's Eye Lost & Found Two Rosy "everything" stamp set.

Ink:  Color Box Fluid Chalk Ink Charcoal, Alabaster.  Stampin' Up! Going Gray. Memories Black.  Versamark Watermark Ink.  Stampin' Up! Embossing Powder Black, Silver.

Ribbon:  We R Memory Keepers Bakers Twine Lemonade, gray satin ribbon from stash.

Embellishments:  Recollections brads, Stampin' Up!  Basic Jewels Rhinestones.

Adhesives:  Scotch ATG, Zots, Foam squares.

Tools:  Paper trimmer, scissors, Cuttlebug, Spellbinders Nestablities Standard Circles Large and Small, Cuttlebug Scrollwork embossing folder, We R Memory Keeper brad setter, sponge, Stamp a ma jig.


I will enter this card into the following challenges:
  1. Deep Ocean - Swirls 
  2. Crafty Cardmakers - Distress it 
  3. Party Time Tuesday - Anything goes 
  4. The Paper Shelter - Vintage or Shabby Chic
  5. The Cuttlebug Spot - Fit for a Queen
  6. Really Reasonable Ribbon - Flowers and Ribbon
  7. Fussy and Fancy Friday - Swirls and Flourishes
  8. Charisma Cardz  - Bling
  9. Simon Says Stamp - Anything Goes
  10. Lets Ink It Up -  Use your favourite embellishments (handmade paper flowers)


Saturday, 26 May 2012

A Summer Wreath

There is a great wreath on the front of this month's Green Craft Magazine.  I bought the magazine simply for the tutorial of how to make one.  Such a great idea, not only because it looks good, but because it uses items you would throw out otherwise.  In this case leftover paper towel rolls, and toilet paper tubes.  While I thought from the instant I saw it that it was a great idea, me being the impatient person I am I didn't want to wait long enough to accumulate paper towel rolls and toilet paper tubes, so I thought I would make my first one with cardstock I already had on hand.


I started with several sheets of white cardstock.  I used both Gina K 120# cardstock, and Stampin' Up! 80#.  My reasoning for this is that the Gina K cardstock would work well to give the center structure, but I knew the project would take quite a few sheets and I have more of the Stampin' Up paper.  Also, I thought the lighter weight cardstock would help keep the finished project from getting so heavy that it might fall apart after a while.  In the end I think I had three sheets of the Gina K, and five or six sheets of the Stampin' Up!.

Since this would be a summer wreath I decided to spray the white sheets with some shimmer mists.  I used purple and yellow.  The brand I have is fairly transparent, and as I only used a few sprays on both sides of the sheets of cardstock, the sprays gave the perfect hint of colour I was looking for.    First I cut about four strips from one of the Gina K sheets measuring 0.5" by 8.5".  The remainder of the sheet, along with the rest of the sheets of cardstock were cut in half lengthwise, then cut in 1" strips so that I had multiple strips measuring 1" by 4.25".  I made a rings out of these small strips with my glue gun, and once cool I 'smooshed' the rings a bit so that they made an almond shape.


In the magazine the original designer used coat hanger wire to make the center of the wreath.  I don't really like working with heavy wire since I am a bit accident prone, so decided to make a form using the heavier cardstock.  I used the longer strips to form a big ring, making the ring several paper layers thick, adhered together with generous amounts of hot glue. The ring measured about  4.75" wide and formed the base of my wreath.

The next part is the fun part, but it is tricky because I burned myself a couple of times so be careful if you decide to try it.  Using more hot glue, I glued a couple of rows of the almond shapes to the base ring, then continued to add more and more shapes until the wreath was the size I wanted it. I kept most of the shapes running in the same direction to mimic the way leaves might appear on wreath made of branches, but changed the direction of a few for interest.  This part is the easiest but took the longest.  When finished the wreath measured about 14" wide.

I decided I wanted to add flowers so I made some out of ribbon with Glubers.  You can read about the first time I did this here.  For the centers I used some vintage style brads and sniped off the prongs with my Tim Holtz scissors since the flower was too thick to poke them through, and adhered the embellishments with Glue Dots.  Before adhering the flowers to the wreath I decided I wanted to add some leaves, so I used my hand carved leaf stamp (you can read about here) with green ink on white cardstock, and cut out the images.  I adhered the leaves with a generous amount of hot glue first, and this gave a base for me to adhere the Gluber flowers too.


Overall the wreath was a bit time consuming but once all of the parts are ready the wreath can easily be assembled while watching TV.  Also, if you are using actual paper towel rolls and toilet paper rolls the assembly will be quicker since you won't have to make your own loops, you can just snip them.  I am saving up my leftover rolls so that I can make more wreaths in the future, my plan is to make one for every season -- or just whenever I feel like it.  :)
I used the following products:

Cardstock: Gina K Designs Pure Luxury 120# Pure White, Stampin' Up!  Whisper White.

Shimmer Sprays:  Shimmerz Paints Spritz Chick-a-dee, Plum Pudding.

Adhesives:  Hot glue sticks from my stash, Glubers, Glue Dots.

Brads: Creative Charms Vintage Brads.

Ribbon:  Yellow American Crafts Satin ribbon, Pink and Purple satin ribbons from stash.

Ink: Color Box Fluid Chalk Ink Olive Pastel.

Friday, 25 May 2012

So Happy to be Canadian

This card was inspired by this weeks challenge over at Papertake Weekly.  Since it is getting close to the Queen's Jubilee, and also the Olympics, their idea was to use either your national colours or the colours of the UK.  I thought this works out well since Prince Charles and his wife Camilla just finished a visit to Canada this week, and they even visited my province. For this reason I decided to go with Canadian colours red and white.


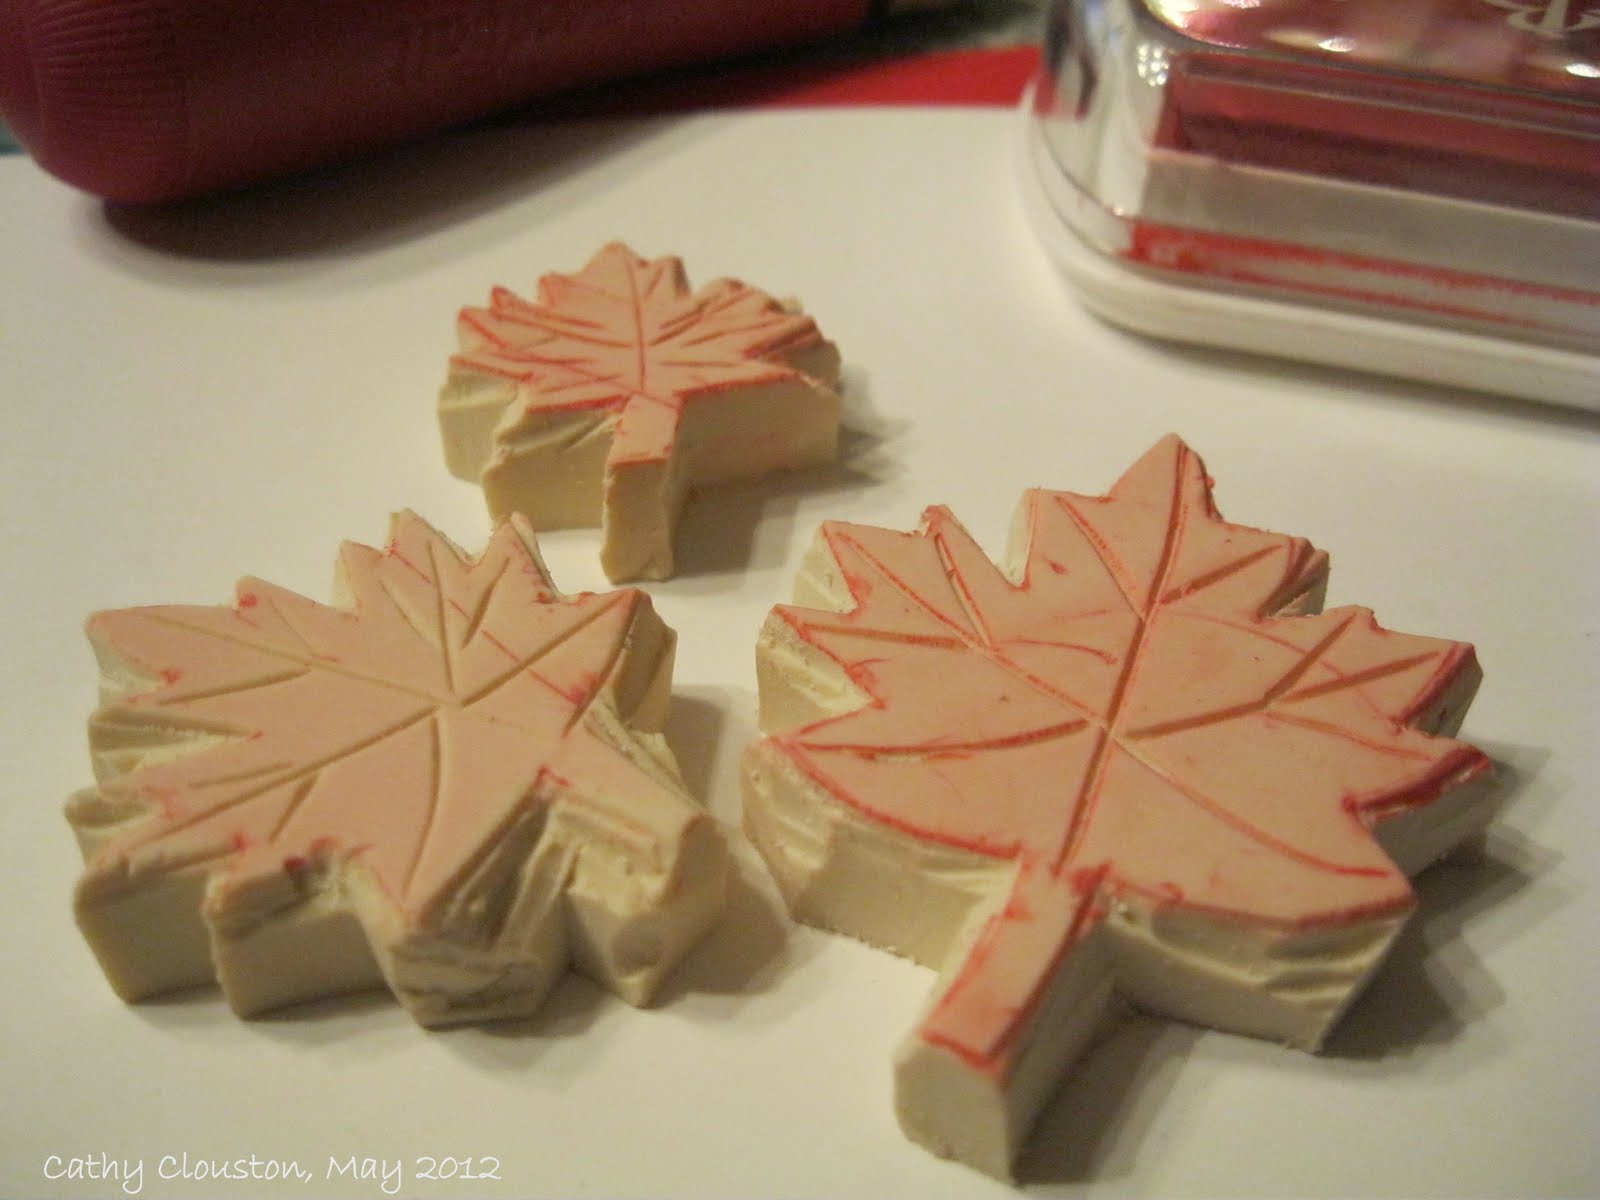
Once I decided on red and white I thought I should probably use a maple leaf image as well, but after searching through my stamps I realized I didn't have one.  And I call myself Canadian!  So I decided to carve my own.  I made three sizes, but only two made it on to this project.  Thats OK, Canada Day is coming soon so I can use the larger one then.


Since my last few cards were birthday cards I decided to make a thank you card this time. I started with a red cardstock base, cut and folded to the A2 size.  I chose some Bazzill dictionary print (which I love!!), and although I usually mat patterns I decided not to for this one as I like the contrast of the gray hue against the red.  I used a distress tool around the edges of the pattern (lightly as the paper is very  thin) and adhered it to the card base.  I added a piece of black ribbon around the middle of the card, making sure the ends were adhered underneath where the main panel would go so that they don't show on the inside of the card.   A second piece of ribbon was tied around the first piece to make the bow.

I decided to make some handmade scrunchy flowers since the thin dictionary paper works so well with this technique. You can read about the first ones I made here.  I used four circles for each flower, and  since I didn't have any jewel brads left I just used simple mini-brads for the flower centers, to which I adhered rhinestones later.  Once put together I sponged the 'petals' with red ink, and sprayed the flowers with red, white, and gold shimmer sprays for sparkle. Adhering the jewels was the last step.


I cut the main focal panel out of white cardstock and stamped a swirly flourish stamp several times on one side.  I stamped three leaves (one medium, two small) on the other side of the panel, turning the stamps each time for interest, and allowing the images to go off the edge.  I chose the sentiment from one of my new My Minds Eye sets, and I thought it worked because it is the same font that is on the dictionary paper.  I chose to stamp it in black to make it stand out from all of the red.  Once the sentiment was added to the center of the panel, I added some Sakura glitter pen to the images, used a distressing tool on all four sides of the panel, and added the flowers with Zots.  The panel was adhered over the ribbon with foam squares.

For the inside of the card I stamped the sentiment on a small piece of white.  The sentiment is actually inside of an oval.  Since the white scrap I used wasn't very big I positioned the stamp so that the sentiment was nestled into the corner and the oval went off the edge of the piece.  Once stamped I added some Sakura glitter pen and distressed the edges with a distressing tool.  I matted the white with more dictionary paper and added this to the inside of the card.


Red and white is not a colour combination I usually turn to, but I'm thinking I should more often.  I also like the idea of keeping things simple by using one bright colour along with black, white, and some neutrals.  This card has given me some ideas for future cards which I am sure you will see soon!  I love how this card turned out, it's patriotic without being obvious about it, and I keep trying to think of someone I need to thank just so I can give it to them!  :)

I would like to enter this card into the following challenges:
  1. Lets Ink It Up - Bling
  2. Creative Craft Challenges - Distressing
  3. Party Time Tuesdays - Vintage or Shabby Chic
  4. Deep Ocean - Swirls
  5. Creative Card Crew - Dimension
  6. Papertake Weekly - True Colours
  7. Ribbon Carousel - Fancy Flowers

I used the following supplies:

Cardstock: Stampin' Up! Real Red, Whisper White, Bazzill Basics Antique Dictionary Page.

Stamps:  My Mind's Eye Fine & Dandy True Blue Stamps, Lost & Found Two Breeze Dream, Lost & Found Two Rosy Everything.  Hand carved maple leaves.

Ink:  Color Box Fluid Chalk Ink Lipstick Red.  Memories Black.  Smooch Spritz Cherry Ice, Shimmerz Paints Shimmerings Goldie Lox, Babies Breath. Sakura Gelly Roll Clear Star pen.

Embellishments:  Recollections Mini Brads, Stampin' Up Jewels Basic Rhinestones, black satin ribbon from stash.

Adhesives:  Tombo Mono Permanent Adhesive Runner, Zots, foam squares.

Tools:  Paper trimmer, scissors, Tonic distressing tool, Cuttlebug, Spellbinders Nestabilities Standard Circles Small, We R Memory Keepers brad setter, bone folder.

Monday, 21 May 2012

A Birthday with Patterns Galore.

One of my favourite colours is green, and when I saw the Pile it On challenge this week - mix your pattern scales - I thought of the perfect green patterns I could use for this.


I love these patterns, and I have wanted to use them for a while but I didn't have the right idea for them until today.  These are Jillibean Soup patterns, and I love how graphic and bright they are.  I decided to use a kraft base, and since I can never leave well enough alone I decided to round all of the corners on all papers and ink the edges with brown.

I embossed the sentiment on a small piece of kraft, banner cut the end, and inked the edges of this piece as well.  I had chosen this lovely piece of green seam binding to coordinate and was just going to put that around the middle, but felt it was not enough, so I added some kraft washi tape with printed text underneath the ribbon. I added the sentiment with some foam tape, and adhered some coordinating Prima flowers with Zots.

I still felt as though something was missing so I added some different sized self-adhesive pearls, and placed them as if they were sprinkled over the sentiment.  Lately that is one of my favourite things to do.  :)


For the inside of the card I corner rounded some leftover scraps, inked them in the same brown ink, and embossed the matching sentiment in the same white.


I really love how this card turned out and I hope my friend I had in mind while making it will enjoy receiving it!

I would like to enter this card into the following challenges:

  1.  Creative Craft Challenges - Distressing.
  2. The Paper Shelter - Birthday Cards with Sentiment.
  3. Moving Along with the Times - Keep it Real/ No Fantasy Figures.
  4. Pile it On - Patterns, Mix your Scales.


I used the following supplies:

Cardstock:  Stampin' Up! Crumb Cake, Jillibean Soup Summer Squash Soup, Blossom Soup 6x6 mini pad.

Stamps:  Stampin' Up!  Petite Pairs

Ink:  Color Box Fluid Chalk Ink Chestnut Roan, Versamark Watermark Ink pad, Martha Stewart Bright White embossing powder.

Embellishments:  Ribbon Carousel Moss Green vintage Seam Biding, Washi tape purchased from Le Box Boutique, Prima Flowers Camille Almanac, Stampin' Up! Jewels Basic Pearls.

Adhesives:  Tombow Mono Permanent Runner, Zots, foam squares.

Tools:  Paper trimmer, scissors, We R Memory Keepers Corner Chomper, sponge.


Wednesday, 9 May 2012

Mother's Day is coming...

Mother's Day is approaching and I wanted to make something but I wasn't sure what since I don't really have a specific Mother's Day stamp.  I was flipping through my patterned paper when I came across a sheet with various sentiments on it, in the Fiddlesticks version of a My Mind's Eye Miss Caroline 6x6 pad. I thought I might use one of these blocks as a focus for a card, but I couldn't decide on one so I made two cards.


I love the patterned papers in the Miss Caroline collection so once I decided on which sentiments to use I decided to use at least three other patterns on my card.  I started with the wood grain, chose the plaid to coordinate, then chose a floral to mat the sentiment.


The wood grain had a floral pattern in two corners, one floral section was taller than the other, so I trimmed the backgrounds according to the height of the florals, then matched the rest of the papers to fit the card front.  It just worked out that one sentiment was taller than the other so I placed the tall one with the card that had more wood, and the shorter sentiment fit perfectly on the plaid section of the card that had half wood and half plaid. Its amazing that some things not planned work out so well.:)


Before adhering I lightly sponged all papers with gray ink, and rounded the corners to keep things soft.  Once the main patterns were adhered to the white matting I added some beige seam binding that coordinated nicely.  I also matted the sentiments with just a thin border of white to make them pop out a bit, then matted the white on the floral.


At first I thought I was done, but as I looked at the whole card I felt like something a bit 'more' was needed.  At this point I pulled out some Stampin' Up! self-adhesive pearls and added them in random sizes around the sentiments.  Just the thing that was needed!


I love that some 6x6 packs include sentiment sheets with them.  Since 6x6 patterns are generally shrunk down these sentiments are perfect for cardmaking.  And I think the sentiments I've used here are perfect for Mother's Day!  :)

I would like to include these cards in the following challenges:
  1. Creative Stamp Friends - Mother's Day
  2. Really Reasonable Ribbon - Mother's Day or Feminine plus ribbon.
  3. Speedy Fox Challenge - Use three of something.
  4. One Crazy Stamper - Mothers.
  5. Party Time Tuesdays - Mums the word.
  6. Creative Card Crew - Sentiment as Focal Point.
  7. Deep Ocean Challenge - What a Wonderful Woman.
  8. The Pink Elephant - All about Mom
  9. Craft Your Passion - Torn or distressed edges.
  10. Ribbon Carousel - Word to your Mother.
  11. Friends of Speedy TV Challenge - Mother's Day

I used the following supplies:

Cardstock:  Stampin' Up! Basic Gray, Whisper White.  My Mind's Eye Miss Caroline Fiddlesticks 6x6 Designer Paper Pad.

Ink:  Stampin' Up!  Going Gray.

Adhesive:  Tombow Mono Permanent Adhesive Runner, Glue Dots, foam squares.

Embellishments:  Ribbon Carousel Croquette Beige Vintage Seam Binding, Stampin' Up! Jewels Basic Pearls.

Tools:  Paper trimmer, scissors, We R Memory Keepers Corner chomper, sponge, We R Memory Keepers brad setter (used the pick end to lift the pearls from the backing sheet and placing on card - works much better than the tweezers I used to use!)

Flowery Friends with Ribbons

For this card I started with ribbons, lots of ribbons!  I have little wooden stands in my craft space with spools of Prima ribbon on them.  I look at them every day, and it occurred to me that I should see how many I could use on one card. :)


I started with a standard size card base made of kraft, and I cut another piece of  cardstock about 1/2 an inch smaller to give enough room to work with.  I chose several colours of ribbons ensuring they were all the same width and cut lengths a bit longer than the long side of the small piece of card.   These strips were adhered to the back of the short side of the card with glue dots.  I attached shorter ribbons to the back of the long side of the card, and wove them with the longer strips of ribbon.  Once done, all ends were attached with glue dots to the back of the card.  This piece was very thick by then so I decided to use more glue dots to attach it to the card front to ensure it was well adhered.


I cut another piece of kraft just slightly smaller than the card front, bigger than the woven piece, and die cut a large circle from it.  I embossed the edge of the circle with the die, and once done distressed the outside edge of the panel with a distressing tool.  A white gel pen was used to add dash lines around the edge of the circle, and the outside edge of the panel.  The sentiment was heat embossed in white.


In order to make the panel look as lush as the ribbon section, I added the last of the lovely silky Champagne ribbon from Ribbon Carousel, and some Prima flowers in soft coordinating colours. The panel was adhered to the ribbon piece with foam squares.


I really splurged on this card.  It was really fun to make and turned out to be so pretty!  :)

I would like to enter this card into the following challenges:
  1. Really Reasonable Ribbon - Mother's Day or feminine plus ribbon.
  2. Stampin' for the Weekend - Layer Upon Layer
  3. Speedy Fox - Use 3 of something.
  4. Deep Ocean Challenge - What a Wonderful Woman

I used the following supplies:

Cardstock:  Stampin' Up! Crumb Cake.

Stamps:  Pocket Silhouettes.

Ink:  Versamark Watermark ink pad, Stampin' Up! White Embossing powder, Sakura White Gelly Roll pen.

Embellishments:  Prima Marketing ribbon, Ribbon Carousel Champagne Silky Crushed ribbon, Prima Camille Almanac flowers.

Adhesive:  Glue Dots, foam squares.

Monkey Business... and a new hobby!

I have a new hobby, and its all thanks to Youtube.  A few months ago I found a very crafty blogger on Youtube called The Frugal Crafter.  She's amazing!  She is primarily a stamper, but covers a wide variety of topics, including the one that piqued my interest - stamp carving.


I've heard of this craft before, and I've even thought about doing it, but it wasn't until seeing this video that I decided I would go out and get the supplies. I love her idea of carving a stamp before buying it, because many times I might get a whole stamp set just for one stamp.  I made my first few attempts a few days ago and came up with this leaf stamp that I really like:


I had started by carving some less simple designs, but they didn't quite turn out how I wanted them, so I decided to try something a bit easier for a beginner like me.  The leaves were a great shape to carve and I like how the stamp turned out, so I decided to use it to make a background for my next card.


I used two shades of green to stamp the leaves on kraft cardstock.  I stamped the entire sheet so the pattern is on the front and back.  I added some green seam binding, and since the leaves reminded me of banana leaves I thought this monkey stamp would work perfectly.  Once stamped and coloured on white cardstock I cut out the image and adhered it with foam squares.

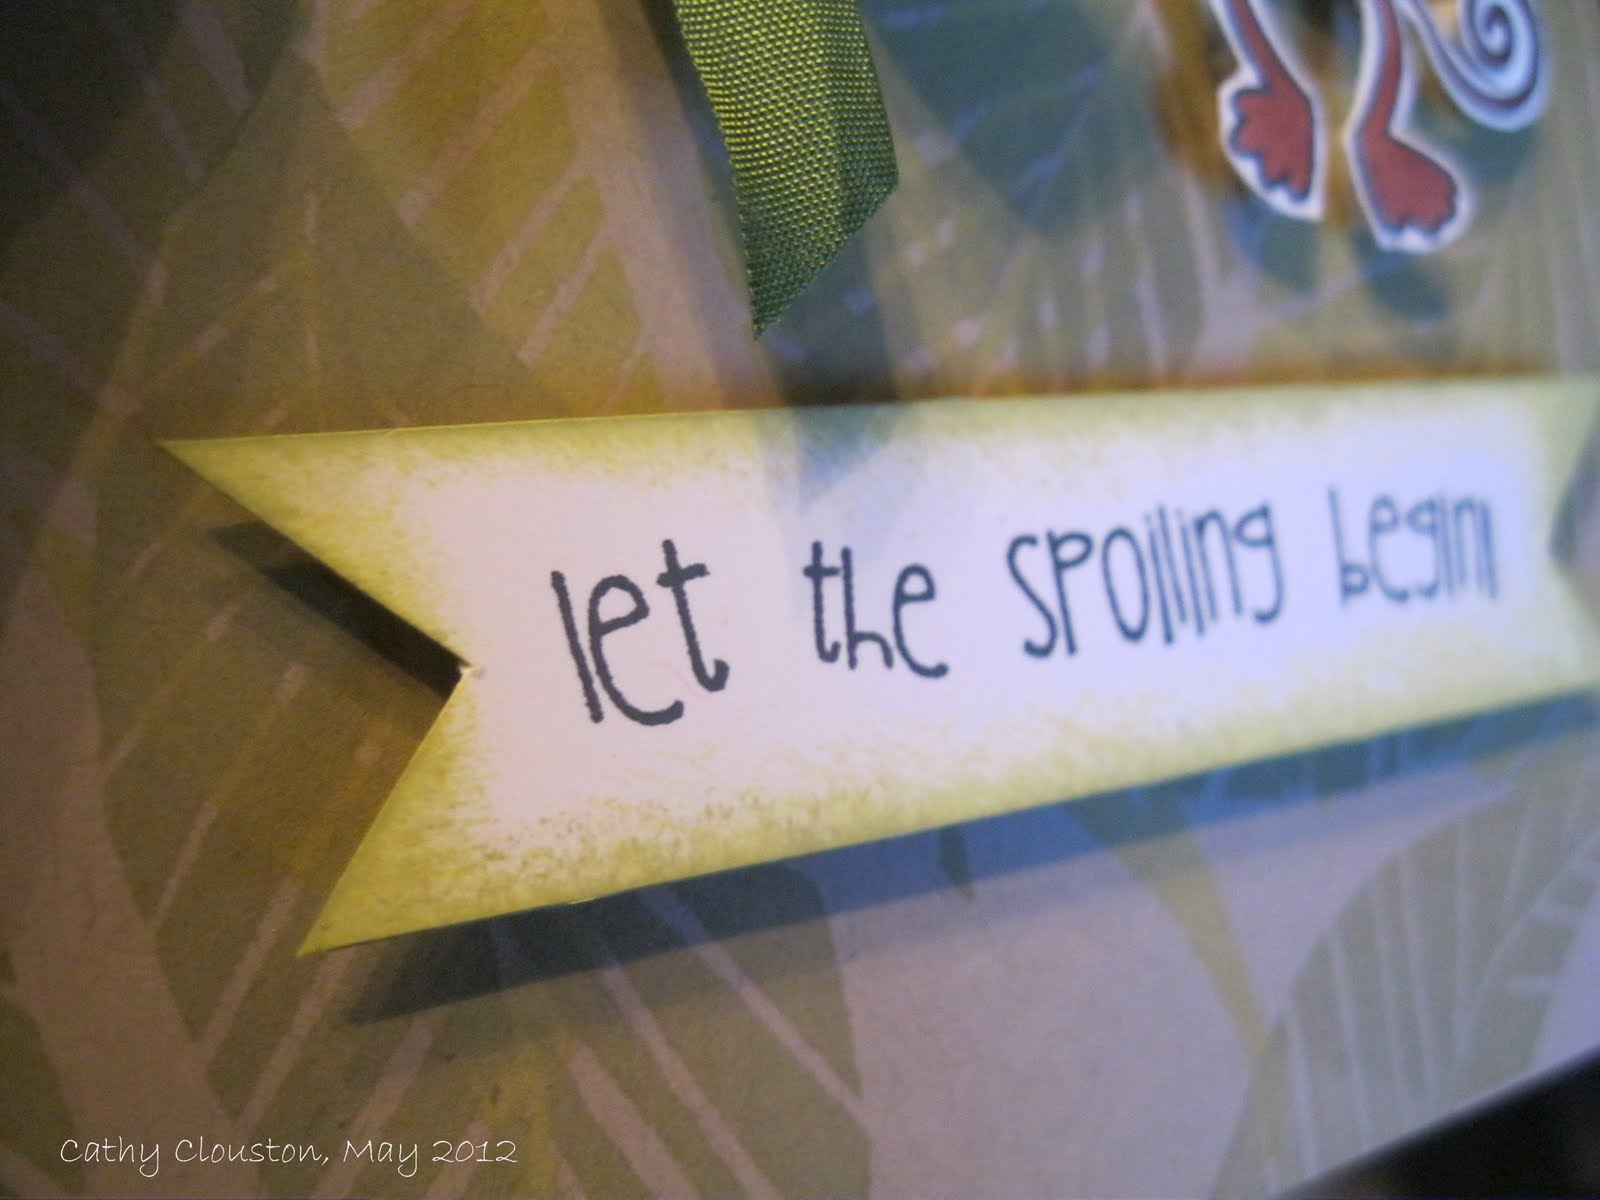
The sentiment was stamped on a strip of white, and trimmed with banner points on each end.  I sponged it with both shades of green ink. Adhered with more foam tape.


This was a pretty quick and simple card, but I love the effect of the background.  I think this would be a great card for a new baby or a baby shower., or even a kid birthday card.  I definitely see more hand carved stamps in my future!

I will enter this card into the following challenges:
  1. Catered Crop - B is for Bodacious (baby)
  2. Creative Craft Challenges - Anything Goes
  3. Crafty Card Makers - For the boys.
  4. Papertake Weekly - Cute, cute, cute.
  5. Everybody Art - Baby

I used the following supplies:

Cardstock:  Stampin' Up! Crumb Cake.  Gina K Pure Luxury 120# Pure White.

Stamps:  Unity Stamp & Bella Blvd Itty Bitty Let the Spoiling Begin.  Hand carved leaves.

Stamp Carving Supplies:  Speedball Speedy-Cut,  Speedball linoleum cutter set.

Ink: Memento Tuxedo Black, Color Box Fluid Chalk Ink Lime Pastel, Olive Pastel.

Markers:  Bic Mark Its Honey Brown, Tiki Hut Tan.

Ribbon: Ribbon Carousel Moss Green Vintage Seam Binding.

Adhesive:  Tombow Mono Permanent Adhesive Runner, Glue Dots, foam squares.

Other tools:  Paper trimmer, scissors, sponge.


Saturday, 5 May 2012

Jewelry for your birthday...

Sometimes I know exactly what I want to make, and even if what I end up with doesn't look exactly like what I had in mind, it always has kernels of my original idea.  that is definitely not what happened with this card.  :)


I started with a piece of kraft cardstock and some natural twill ribbon.  I spotted some metal sheets in my sash and decided to try embossing them in my Cuttlebug.  Wat a result1  I love the effect, it reminds me of old fashioned tin ceiling tiles  As such I thought I would age it a bit by sponging on some black Staz-on.

Once this was done i thought I would play with some more ribbon and Glubers.  You can read about my original Gluber flower here.  I chose red, pink and black this time, for no other reason that thats what struck my fancy at the time.  I used various Gluber sizes and added rhinestones to the centre, then kept adding and kept adding!  I'm usually stingy with rhinestones, but this time I felt like splurging. 


Once done I decided the kraft cardstock and twill ribbon I had originally chose wouldn't go with the direction I was heading in.  I chose some black cardstock instead, and instead of adding more ribbon I decided to heat emboss the sentiment on a strip of black cardstock.  I trimmed the end with banner points, and adhered the piece with foam squares.  I of course had to add more rhinestones.  :)

This card turned out so blingy that it almost looks like jewelry!  What do you think?

I would like to enter this card in the following challenges:
  1. Creative Card Crew - Ribbon 
  2. Catered Crop - B for Bodacious 
  3. Creative Craft Challenges - Anything Goes 
  4.  Craft your Passion - Lots of texture
  5. Party time Tuesdays - Two or more ribbons
  6. Really Reasonable Ribbon - Mother's Day or Feminine plus ribbon
  7. Papertake Weekly - Anything Goes
  8. Simon Says Stamp challenge - Anything birthday goes
  9. The Cuttlebug Spot - Flowers for Mom
  10. Lets Ink it Up - Bling
  11. Speedy Fox Challenge - Use 3 of Something

I used the following supplies:

Cardstock:   Stampin' Up!  Basic Black

Stamps:  Stampin' Up! Petite Pairs.

Ink:  Staz-On Jet Back, Versamark Watermark Ink pad

Metal:  Quick Kuttz Metal Sheets, Stampin' Up!  Silver Embossing Powder.

Other embellishments:  Ribbons from my Stash,Micheals Rhinestone stickers.

Adhesive:  Cosmo Cricket Glubers, Tombo Mono permanent adhesive runner, foam squares.

Tools:  Paper trimmer, scissors, Cuttlebug, Cuttlebug embossing folder from Paperlace II set, We R Memory Keepers Corner Chomper, Sponge.


Tuesday, 1 May 2012

The wonders of Washi tape

Sometimes no matter how hard I try I just can't sleep.  Other times I will go to bed early because I am so tired, but then I wake up in the middle of the night and can't go back to sleep because maybe I wasn't as tired as I thought.  When that happens I will sometimes surf the web until I am tired again, or I may make something.  That is what happened when I made this card.


Clean and simple cards are not something that comes to me naturally, I usually have to think about it and if I think about it I usually over-think it and then its not clean and simple anymore.  This clean and simple card was pretty easy though, probably because I was half asleep at the time, lol. 

I had just received an order of washi tape in the mail, so it was on my mind when I got the idea for this card.  I started with Gina K's 120# white cardstock and embossed it with a Tim Holtz Texture fade. Once embossed I randomly added various stripes of washi tape, tearing each end so it was a bit jagged.

I love this stuff!  I've never worked with it before, but since its everywhere I thought I would try it out.   It is so nice, repostionable and pretty.  I will definitely be purchasing more. 


I stamped my sentiment on a strip of white cardstock, trimmed the end to points, adhered it with foam squares, and as an afterthought added some bakers twine I received as a gift with my washi tape order.  I was going to add some ink to the embossed space, but I really don't think it was necessary.

Since this was a simple card I left the inside plain except for the sentiment.


I'm really impressed with what I can do when I'm half-asleep, lol.   My husband said that this was one of the brightest cards I've made in a while.  I decided to take that as a compliment. :)

I would like to enter this card into the following challenges:
  1. Simon Says Stamp Challenge -  Anything Goes
  2. Simon Says Stamp and Show - A Kaleidescope of Colour
  3. Creative Craft Challenges -  Anything Goes
  4. The Pink Elephant - Springtime
  5. Craft Your Passion - Lots of Texture
  6. Papertake Weekly - Anything Goes

I used the following supplies:

Cardstock:  Gina K Designs 120# Pure Luxury Pure White.

Stamps:  Stampin' Up!  Petite Pairs.

Ink:  Memories Black.

Adhesive:  Foam Squares.

Embellishments: Washi tape purchased from Le Box Boutique.  Bakers Twine was a gift with purchase.

Tools:  Paper trimmer, bone folder, scissors, Cuttlebug, Sizzix Tim Holtz Texture Fade Checkerboard.

Sunday, 29 April 2012

In a word 'Love'

For this card I wanted to try a technique that I had never tried before which is faux metal.  I watched Kristina Werner do this in one of her you tube videos:


For my card I thought it would be fun to use a new alphabet set I got from Michaels to make metal looking tags that spelled out a word.  Here is what I came up with:


I thought I would go for a look that is more grungy than usual, so I used a Tim Holtz embossing folder on a piece of kraft cardstock.  I made another crumpled paper flower out of the same script paper I used before, this time with 9 circles.  I inked the edges of the flower in gray to coordinate with everything.  A sparkly brad and some prima flowers added just enough sparkle.


Once I followed Kristina's technique with the alphabet stamp set I mentioned I used my nestabilities circles to cut the letters out out, and my Crop-a-dile to punch a hole in each. I attached them to the card front with black hemp twine and foam squares.  I love how they turned out, I even love the impression left behind by the dies.  My husband was even impressed (at least thats what he told me, lol).


On the inside of the card I used the same shades of cardstock as on the front and inked them to match and stamped a nice sentiment.


I think any loved one would enjoy receiving this card.  :)


I would like to enter this into the following challenges:
  1.  Simon Says Stamp and Show - Show your favourite word
  2. Fussy and Fancy Friday - Punches and dies
  3. Deep Ocean Challenge - Use punches and dies
  4. Ribbon Carousel Challenge - Anything goes
  5. Simon Says challenge - Anything goes
  6. Moving Along With the Times - Garden or Flowers

I used the following supplies:

Cardstock:  Stampin' Up!  Basic Gray, Whisper White, Crumb cake.  Bazzill Basics Antique Script.

Stamps:  Stampin' Up!  Petite Pairs, Recollections Rubber Stamp Set (alphabet)

Ink:  Color Box Fluid Chalk Ink Charcoal, Stampin' Up!  Going Gray.  Versamark Watermark ink.  Stampin' Up! Silver embossing powder. 

Adhesive:  Tombow Mono Permanent Adhesive Runner, Glue Dots, foam squares.

Embellishments:  Prima Flowers Melisse Nature Garden, Creative Charms brads, black hemp twine from stash.

Tools:  Paper trimmer, scissors, bone folder, tweezers, heat tool, Cuttlebug, Spellbinders Nestablities Standard Circles Small and Large, Sizzix Tim Holtz Texture fade Cracked,  Ranger Inkssentials blending tool, We R Memory Keepers brad setter, Crop-A-Dile

Wedding Wishes

Today's card started with Glubers.  What a wonderful invention!  If you don't know what these are, they are huge glue dots that you can stick ribbon and other things to make your own flowers and rosettes.  So fun!


I started with a 2" Gluber, and since I didn't really know what I was doing I chose some green ribbon that I had alot of.  I just stuck the ribbon around the Gluber starting with the outside edge and pleating with my fingers as I went until I got to the middle.  At the middle I cut my ribbon, tucked the end under, and added some self-adhesive rhinestones.  So cute!


To make my card I chose a base of green to match the flower, and decided I wanted to make something 'vintagey' (a lovely non existent word, lol).  I chose antique newsprint, some black, and some kraft.

I decided the newsprint text was a bit too dark for what I wanted to do, so I brushed some white crackle paint over the middle and dried it with my heat gun. The crackle is very subtle and difficult to see in the main picture so I took a close up:


Since the newsprint paper was thinner than regular patterned paper it buckled and wrinkled more than usual, but I really like the effect.  After inking the edges and over the paint with creamy brown I matted the piece with black and kraft, added the base ribbon and adhered it to the front of the card.

For the sentiment, I punched a small tag out of kraft, heat embossed the sentiment in white, and inked the edges with creamy brown.  Even though  the ink colour is quite close to the kraft it was just enough to add a bit of dimension to the tag.  I added a bit of green string to the tag and adhered it with foam squares.

On the inside I used the same papers on the front but layered them so that the kraft would hold the sentiment, and leave lots of room for the giver to leave a nice note.  I put paint and ink on the newsprint  for the inside also, just enough paint to peek out behind the black.


This card was pretty quick to make, and it was a bit messy so the best of both worlds!

I would like to enter this card into the following challenges:
  1. Pretty Little Ribbon Challenge - To die for  - die cuts and punches
  2. Fussy and Fancy Friday - Punches and Dies
  3. Everybody Art - Wedding
  4. Party Time Tuesdays - Anything goes + kraft
  5. Creative Card Crew - Ribbon
  6. Deep Ocean Challenge - Punches and dies
  7. Ribbon Carousel Challenge - Anything goes
  8. Simon Says Challenge - Anything Goes
  9. Moving Along With the Times - Gardening or Flowers
  10. Catered Crop - B for Bodacious  - I used lots of creamy Brown and Brown kraft :)

I used the following supplies:

Cardstock:  Stampin' Up! Garden Green, Basic Black, Crumb Cake.  Bazzill Basics Antique Newsprint.

Stamps:  Stampin' Up! Petite Pairs.

Ink:  Color Box Fluid Chalk Ink Creamy Brown, Versamark watermark ink, Martha Stewart White Embossing Powder, Tim Holtz Distress Crackle Paint Picket Fence.

Embellishments:  Green grosgrain ribbon from stash, Michaels Rhinestone Stickers, green craft string from my stash.

Adhesives:  Tombow Mono Permanent Adhesive Runner, Cosmo Cricket Glubers, Glue Dots, foam squares.

Tools:  Paper trimmer, scissors, sponge, bone folder, heat tool, paint brush, Ranger heat resistant craft sheet, Stampin' Up! Embossing Buddy, We R Memory Keepers Crop-A-Dile, Stampin' Up! Extra Large Tag punch.