Showing posts with label Craft Your Passion. Show all posts

Monday, 25 June 2012

Sparkly Butterflies - Craft Your Passion Challenge #116

So here it is, my fourth and final week as guest designer at Craft Your Passion Challenges.  I've really enjoyed this opportunity, and I'm so thankful to Craft Your Passion for having me!

This week the challenge is Things with Wings, and is being sponsored by Stitchy Bear Digital Stamps.  I got to chose a digital image to work with, and I love this Floppy Latte Design called Butterflies in the Grass.


Once my image was chosen I had the idea to use three colours of washi tape.  I decided on which colours I wanted to use, I thought three bright colours would be pretty and summery.  I printed the image on cream cardstock, heat set the image, and coloured it to match the shades of tape. I corner rounded the image and inked the edges with green.

I chose a cream cardstock base, and kraft to layer  After corner rounding the bottom of both pieces, I added green ink to both the card base and the layering piece.  At this point I adhered strips of tape, using two strips of each colour, layering them slightly when pressing them down. I made sure that when tearing the ends they were jagged for a bit of interest.

Matching shades of satin ribbon was layered over the washi tape and knotted.  This was a cheater knot, as I cut the longer piece just long enough to zot each end to the back, then tied a separate smaller piece to make the knot.  I like doing it this way because you save ribbon, and it is much easier to get the knot to lie the way you want it to.  I secured the knot in place with a Zot.

Once the ribbon was adhered I foam taped the image in place.  I added Sakura glitter pen to the lighter areas of the butterflies, and also outlined each butterfly.  I decided that this wasn't enough though, and finished the image off with some rhinestones.

I decided to make this a thank you card so inside I added some strips of tape, and a small corner rounded piece of kraft with the sentiment stamped on it in black.  I added a few more rhinestones to finish it off.

I used the following products:

Cardstock:  Stampin' Up! Very Vanilla, Crumb Cake.  Gina K Designs Pure Luxury 120# Pure Ivory.

Stamps:  Stitchy Bear Butterflies In the Grass.  Stampin' Up! Kindness Matters.

Markers:  Stampin' Up!  Stampin' Write Markers Certainly Celery, Orchid Opulence, Bashful Bue, not Quite Navy, Rose Red, Summer Sun, Regal Rose.  Sakura Gelly Roll Clear Stardust.

Ink:  Color Box Fluid Chalk Ink Olive Pastel.  Memories Black.

Embellishments:  My Minds Eye Indie Chic Paper Tape, American Crafts Statin Ribbon, Stampin' Up! Basic Jewels Rhinestones.

Adhesives:  Tombow Mono Permanent Adhesive Runner, Zots, foam squares.

Other Tools:  Paper trimmer, scissors, bone folder,  We R Memory Keepers Corner Chomper, artist sponge.


I'm entering into the following challenges:
  1. Deep Ocean - Welcome Summer
  2. Creative Card Crew - Easy as 1, 2, 3 - 1 image, 2 butterflies, 3 ribbons and washi tapes 
  3. Ladybug Crafts Ink - Double Trouble 
  4. Charisma Cardz - Summer

Monday, 18 June 2012

A Waterfall Memo - Craft Your Passion Challenge #115

Wow, time flies!  Its already my third week guest designing with Craft Your Passion Challenges.  This week the challenge is Flips and Folds.  I immediately thought of a waterfall card.


These cards are really fun, and they look a lot more difficult than they actually are, but with that said its probably been years since I last made one and I had to Google the directions.  I found a helpful tutorial so rather than re-inventing the wheel you can find the tutorial I used here.

Before deciding on papers I chose the stamps to use.  Lucky for me, the sponsor of this week's challenge is Tiddly Inks and on their site I found the stamp set called "Type Me some Flower Wishes".  So cute!  I thought that Lily Bee Designs Memorandum paper set would work well with these images so I chose a few sheets,  then chose various shades of cardstock to coordinate.

I started with a sand coloured base sized at 5.5" by 4.25".  I chose a lighter shade of blue to use as the background, and black to mat the piece.  I dry embossed the blue sheet with my Cuttlebug, then used  the same shades to mat the squares of patterned paper I had cut to size.  Once everything was cut and inked I adhered everything according to the directions.


At this point I sized and printed the images I wanted to use, cut them out, and inked the edges to coordinate with the papers. I adhered them on the squares, and I punched two holes at the bottom of the long strip.  Some black hemp twine was tied through the holes to make a pull.  Lastly I added some rhinestones, and some Basic Grey typewriter key embellishments that I thought worked perfectly.


The typewriter keys were originally paper clips, but I couldn't make them work as they were.  Since I have a pair of Tim Holtz Tonic scissors I thought I would try to snip the clips off and it worked - the scissors cut through the thin metal almost like butter! 

Waterfall cards are so fun to make and fun to receive.  While there are quite a few steps you must follow in order to make the card work, it is definitely worth it to send a loved one such an impressive card.  Now I can't wait to see what everyone else comes up with!  :)

I used the following products for this card:

Cardstock:  Stampin' Up! Sahara Sand, Whisper White, Baja Breeze, Basic Black.  Lily Bee Design Memorandum 6x6 Tiny Tablet.

Digital Stamps:  Tiddy Inks Type Me Some Flowery Images.

Ink:  Color Box Fluid Chalk Ink Lipstick Red, Charcoal.

Embellishments:  Stampin' Up! Basic Jewels Rhinestones, Basic Grey Decorative paper Clips, Recollections mini brads, black hemp twine from stash.

Adhesives:  Stampin' Up! Sticky Strip, Tombow Mono Permanent Adhesive runner, Zots.

Other Tools:  Paper trimmer, scissors, Tim Holtz Tonic scissors, bone folder, Cuttlebug, Cuttlebug embossing folder Seeing Spots.


I am entering into the following challenges:
  1. The Pretty Little Ribbon - Lots of Layers
  2. The Paper Shelter - Anything Goes
  3. Speedy Fox - Vintage

Monday, 11 June 2012

Pretty Hummingbirds - Craft Your Passion Challenge #114

Hi everyone!  I can't believe its been a whole week since I posted last.  I've been crafting, just haven't had a chance to post so stay tuned for that sometime this week.  In the meantime, its time for my second challenge as guest design team member with Craft Your Passion Challenges.   The theme for challenge #114 is Anything Goes which is always fun.  The challenge is being sponsored by My Heart Pieces so I got to choose one of their lovely images for my card.


I started with the image called "Flower".  I love the birds and I thought it might work well with the papers in  Kaiser Craft's 6.5x6.5  pad called "Bonjour". The papers have lots of pastel and creamy shades, and are have lots of imagery that I find really soft and pretty.

I decided to colour the image before choosing the exact patterns to use.  I kept the colours light and toned down the brightness by using a touch of gray. I chose the three patterns that I thought worked best with the image.  I particularly liked the brown background as the cream postmarks are actually embossed on the paper.


I chose some green for the card base, and some kraft to mat the patterns.  I inked the edges of the brown pattern and the kraft with brown ink, and tore the top edge of the green and pink patterns.  The patterns were adhered to the kraft and I added some hemp twine and cream seam binding. Once the image was adhered with foam squares over the ribbon, I thought I was going to be finished but I felt something else was needed.  I decided to add some rhinestones to the centers of the flowers.  All done!


For the inside, I decided not to use a sentiment but I still thought it deserved some decoration, so I added an inked piece of cream cardstock, a couple of die cuts from the paper pad, and some torn scraps.


I love these colours together.  I think anyone would love to receive a note inside this card, don't you?


I used the following products:

Cardstock:  Stampin' Up! Certainly Celery, Crumb Cake, Very Vanilla.  Gina K Designs Pure Luxury 120# Pure Ivory.  Kaiser Craft 6.5" Paper Pad Bonjour.

Stamp:  My Heart Pieces Flower.

Markers:  Bic Mark Its Margarita Green, Oceanview Blue, Peach Parfait.  Copic R20, W3, 0.

Ink:  Color Box Fluid Chalk Ink Chestnut Roan.

Embellishments:  Ribbon Carousel Croquette Beige Vintage Seam Binding, natural hemp twine from my stash. Stampin' Up! Basic Jewels Rhinestones.

Adhesive:  Scotch Advance Tape Glider adhesive, Zots, foam squares.

Tools:  Paper trimmer, scissors, We R Memory Keepers Corner Chomper, Tim Holtz Tonic distressing tool.


I am entering this card into the following challenges:
  1. Really Reasonable Ribbon - Flowers and Ribbon 
  2. The Pretty Little Ribbon - Lots of Layers 
  3. Papertake Weekly - Anything Goes 
  4. The Paper Shelter - Going Dottie 
  5. Allsorts - Ice Cream Colours 
  6. Simon Says Stamp - Diamond Jubilee

Monday, 4 June 2012

'Bee' Happy - Craft Your Passion Challenge #113

I'm so exited - this is my first post for Craft Your Passion as a Guest Design Team member for June!

For this week, the challenge was to use chevrons.  An Inspiration photo was also provided:


Very pretty!  And how lucky I was that I have the perfect washi tape for such a project - from My Minds Eye Indie Chic collection.  Here is what I came up with:


Once I decided on the pattern, I had to decide on an image.  Since I got to choose from images provided by the sponsor of this week's challenge Delicious Doodles the most difficult part was just picking one (I have never been known to be a decisive person).  After some consideration I chose "Bee and Flower".  So cute!

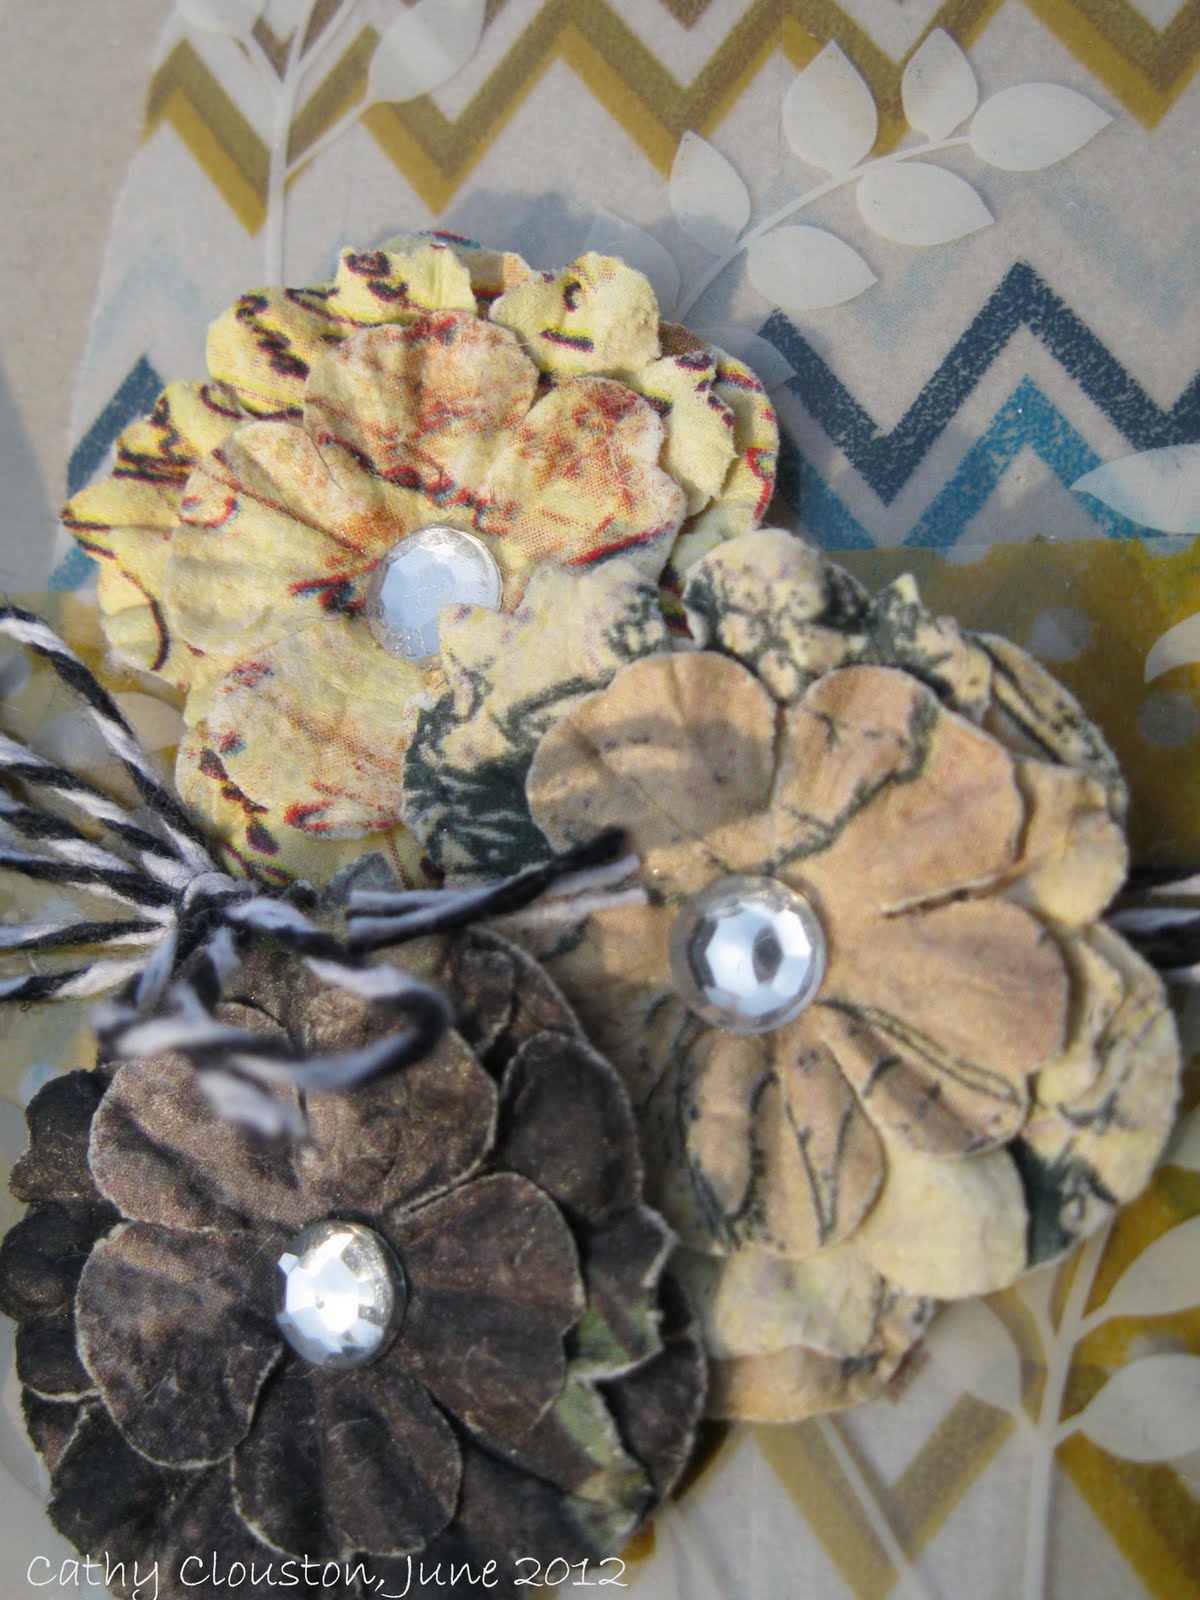
I started with some kraft cardstock cut and scored to a standard A2 size. After corner rounding the bottom corners I added my tissue tape vertically strip by strip, matching the pattern as I went along, kind of like you would match up wall paper.  I left the bottom of each strip jagged and uneven as I thought this would allow for some interest.  For the same reason I lifted the strips on either end and tore them lengthwise before replacing them in their alloted spaces.  To add contrast I placed two strips of yellow tape with polka dots horizontally about a third of the way from the bottom.  Since the tape is semi-transparent you can still see a bit of the chevron through the yellow. I really like the effect.

Since this was my first card for Craft Your Passion I wanted to do something a little different and special, so I pulled some Stampin' Up! transparencies from my stash.  I've been hoarding these sheets forever but I thought they would be fun here, particularly the one with foliage on it.  To hide the adhesive I first attached the sheet to the card with Zots placed at either end of the yellow tape, since I knew I  would be putting ribbon or twine over that spot.  After the rest of the elements were added I carefully lifted the transparency and added more Zots under each so that the sheet was more secure.


I added some baker's twine and placed some Prima flowers over the foliage.  I heat embossed the sentiment on a banner cut strip of kraft and  corner rounded the opposite end.  The sentiment was adhered with foam squares.  Once this was done it was time to work with my image.


I was slightly nervous about this part as I have rarely worked with digi images, but I'm all for learning new things so I googled some instructions and got to work.  I printed the image on 120# cardstock and heat set it to minimize smudging.  I then coloured the image and added some Sakura glitter pen.  My original intention was to only add glitter to the wings, but then I added some to the antennae, then I thought some might look nice around the face, and then before I knew it, all of the black was covered in glitter.  Thats ok, I like glitter!  Once my image was finished I cut it out with some detail scissors and placed on my card with foam squares.


On the inside of the card I heat embossed the matching sentiment and added a touch of glitter pen to the letters.  Since the cardfront is fairly busy (like a bee maybe, lol) I decided that further decoration wasn't necessary.


This was a really fun card to make.  I love the combination of the chevrons with the flowers and the bakers twine, and I love the shine of the transparency, and the leaves under the flowers.  Best of all, I really love the little bee - she's so cute!  I think it is fair to say that I am over my fear of digi images - I foresee more projects with them in the future!  :)


I used the following products:

Cardstock:  Stampin' Up!  Crumb Cake.  Gina K Designs Pure Luxury 120# Pure White.

Stamps: Delicious Doodles Bee and Flower (digi), Stampin' Up! Petite Pairs.

Ink:  Versamark Watermark Ink, Martha Stewart Bright White Embossing Powder.

Markers:  Bic Mark Its Fandango Pink, Sunset Orange, Pink Flamingo Peach Parfait, Yellow Blaze, Forest Green.  Copic W5, W3.

Embellishments:  My Minds Eye Indie Chic Paper Tape, Prima Flowers Mellisse Nature Garden, We R Memory Keepers Sew Easy Bakers Twine Blueberry, Sakura Gelly Roll Clear Stardust. Stampin' Up! Clearly Thanks printed window sheets.

Adhesive:  Zots, Foam Squares.

Other tools:  Paper Trimmer, scissors, bone folder We R Memory Keeper Corner Chomper.


I am also entering the following challenges:
  1. The Paper Shelter - Vintage or shabby chic
  2. Charisma Cardz - Bling
  3. Simon Says Stamp - Anything Goes


Tuesday, 22 May 2012

A Woodsy Birthday

While I occasionally work from sketches I usually start with either papers or stamps.  This time, however, I really wanted to try out  the following sketch Craft Your Passion has as their most current challenge:


I really like the layout of this sketch, and I have a masculine birthday coming up so I used the sketch to make the following card:


Once I decided on layout and theme, I looked for papers that I thought would work best.  I decided on My Minds Eye Miss Caroline Collection Dilly Dally 6x6 pad.  I liked the colours and the wood grain, and thought it would work with a woodsy theme.  Once I decided on patterns I choose coordinating cardstock and a Bo Bunny stamp set that would work well.

I decided on gray for the base,, and black as an accent.  I thought I would try out a technique that I had seen but not used before.  On the black piece I decided to use as the focal of the card I stamped my image with white craft ink.  After heat setting the ink I coloured over it with pencil crayons.  I was going to leave the centre of the tree uncoloured, but as I was going for 'tree at night' effect so I decided to colour the inside of the tree with green as well.  The green on the inside of the tree isn't completely visible but I think it blends in a bit better.

I thought it would be fun to use the flashlight from the set, so I cut some yellow from the same paper pad in a triangle that would fit the bottom of the focal point piece.  I temporarily adhered the yellow to the black piece and stamped the 'Happy Birthday' sentiment in Versamark over both pieces.  The section of sentiment over black I heat embossed in white, and the section over yellow I heat embossed in black.  Once the corners were rounded and the edges sponged I foam taped the triangle over the tree.

I wanted to add more detail to the background so I sponged the edges of each pattern with black and adhered them to the black accent piece.  I die cut some rick rack squares from gray and sponged them with white to make them look more distressed.  Once adhered somewhat randomly I added black hemp twine around the middle.  The focal card was adhered with foam squares to the background,  the little flashlight was foam taped in place, and the background was adhered to the card base.  


To follow with the sketch I found some buttons that would coordinate and knotted some brown thread through the centres of each.  I adhered these buttons with Zots to the background and I was done.

This card was fun to put together and I really like the result.  I should work from sketch challenges more often!

I would like to enter this card into the following challenges:
  1. Craft Your Passion - Sketch Challenge
  2. Catered Crop - Rickety Rack Recipe Swap
  3. Creative Craft Challenges - Distressing.
  4. Moving Along With the Times - Keeping it Real.
  5. The Pink Elephant - Buttons Galore.
  6. Simon Says Stamp and Show - Summer Holiday.
  7. Really Reasonable Ribbon - Father's day or Masculine with Ribbon or Trim.
  8. Creative Card Crew - Dimension.

I used the following supplies:

Cardstock:  Stampin' Up!  Basic Gray, Basic Black.  My Minds Eye Miss Caroline Dilly Dally 6x6 pad.

Stamps:  Stampin' Up! On Your Birthday, Bo Bunny Roughin' It.

Ink:  Stampin' Up!  Whisper White, Versamark Watermark Ink, Memories Black.

Embossing Powder:  Stampin' Up!  Basic Black, Martha Stewart Bright White.

Pencil Crayons:  Crayola Green, Brown, Gray.

Other Embellishments:  Buttons, thread, hemp twine all from stash.

Adhesive:  Tombow Mono Permanent Adhesive Runner, foam squares, Quickie Glue pen, Zots. 

Tools:  Cuttlebug, Quick Kutz Nesting Rick Rack Squares, scissors, paper trimmer, bone folder, We R Memory Keepers Corner Chomper.