Showing posts with label Thank you card. Show all posts

Sunday, 1 July 2012

Oh Canada!

Happy Canada Day everyone!  We will be joining in with our city's Canada Day celebrations a little later but in the meantime I came up with this card:


I obviously got some inspiration from the Canadian flag, but I started with the maple leaves.  You'll never believe where they came from! One of the teams at work was having a bake sale for charity and where selling these cute little Canada Day cupcakes and they were decorated with these felt maple leaves.  As I was admiring how cute it was I realized that it was a felt sticker.  Only a small bit of the stem had touched the icing, so I wiped it off and it was good as new!

When I peeled the felt off of the backing I realized it was just clear acetate, and since it was already in the shape if a maple leaf I decided to use it too and coloured it with a red alcohol marker.  Perfect Canada Day embellishments!


Once I had my embellishments I chose cardstock (went with the easy choice of red and white)  and pulled out my Cuttlebug.  I used some new embossing folders I got from Scrapbook Steals, roughed the edges of both panels with a distressing tool.  I added ribbon to the red panel, and added the maple leaves to the white panel.  As a last minute thought I decided to add the heart button with some more white ribbon.  The button came from a pound bag of buttons I bought years and years ago that I never think to use but since I thought the card needed something I thought a button might work.  Once the white panel was assembled I foam taped it over the ribbon.

I didn't want this card to be completely without sentiment, so I added a simple white panel with distressed edges to the middle of the card and added a simple 'thanks sentiment'.


Making this card was fun to make - patriotic with just a touch of fun.  :).   And now I better go get ready to join in the celebrations.  I can't wait to see my son's reactions to the fireworks this year!

Happy Canada Day everyone!!


I used the following products:

Cardstock::  Stampin' Up! Real Red, Whisper White.

Stamps:  Stampin' Up!  Kindess Matters

Ink:  Memento Tuxedo Black.

Marker:  Bic Mark Its Rambunctious Red.

Embellishments: Button from stash, white satin ribbon from stash, maple leaf decoration  from a cupcake.

Adhesive:  Scotch ATG, foam tape.

Tools:  Paper trimmer, bone folder, scissors, Cuttlebug, Lifestyle Crafts Embossing folders Bloom set, Tim Holtz distressing tool.


I am entering into the following challenges:
  1. Party Time Tuesdays - Anything Goes 
  2. Charisma Cardz - Anything Goes
  3. Simon Says Stamp - Sporty and/or Patriotic
  4. Use it Tuesday - Be a Patriot  (button from stash, ribbon from stash, maple leaf cupcake decoration)
  5. Hiding in My Craftroom - Freestyle

Monday, 25 June 2012

Sparkly Butterflies - Craft Your Passion Challenge #116

So here it is, my fourth and final week as guest designer at Craft Your Passion Challenges.  I've really enjoyed this opportunity, and I'm so thankful to Craft Your Passion for having me!

This week the challenge is Things with Wings, and is being sponsored by Stitchy Bear Digital Stamps.  I got to chose a digital image to work with, and I love this Floppy Latte Design called Butterflies in the Grass.


Once my image was chosen I had the idea to use three colours of washi tape.  I decided on which colours I wanted to use, I thought three bright colours would be pretty and summery.  I printed the image on cream cardstock, heat set the image, and coloured it to match the shades of tape. I corner rounded the image and inked the edges with green.

I chose a cream cardstock base, and kraft to layer  After corner rounding the bottom of both pieces, I added green ink to both the card base and the layering piece.  At this point I adhered strips of tape, using two strips of each colour, layering them slightly when pressing them down. I made sure that when tearing the ends they were jagged for a bit of interest.

Matching shades of satin ribbon was layered over the washi tape and knotted.  This was a cheater knot, as I cut the longer piece just long enough to zot each end to the back, then tied a separate smaller piece to make the knot.  I like doing it this way because you save ribbon, and it is much easier to get the knot to lie the way you want it to.  I secured the knot in place with a Zot.

Once the ribbon was adhered I foam taped the image in place.  I added Sakura glitter pen to the lighter areas of the butterflies, and also outlined each butterfly.  I decided that this wasn't enough though, and finished the image off with some rhinestones.

I decided to make this a thank you card so inside I added some strips of tape, and a small corner rounded piece of kraft with the sentiment stamped on it in black.  I added a few more rhinestones to finish it off.

I used the following products:

Cardstock:  Stampin' Up! Very Vanilla, Crumb Cake.  Gina K Designs Pure Luxury 120# Pure Ivory.

Stamps:  Stitchy Bear Butterflies In the Grass.  Stampin' Up! Kindness Matters.

Markers:  Stampin' Up!  Stampin' Write Markers Certainly Celery, Orchid Opulence, Bashful Bue, not Quite Navy, Rose Red, Summer Sun, Regal Rose.  Sakura Gelly Roll Clear Stardust.

Ink:  Color Box Fluid Chalk Ink Olive Pastel.  Memories Black.

Embellishments:  My Minds Eye Indie Chic Paper Tape, American Crafts Statin Ribbon, Stampin' Up! Basic Jewels Rhinestones.

Adhesives:  Tombow Mono Permanent Adhesive Runner, Zots, foam squares.

Other Tools:  Paper trimmer, scissors, bone folder,  We R Memory Keepers Corner Chomper, artist sponge.


I'm entering into the following challenges:
  1. Deep Ocean - Welcome Summer
  2. Creative Card Crew - Easy as 1, 2, 3 - 1 image, 2 butterflies, 3 ribbons and washi tapes 
  3. Ladybug Crafts Ink - Double Trouble 
  4. Charisma Cardz - Summer

Friday, 25 May 2012

So Happy to be Canadian

This card was inspired by this weeks challenge over at Papertake Weekly.  Since it is getting close to the Queen's Jubilee, and also the Olympics, their idea was to use either your national colours or the colours of the UK.  I thought this works out well since Prince Charles and his wife Camilla just finished a visit to Canada this week, and they even visited my province. For this reason I decided to go with Canadian colours red and white.


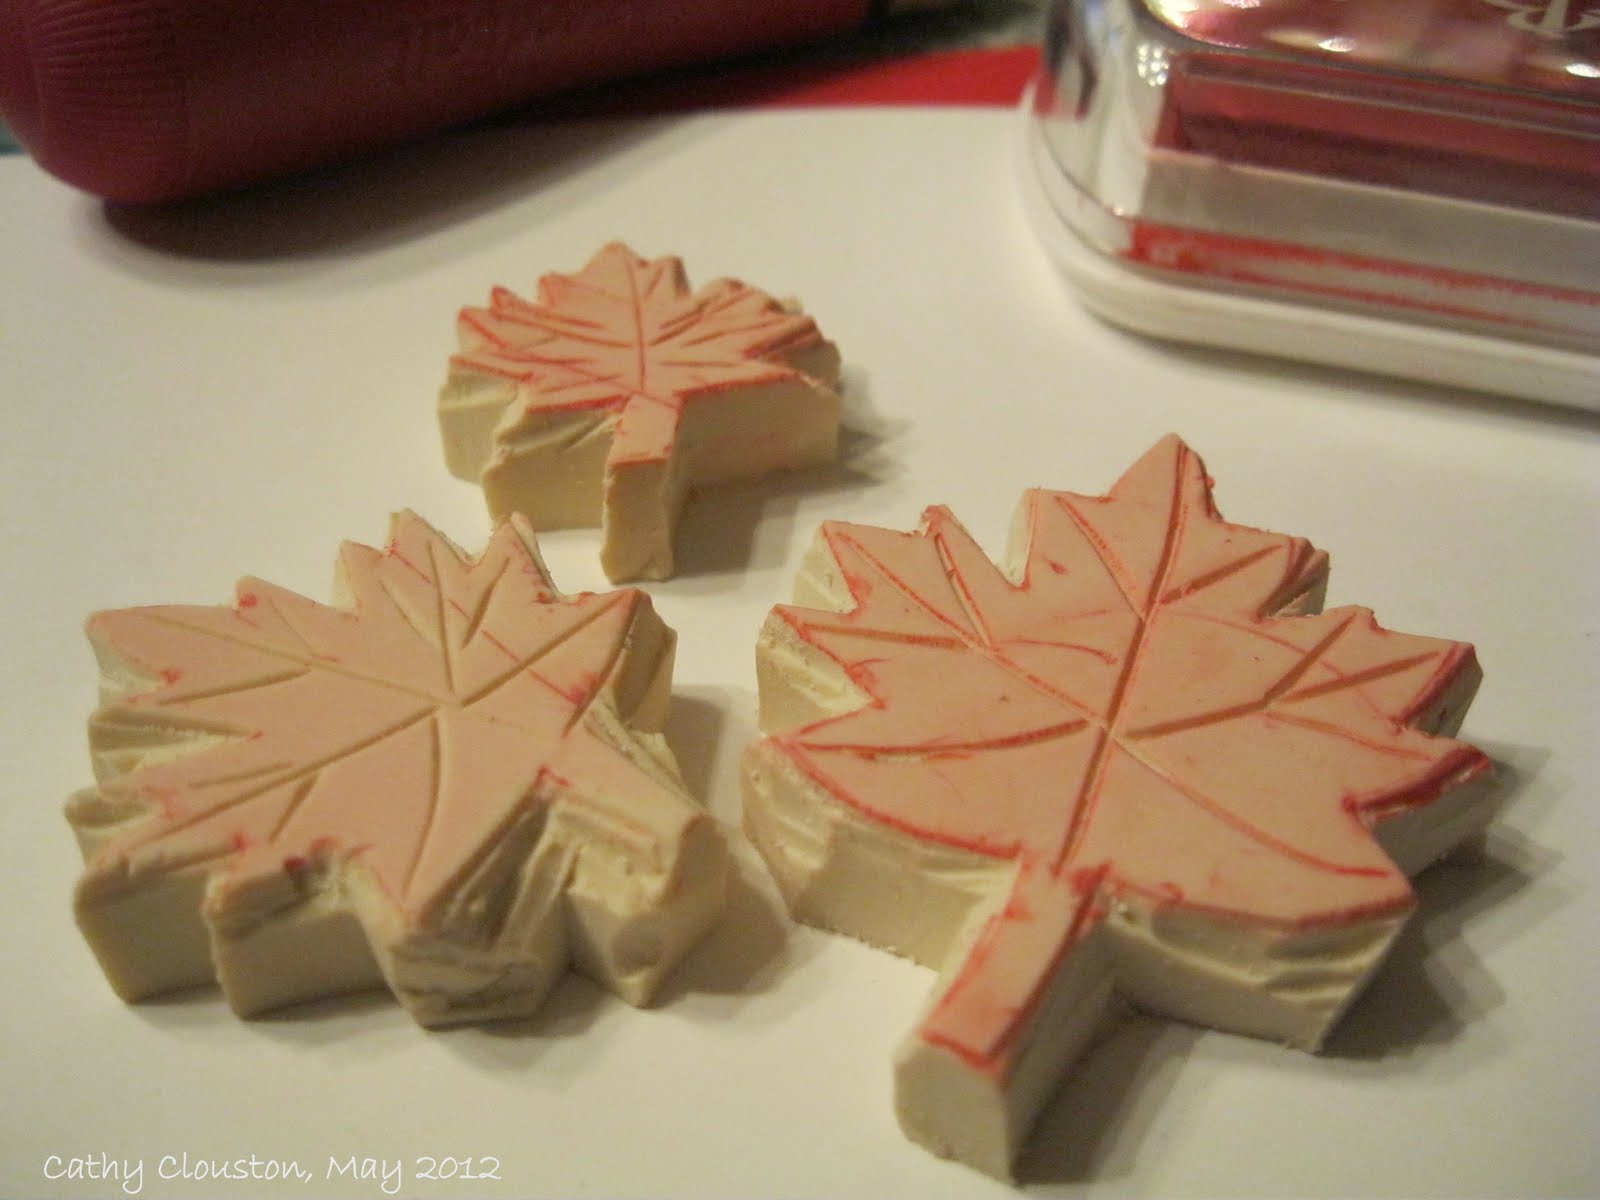
Once I decided on red and white I thought I should probably use a maple leaf image as well, but after searching through my stamps I realized I didn't have one.  And I call myself Canadian!  So I decided to carve my own.  I made three sizes, but only two made it on to this project.  Thats OK, Canada Day is coming soon so I can use the larger one then.


Since my last few cards were birthday cards I decided to make a thank you card this time. I started with a red cardstock base, cut and folded to the A2 size.  I chose some Bazzill dictionary print (which I love!!), and although I usually mat patterns I decided not to for this one as I like the contrast of the gray hue against the red.  I used a distress tool around the edges of the pattern (lightly as the paper is very  thin) and adhered it to the card base.  I added a piece of black ribbon around the middle of the card, making sure the ends were adhered underneath where the main panel would go so that they don't show on the inside of the card.   A second piece of ribbon was tied around the first piece to make the bow.

I decided to make some handmade scrunchy flowers since the thin dictionary paper works so well with this technique. You can read about the first ones I made here.  I used four circles for each flower, and  since I didn't have any jewel brads left I just used simple mini-brads for the flower centers, to which I adhered rhinestones later.  Once put together I sponged the 'petals' with red ink, and sprayed the flowers with red, white, and gold shimmer sprays for sparkle. Adhering the jewels was the last step.


I cut the main focal panel out of white cardstock and stamped a swirly flourish stamp several times on one side.  I stamped three leaves (one medium, two small) on the other side of the panel, turning the stamps each time for interest, and allowing the images to go off the edge.  I chose the sentiment from one of my new My Minds Eye sets, and I thought it worked because it is the same font that is on the dictionary paper.  I chose to stamp it in black to make it stand out from all of the red.  Once the sentiment was added to the center of the panel, I added some Sakura glitter pen to the images, used a distressing tool on all four sides of the panel, and added the flowers with Zots.  The panel was adhered over the ribbon with foam squares.

For the inside of the card I stamped the sentiment on a small piece of white.  The sentiment is actually inside of an oval.  Since the white scrap I used wasn't very big I positioned the stamp so that the sentiment was nestled into the corner and the oval went off the edge of the piece.  Once stamped I added some Sakura glitter pen and distressed the edges with a distressing tool.  I matted the white with more dictionary paper and added this to the inside of the card.


Red and white is not a colour combination I usually turn to, but I'm thinking I should more often.  I also like the idea of keeping things simple by using one bright colour along with black, white, and some neutrals.  This card has given me some ideas for future cards which I am sure you will see soon!  I love how this card turned out, it's patriotic without being obvious about it, and I keep trying to think of someone I need to thank just so I can give it to them!  :)

I would like to enter this card into the following challenges:
  1. Lets Ink It Up - Bling
  2. Creative Craft Challenges - Distressing
  3. Party Time Tuesdays - Vintage or Shabby Chic
  4. Deep Ocean - Swirls
  5. Creative Card Crew - Dimension
  6. Papertake Weekly - True Colours
  7. Ribbon Carousel - Fancy Flowers

I used the following supplies:

Cardstock: Stampin' Up! Real Red, Whisper White, Bazzill Basics Antique Dictionary Page.

Stamps:  My Mind's Eye Fine & Dandy True Blue Stamps, Lost & Found Two Breeze Dream, Lost & Found Two Rosy Everything.  Hand carved maple leaves.

Ink:  Color Box Fluid Chalk Ink Lipstick Red.  Memories Black.  Smooch Spritz Cherry Ice, Shimmerz Paints Shimmerings Goldie Lox, Babies Breath. Sakura Gelly Roll Clear Star pen.

Embellishments:  Recollections Mini Brads, Stampin' Up Jewels Basic Rhinestones, black satin ribbon from stash.

Adhesives:  Tombo Mono Permanent Adhesive Runner, Zots, foam squares.

Tools:  Paper trimmer, scissors, Tonic distressing tool, Cuttlebug, Spellbinders Nestabilities Standard Circles Small, We R Memory Keepers brad setter, bone folder.

Sunday, 4 March 2012

Butterflies and Dragonflies

The card I'm posting tonight I`ve been thinking about for a while.  I started with K&C Company paper pack, and one of the main reasons I bought the pad is for a sheet filled with butterflies and dragonflies.  I bought the pack around Christmas time, however, so I kind of forgot of the idea I had until recently.


Originally I was going to cut out the dragonfly and butterfly completely, but I really like the background, so instead I decided to just cut out the wings with my Cutterbee craft knife.  The bee was on the same sheet, so I included it, but the paper encompassing all three bugs was slightly bigger than I wanted it to be.  For this reason once the wings were cut I folded over the bee's left wing and trimmed off the edge with my trimmer.  I really like the effect of the bee's wing over the edge, so I'm glad I kept the bee.  :)

Once I decided to keep the background I choose some cardstock to coordinate, and because of the vintage feeling of the paper I decided on using just hemp twine instead of ribbon. Once everything was inked and assembled I popped up each of the wings with foam squares, and added the sentiment.  This card seems so different from what I usually do but its just so pretty!

Since this is another thank-you card I didn't want to put a sentiment inside, but I didn't want to leave it plain either.  For this reason after adhering some kraft and cream cardstock I cut out another dragonfly and been and glued them inside.  


I really enjoyed making this card so I think I will try similar techniques with some of my other favourite papers.  :)

I am entering this card into the following challenges:
  1. Allsorts Challenge - Spread Your Wings 
  2. Daring Cardmakers - Colour Combo Challenge 
  3. Scrap-Creations - Pop it Up 
  4. Simon Says Stamp Challenge - Anything Goes 
I used the following supplies:

Cardstock:  Stampin' Up!  Baja Breeze, Very Vanilla.  Recollections Kraft.  K&C Company Tim Coffey Blossomwood 12 x 12  Designer paper pad.

Stamp Set:  Stampin' Up! Pocket Silhouettes

Ink:  Colorbox Fluid Chalk Ink Chestnut Roan.

Embellishment:  Hemp twine from my stash.

Adhesives:  Tombo Mono permanent adhesive runner,  foam squares, generic glue stick.

Tools:  Cutterbee craft knife, scissors, paper trimmer.

Monday, 14 November 2011

Pretty Poppies

Today I was clicking on some blogs for some card inspiration and I found a couple of challenges that piqued my interest.  First was the  Simon Says Stamp Challenge blog,  Their challenge is to be based on an image of a beautiful field of poppies in honour of Remembrance Day and Veteran's Day last week.  I have had a lovely stack of floral papers for a while, and one of the papers is a beautiful poppy pattern so I thought this was the perfect time to use it. Next I went over to the Daring Cardmakers blog, and their challenge was to use a piece of jewelry for inspiration. On top of this my awesome husband and son gave me a Cuttlebug for my birthday so I definitely had to use that!  Hmmmm, poppies, jewelry, and a Cuttlebug....

So I searched around the Internet to see what I could find.  I eventually found this lovely necklace:


 So pretty, and perfect for these challenges!   Here is what I came up with:


I started out with an 8.5" by 11" medium-brown sheet of textured cardstock, cut in half to 5.5" by 8.5", then scored and folded in half at 4.25". I inked the edges of the card front with dark brown.  I cut a piece of kraft cardstock to 5.25" by 4" and ran it through my Cuttlebug with an embossing folder that reminded me of the intricate metalwork on the back of the necklace.  I used a blending tool to blend two shades of green over the cardstock to emphasize the embossed pattern. I inked the edges with dark brown ink. 

Next I cut a piece of patterned paper to 3.75" by 3.75".  I wanted to make it a bit old looking, so I crumpled it up and used Tim Holtz's distressing tool on the edges.  I used the blending tool to run a bit of dark brown over the creases and the edges of the paper. Once satisfied with my results I smoothed out the paper with the help of my bone folder and adhered it to the embossed cardstock.

To add the sentiment I first cut a small piece of cream cardstock at 1.5" by 0.75" and corner rounded the corners. I inked the edges with brown, and stamped the sentiment using a Stamp-a-ma-jig.  Mini brads were added and the sentiment was adhered using foam squares.

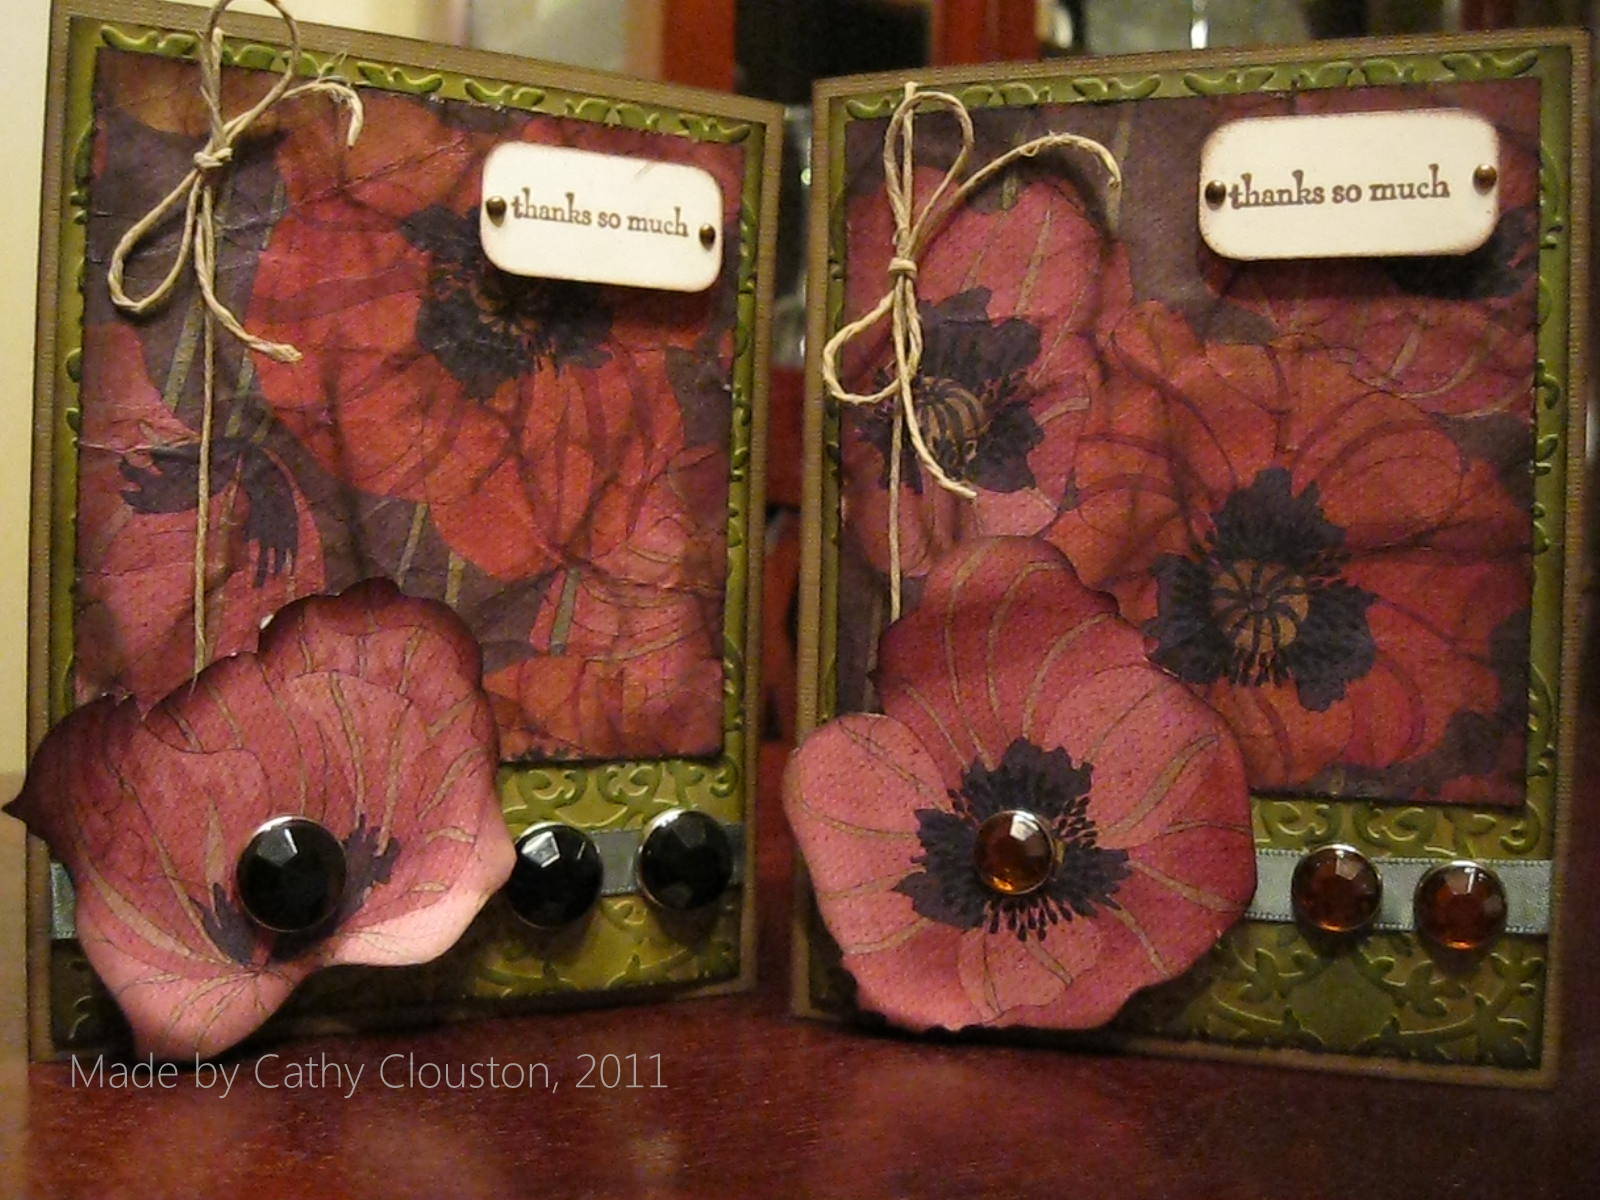
After adding ribbon and hemp twine, I made the poppy embellishment by trimming a flower out of the patterned paper, inking the edges with dark brown, and using my fingers to curl the petals a bit.  I added a large brad to the center of the flower, and two matching brads to the side through the ribbon.  Finally the finished piece was adhered to the card front.

Since there is an extra piece left over when making a card out of 8.5" by 11" cardstock I will often make two (or more) cards the same time.  This is helpful as if I make a mistake I hopefully have one that turned out, and if I don't make a mistake I have an extra card that I can use if I need one quickly and don't have time to make one from scratch.  This time is no different except when I got to the point of adding the brads I realized I didn't have enough black ones for both cards so I substituted amber ones:


I really love how both of these cards turned out!

Using the Cuttlebug on this project was so much fun,  I haven't had a chance to use it much yet but I find the embossing gives the card so much more personality with so little effort.  Also, the way the two greens blended together on background reminds me of the patina from oxidized bronze. 

I find that changing the colour of the brads makes a big difference for both of these cards. On the first card I like the black brads because it makes the vintage feeling card a little more sophisticated. These are the same two elements I feel the jewelry piece reflects, so I think I did OK in relating the card to the necklace. I like the amber brads on the second card because its a bit lighter, and it brings out the centers of the flowers in the patterned paper.  I really like both of these cards and it always surprises me how changing one small element can make such a difference in the end product.  :)

As far as making 'thank you' cards goes, I thought this was appropriate.  Poppies are used on Remembrance Day to symbolize the blood that was shed by those who have fought and continue to fight for us.  I am very thankful for and humbled by those who have sacrificed themselves for our countries.  Lest we forget.


Here are the supplies I used:

Cardstock:  Stampin Up!  Dusty Durango textured, Very Vanilla, K&C Company Tim Coffey Blossomwood 12 by 12 Designer Paper Pad, Recollections Kraft.

Ink: Stampin Up! Chocolate Chip, Kiwi Kiss, Garden Green

Stamp Set:  Stampin Up! Pocket Silhouettes. 

Embellishments: Stampin Up! Natural Hemp Twine, American Crafts Ribbon in green, Theresa Collins Haunted Hallows Decorative Brads, Recollections Mini Brads.

Adhesives: Tombow Mono adhesive runner, Zots, Foam Squares.

Tools used:  Fiskars paper trimmer, We R Memory Keepers Corner Rounder, Ranger Inkssentials Blending Tool, Tonic Studios Tim Holtz Paper Distresser.