Showing posts with label Anytime card. Show all posts

Monday, 25 June 2012

Woven Ribbon Cardfront - I love ribbon!

As you may have gathered from the name of this blog, I really love ribbon.  If you read my last post (or click here) you know I was lucky enough to be asked to write a tutorial based on this original card.  Of course, to do a tutorial I had to make a new card and this is what I came up with:


I started with the stamp set  "Relax a Bit" from Marks Finest Papers that I won from a Speedy Fox challenge a few weeks back.  I love this stamp set!  I collect teapots so it was the perfect addition to my stamp collection.  I thought that the Authentique 6x6 Gathering collection would go well with this set.  Once I decided on patterns I chose ribbons and card stock to coordinate. 

I cut, scored, and die cut all of the basic pieces, then heat embossed the images I wanted to use on the patterned paper in black.  This is the first time I paper pieced with embossing and I found it really easy to cut everything out as I could almost let the raised image guide my scissors. It also helped me stay in the lines when colouring.  I used my craft knife to cut out the handle of the teapot and the inside of the teabag string.


Once I had all of my elements ready I completed the woven ribbon panel.  I adhered the panel to the card front with Scotch ATG adhesive and glue dots.  Because the ribbon panel is quite heavy it is important to use a strong adhesive.  The die cut piece was foam taped over the top.


I added some faux stitching, adhered the teapot, added some twine, and Prima flowers.  I glued the teabag to the Prima flowers, and foam taped the sentiment at the bottom.  This card took some time to make, but I think it was worth it!


 Since the front had so much going on I kept the inside simple with just a stamped verse.  I love this quote!  This would be a great card for a pick-me-up.


Again, I made this card because Debbie from Friends of Speedy TV asked me to write this tutorial for them.  If  you haven't already, take some time to visit Friends of Speedy TV.  They have a great tutorial section among other fun things.  You won't regret you did!  :)

I used the following  supplies:

Cardstock:  Gina K Pure Luxury 120# Pure Ivory, Stampin' Up!  Very Vanilla.

Stamps:  Mark's Finest Papers Relax a Bit.

Ink:  Versamark Watermark Ink, Stampin' Up! Black Embossing Powder, Memento Tuxedo Black.

Markers:  Bic Mark Its Sunset Orange, Hot Aqua.  Black felt tip marker.

Ribbon:  American Crafts Premium Satin Ribbon.

Embellishments:  Prima Flowers Mellise Nature Garden,  Stampin' Up!  Basic Jewels Rhinestones.

Adhesive:  Scotch ATG, Stampin' Up|!  Sticky Strip, Zots, Quickie Glue Pen, foam squares.

Tools:  Paper trimmer, bone folder, scissors, Cuttlebug, Spellbinders Nestabilities Standard Circles Small, heat tool, Fiskars craft knife.


I am entering this card into the following challenges:
  1. Pause Dream Enjoy - #22 Use your favourite quote or verse.
  2. Papertake Weekly - Bingo! (Ribbon/ Free (Gems)/ Blooms)
  3. Allsorts - Any die will do
  4. Pile it On - Make your own embellishments
  5. Friends of Speedy TV Tutorial Time - Heat Embossing

Sparkly Butterflies - Craft Your Passion Challenge #116

So here it is, my fourth and final week as guest designer at Craft Your Passion Challenges.  I've really enjoyed this opportunity, and I'm so thankful to Craft Your Passion for having me!

This week the challenge is Things with Wings, and is being sponsored by Stitchy Bear Digital Stamps.  I got to chose a digital image to work with, and I love this Floppy Latte Design called Butterflies in the Grass.


Once my image was chosen I had the idea to use three colours of washi tape.  I decided on which colours I wanted to use, I thought three bright colours would be pretty and summery.  I printed the image on cream cardstock, heat set the image, and coloured it to match the shades of tape. I corner rounded the image and inked the edges with green.

I chose a cream cardstock base, and kraft to layer  After corner rounding the bottom of both pieces, I added green ink to both the card base and the layering piece.  At this point I adhered strips of tape, using two strips of each colour, layering them slightly when pressing them down. I made sure that when tearing the ends they were jagged for a bit of interest.

Matching shades of satin ribbon was layered over the washi tape and knotted.  This was a cheater knot, as I cut the longer piece just long enough to zot each end to the back, then tied a separate smaller piece to make the knot.  I like doing it this way because you save ribbon, and it is much easier to get the knot to lie the way you want it to.  I secured the knot in place with a Zot.

Once the ribbon was adhered I foam taped the image in place.  I added Sakura glitter pen to the lighter areas of the butterflies, and also outlined each butterfly.  I decided that this wasn't enough though, and finished the image off with some rhinestones.

I decided to make this a thank you card so inside I added some strips of tape, and a small corner rounded piece of kraft with the sentiment stamped on it in black.  I added a few more rhinestones to finish it off.

I used the following products:

Cardstock:  Stampin' Up! Very Vanilla, Crumb Cake.  Gina K Designs Pure Luxury 120# Pure Ivory.

Stamps:  Stitchy Bear Butterflies In the Grass.  Stampin' Up! Kindness Matters.

Markers:  Stampin' Up!  Stampin' Write Markers Certainly Celery, Orchid Opulence, Bashful Bue, not Quite Navy, Rose Red, Summer Sun, Regal Rose.  Sakura Gelly Roll Clear Stardust.

Ink:  Color Box Fluid Chalk Ink Olive Pastel.  Memories Black.

Embellishments:  My Minds Eye Indie Chic Paper Tape, American Crafts Statin Ribbon, Stampin' Up! Basic Jewels Rhinestones.

Adhesives:  Tombow Mono Permanent Adhesive Runner, Zots, foam squares.

Other Tools:  Paper trimmer, scissors, bone folder,  We R Memory Keepers Corner Chomper, artist sponge.


I'm entering into the following challenges:
  1. Deep Ocean - Welcome Summer
  2. Creative Card Crew - Easy as 1, 2, 3 - 1 image, 2 butterflies, 3 ribbons and washi tapes 
  3. Ladybug Crafts Ink - Double Trouble 
  4. Charisma Cardz - Summer

Sunday, 17 June 2012

A Fancy Cup of Tea

I won a new stamp set a few weeks ago from the Speedy Fox Challenge - you can see my original card that won here - called "Relax a Bit:".  Its really cute with a teapot and a teacup, which is great because I collect teapots. :)  I wasn't sure what  to do with it at first so I just sat down with the set, some inks and papers, and this is the card I came up with:


It is not the colour scheme I usually go for, but I think it turned out ok.  I started with a My Minds Eye 6x6 pad and chose some pinks patterns, and som patterns with some teal shades. I decided to use the gingham pattern as the background and made all of the other decisoins from there. 

Once everthing was trimmed and die cut to size I stamped the images I watned in white and die cut them with my Spellbinders circles.  I also embossed the circles with the tan Spellbinders mat and inked all components with brown inks.  I adhered the background papers and added twine, then matted the stamped images and adhered them with foam tape for dimentsion.  This panel was adhered to the card front.  The circles went over the edge a bit so I trimmed with my sissors, and I decided that the card needed a bit more sparkle.  I added some rhinestones to the images and the sparkly multifacited gems I had gotten at Micheals on sale.  All done!

This was a fun card to make because I didn't really have an end result in mind so I just played with it until I was done.  I think it is a fun result! 

I used the following supplies:

Cardstock: Stampin' Up!  Crumb Cake, Whisper White.  My Minds Eye Miss Caroline Dolled Up 6x6 pad.

Stamps:  Mark's Finest Papers Relax a Bit

Ink:  Color Box Fluid Chalk Ink Chestnut Roan, Creamy Brown

Embellishments:  We R Memory Keepers Baker's Twine, Recollections Gemstone Stickers, rhinestones from stash.

Adhesives:  Scotch ATG, foam squares.

Tools:  Paper trimmer, scissors, bone folder, Cuttlebug, Spellbinders Nestabilities Standard Circles Small and Large, sponge.


I am entering into the following challenges:
  1.  Simon Says Stamp and Show - Anything Goes 
  2. The Paper Shelter - Anything Goes 
  3. Moving Along with the Times - Lets Get Krafty 

Monday, 11 June 2012

Pretty Hummingbirds - Craft Your Passion Challenge #114

Hi everyone!  I can't believe its been a whole week since I posted last.  I've been crafting, just haven't had a chance to post so stay tuned for that sometime this week.  In the meantime, its time for my second challenge as guest design team member with Craft Your Passion Challenges.   The theme for challenge #114 is Anything Goes which is always fun.  The challenge is being sponsored by My Heart Pieces so I got to choose one of their lovely images for my card.


I started with the image called "Flower".  I love the birds and I thought it might work well with the papers in  Kaiser Craft's 6.5x6.5  pad called "Bonjour". The papers have lots of pastel and creamy shades, and are have lots of imagery that I find really soft and pretty.

I decided to colour the image before choosing the exact patterns to use.  I kept the colours light and toned down the brightness by using a touch of gray. I chose the three patterns that I thought worked best with the image.  I particularly liked the brown background as the cream postmarks are actually embossed on the paper.


I chose some green for the card base, and some kraft to mat the patterns.  I inked the edges of the brown pattern and the kraft with brown ink, and tore the top edge of the green and pink patterns.  The patterns were adhered to the kraft and I added some hemp twine and cream seam binding. Once the image was adhered with foam squares over the ribbon, I thought I was going to be finished but I felt something else was needed.  I decided to add some rhinestones to the centers of the flowers.  All done!


For the inside, I decided not to use a sentiment but I still thought it deserved some decoration, so I added an inked piece of cream cardstock, a couple of die cuts from the paper pad, and some torn scraps.


I love these colours together.  I think anyone would love to receive a note inside this card, don't you?


I used the following products:

Cardstock:  Stampin' Up! Certainly Celery, Crumb Cake, Very Vanilla.  Gina K Designs Pure Luxury 120# Pure Ivory.  Kaiser Craft 6.5" Paper Pad Bonjour.

Stamp:  My Heart Pieces Flower.

Markers:  Bic Mark Its Margarita Green, Oceanview Blue, Peach Parfait.  Copic R20, W3, 0.

Ink:  Color Box Fluid Chalk Ink Chestnut Roan.

Embellishments:  Ribbon Carousel Croquette Beige Vintage Seam Binding, natural hemp twine from my stash. Stampin' Up! Basic Jewels Rhinestones.

Adhesive:  Scotch Advance Tape Glider adhesive, Zots, foam squares.

Tools:  Paper trimmer, scissors, We R Memory Keepers Corner Chomper, Tim Holtz Tonic distressing tool.


I am entering this card into the following challenges:
  1. Really Reasonable Ribbon - Flowers and Ribbon 
  2. The Pretty Little Ribbon - Lots of Layers 
  3. Papertake Weekly - Anything Goes 
  4. The Paper Shelter - Going Dottie 
  5. Allsorts - Ice Cream Colours 
  6. Simon Says Stamp - Diamond Jubilee

Monday, 4 June 2012

'Bee' Happy - Craft Your Passion Challenge #113

I'm so exited - this is my first post for Craft Your Passion as a Guest Design Team member for June!

For this week, the challenge was to use chevrons.  An Inspiration photo was also provided:


Very pretty!  And how lucky I was that I have the perfect washi tape for such a project - from My Minds Eye Indie Chic collection.  Here is what I came up with:


Once I decided on the pattern, I had to decide on an image.  Since I got to choose from images provided by the sponsor of this week's challenge Delicious Doodles the most difficult part was just picking one (I have never been known to be a decisive person).  After some consideration I chose "Bee and Flower".  So cute!

I started with some kraft cardstock cut and scored to a standard A2 size. After corner rounding the bottom corners I added my tissue tape vertically strip by strip, matching the pattern as I went along, kind of like you would match up wall paper.  I left the bottom of each strip jagged and uneven as I thought this would allow for some interest.  For the same reason I lifted the strips on either end and tore them lengthwise before replacing them in their alloted spaces.  To add contrast I placed two strips of yellow tape with polka dots horizontally about a third of the way from the bottom.  Since the tape is semi-transparent you can still see a bit of the chevron through the yellow. I really like the effect.

Since this was my first card for Craft Your Passion I wanted to do something a little different and special, so I pulled some Stampin' Up! transparencies from my stash.  I've been hoarding these sheets forever but I thought they would be fun here, particularly the one with foliage on it.  To hide the adhesive I first attached the sheet to the card with Zots placed at either end of the yellow tape, since I knew I  would be putting ribbon or twine over that spot.  After the rest of the elements were added I carefully lifted the transparency and added more Zots under each so that the sheet was more secure.


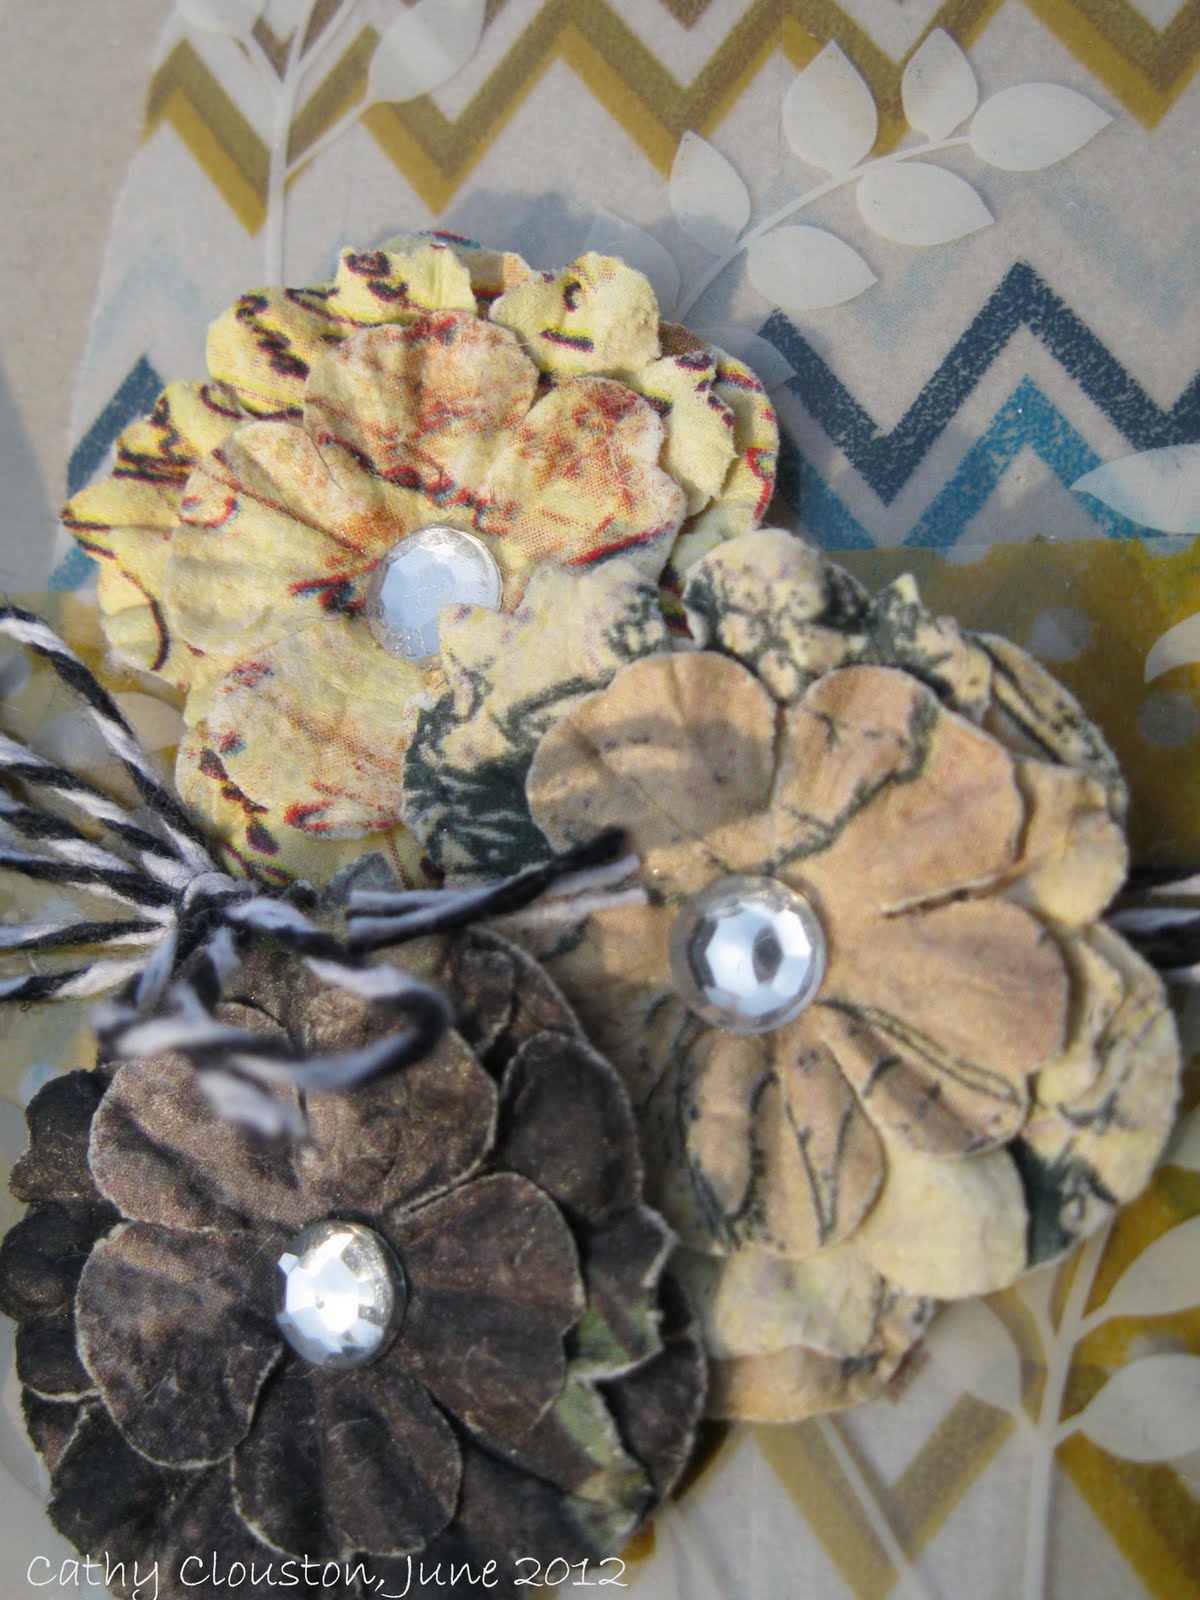
I added some baker's twine and placed some Prima flowers over the foliage.  I heat embossed the sentiment on a banner cut strip of kraft and  corner rounded the opposite end.  The sentiment was adhered with foam squares.  Once this was done it was time to work with my image.


I was slightly nervous about this part as I have rarely worked with digi images, but I'm all for learning new things so I googled some instructions and got to work.  I printed the image on 120# cardstock and heat set it to minimize smudging.  I then coloured the image and added some Sakura glitter pen.  My original intention was to only add glitter to the wings, but then I added some to the antennae, then I thought some might look nice around the face, and then before I knew it, all of the black was covered in glitter.  Thats ok, I like glitter!  Once my image was finished I cut it out with some detail scissors and placed on my card with foam squares.


On the inside of the card I heat embossed the matching sentiment and added a touch of glitter pen to the letters.  Since the cardfront is fairly busy (like a bee maybe, lol) I decided that further decoration wasn't necessary.


This was a really fun card to make.  I love the combination of the chevrons with the flowers and the bakers twine, and I love the shine of the transparency, and the leaves under the flowers.  Best of all, I really love the little bee - she's so cute!  I think it is fair to say that I am over my fear of digi images - I foresee more projects with them in the future!  :)


I used the following products:

Cardstock:  Stampin' Up!  Crumb Cake.  Gina K Designs Pure Luxury 120# Pure White.

Stamps: Delicious Doodles Bee and Flower (digi), Stampin' Up! Petite Pairs.

Ink:  Versamark Watermark Ink, Martha Stewart Bright White Embossing Powder.

Markers:  Bic Mark Its Fandango Pink, Sunset Orange, Pink Flamingo Peach Parfait, Yellow Blaze, Forest Green.  Copic W5, W3.

Embellishments:  My Minds Eye Indie Chic Paper Tape, Prima Flowers Mellisse Nature Garden, We R Memory Keepers Sew Easy Bakers Twine Blueberry, Sakura Gelly Roll Clear Stardust. Stampin' Up! Clearly Thanks printed window sheets.

Adhesive:  Zots, Foam Squares.

Other tools:  Paper Trimmer, scissors, bone folder We R Memory Keeper Corner Chomper.


I am also entering the following challenges:
  1. The Paper Shelter - Vintage or shabby chic
  2. Charisma Cardz - Bling
  3. Simon Says Stamp - Anything Goes


Wednesday, 9 May 2012

Flowery Friends with Ribbons

For this card I started with ribbons, lots of ribbons!  I have little wooden stands in my craft space with spools of Prima ribbon on them.  I look at them every day, and it occurred to me that I should see how many I could use on one card. :)


I started with a standard size card base made of kraft, and I cut another piece of  cardstock about 1/2 an inch smaller to give enough room to work with.  I chose several colours of ribbons ensuring they were all the same width and cut lengths a bit longer than the long side of the small piece of card.   These strips were adhered to the back of the short side of the card with glue dots.  I attached shorter ribbons to the back of the long side of the card, and wove them with the longer strips of ribbon.  Once done, all ends were attached with glue dots to the back of the card.  This piece was very thick by then so I decided to use more glue dots to attach it to the card front to ensure it was well adhered.


I cut another piece of kraft just slightly smaller than the card front, bigger than the woven piece, and die cut a large circle from it.  I embossed the edge of the circle with the die, and once done distressed the outside edge of the panel with a distressing tool.  A white gel pen was used to add dash lines around the edge of the circle, and the outside edge of the panel.  The sentiment was heat embossed in white.


In order to make the panel look as lush as the ribbon section, I added the last of the lovely silky Champagne ribbon from Ribbon Carousel, and some Prima flowers in soft coordinating colours. The panel was adhered to the ribbon piece with foam squares.


I really splurged on this card.  It was really fun to make and turned out to be so pretty!  :)

I would like to enter this card into the following challenges:
  1. Really Reasonable Ribbon - Mother's Day or feminine plus ribbon.
  2. Stampin' for the Weekend - Layer Upon Layer
  3. Speedy Fox - Use 3 of something.
  4. Deep Ocean Challenge - What a Wonderful Woman

I used the following supplies:

Cardstock:  Stampin' Up! Crumb Cake.

Stamps:  Pocket Silhouettes.

Ink:  Versamark Watermark ink pad, Stampin' Up! White Embossing powder, Sakura White Gelly Roll pen.

Embellishments:  Prima Marketing ribbon, Ribbon Carousel Champagne Silky Crushed ribbon, Prima Camille Almanac flowers.

Adhesive:  Glue Dots, foam squares.

Monkey Business... and a new hobby!

I have a new hobby, and its all thanks to Youtube.  A few months ago I found a very crafty blogger on Youtube called The Frugal Crafter.  She's amazing!  She is primarily a stamper, but covers a wide variety of topics, including the one that piqued my interest - stamp carving.


I've heard of this craft before, and I've even thought about doing it, but it wasn't until seeing this video that I decided I would go out and get the supplies. I love her idea of carving a stamp before buying it, because many times I might get a whole stamp set just for one stamp.  I made my first few attempts a few days ago and came up with this leaf stamp that I really like:


I had started by carving some less simple designs, but they didn't quite turn out how I wanted them, so I decided to try something a bit easier for a beginner like me.  The leaves were a great shape to carve and I like how the stamp turned out, so I decided to use it to make a background for my next card.


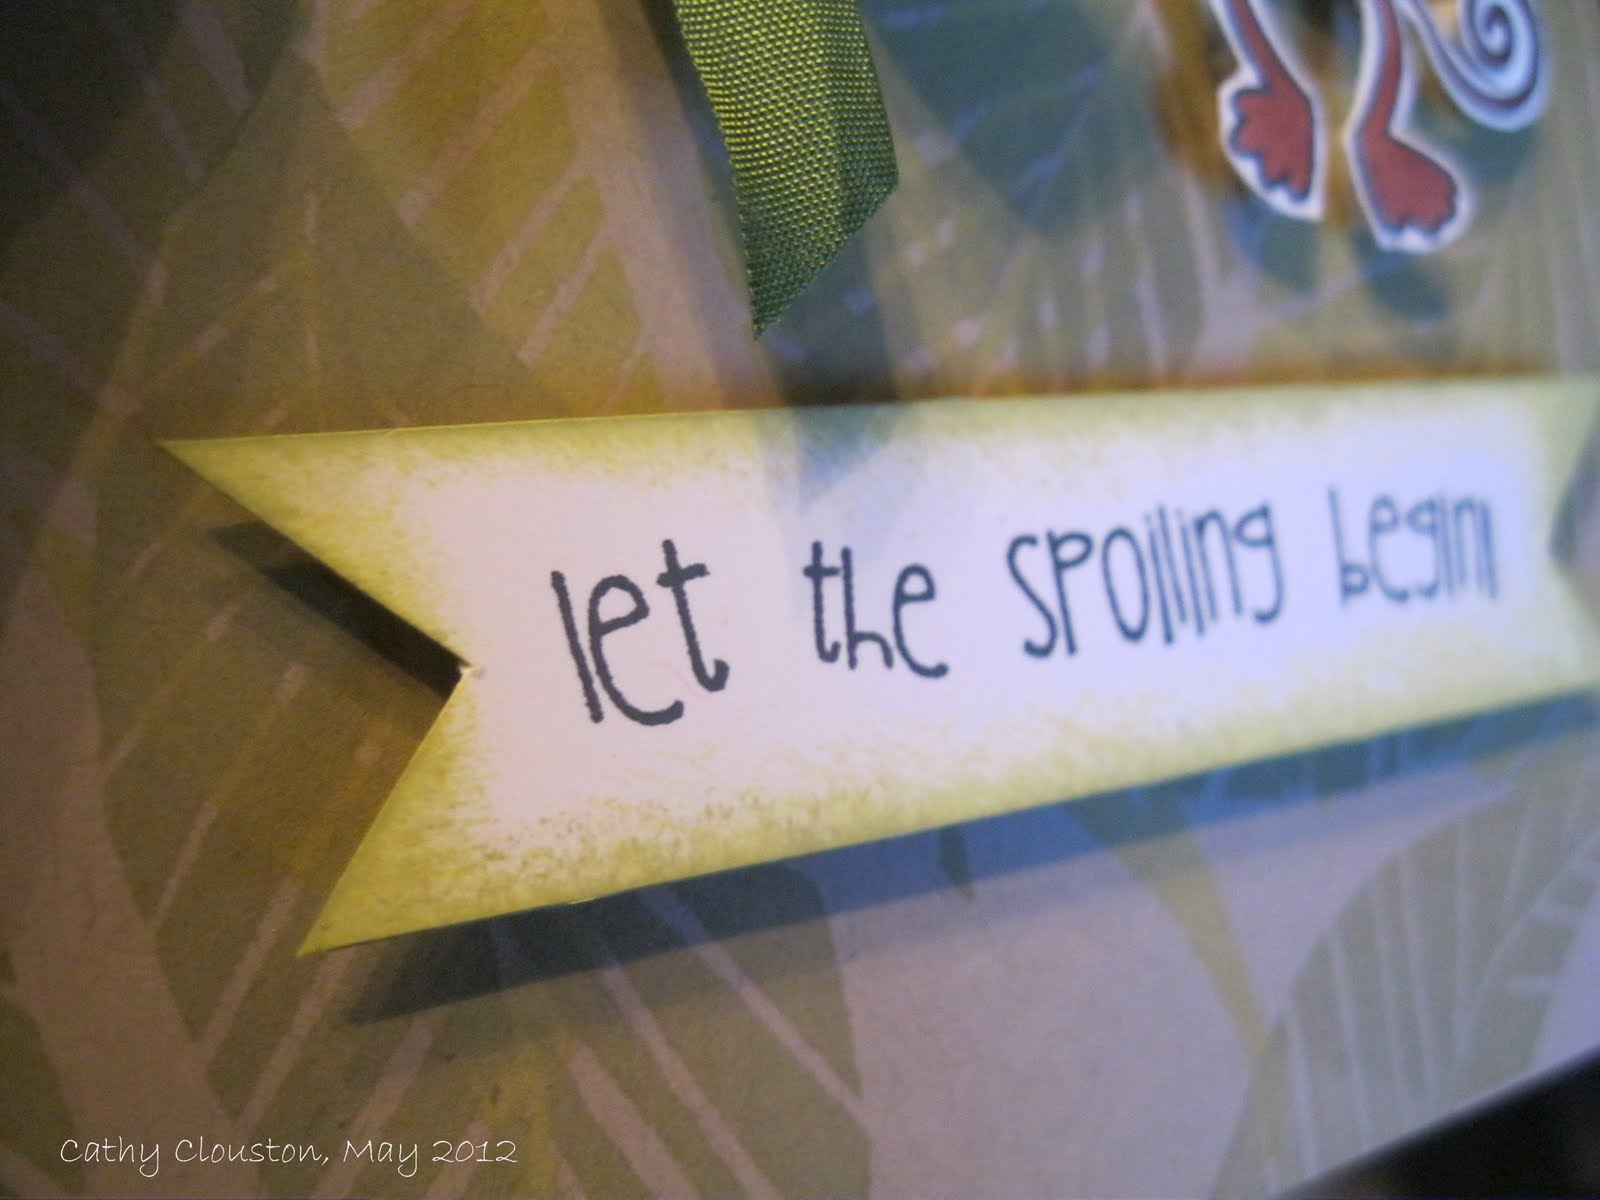
I used two shades of green to stamp the leaves on kraft cardstock.  I stamped the entire sheet so the pattern is on the front and back.  I added some green seam binding, and since the leaves reminded me of banana leaves I thought this monkey stamp would work perfectly.  Once stamped and coloured on white cardstock I cut out the image and adhered it with foam squares.

The sentiment was stamped on a strip of white, and trimmed with banner points on each end.  I sponged it with both shades of green ink. Adhered with more foam tape.


This was a pretty quick and simple card, but I love the effect of the background.  I think this would be a great card for a new baby or a baby shower., or even a kid birthday card.  I definitely see more hand carved stamps in my future!

I will enter this card into the following challenges:
  1. Catered Crop - B is for Bodacious (baby)
  2. Creative Craft Challenges - Anything Goes
  3. Crafty Card Makers - For the boys.
  4. Papertake Weekly - Cute, cute, cute.
  5. Everybody Art - Baby

I used the following supplies:

Cardstock:  Stampin' Up! Crumb Cake.  Gina K Pure Luxury 120# Pure White.

Stamps:  Unity Stamp & Bella Blvd Itty Bitty Let the Spoiling Begin.  Hand carved leaves.

Stamp Carving Supplies:  Speedball Speedy-Cut,  Speedball linoleum cutter set.

Ink: Memento Tuxedo Black, Color Box Fluid Chalk Ink Lime Pastel, Olive Pastel.

Markers:  Bic Mark Its Honey Brown, Tiki Hut Tan.

Ribbon: Ribbon Carousel Moss Green Vintage Seam Binding.

Adhesive:  Tombow Mono Permanent Adhesive Runner, Glue Dots, foam squares.

Other tools:  Paper trimmer, scissors, sponge.


Tuesday, 1 May 2012

The wonders of Washi tape

Sometimes no matter how hard I try I just can't sleep.  Other times I will go to bed early because I am so tired, but then I wake up in the middle of the night and can't go back to sleep because maybe I wasn't as tired as I thought.  When that happens I will sometimes surf the web until I am tired again, or I may make something.  That is what happened when I made this card.


Clean and simple cards are not something that comes to me naturally, I usually have to think about it and if I think about it I usually over-think it and then its not clean and simple anymore.  This clean and simple card was pretty easy though, probably because I was half asleep at the time, lol. 

I had just received an order of washi tape in the mail, so it was on my mind when I got the idea for this card.  I started with Gina K's 120# white cardstock and embossed it with a Tim Holtz Texture fade. Once embossed I randomly added various stripes of washi tape, tearing each end so it was a bit jagged.

I love this stuff!  I've never worked with it before, but since its everywhere I thought I would try it out.   It is so nice, repostionable and pretty.  I will definitely be purchasing more. 


I stamped my sentiment on a strip of white cardstock, trimmed the end to points, adhered it with foam squares, and as an afterthought added some bakers twine I received as a gift with my washi tape order.  I was going to add some ink to the embossed space, but I really don't think it was necessary.

Since this was a simple card I left the inside plain except for the sentiment.


I'm really impressed with what I can do when I'm half-asleep, lol.   My husband said that this was one of the brightest cards I've made in a while.  I decided to take that as a compliment. :)

I would like to enter this card into the following challenges:
  1. Simon Says Stamp Challenge -  Anything Goes
  2. Simon Says Stamp and Show - A Kaleidescope of Colour
  3. Creative Craft Challenges -  Anything Goes
  4. The Pink Elephant - Springtime
  5. Craft Your Passion - Lots of Texture
  6. Papertake Weekly - Anything Goes

I used the following supplies:

Cardstock:  Gina K Designs 120# Pure Luxury Pure White.

Stamps:  Stampin' Up!  Petite Pairs.

Ink:  Memories Black.

Adhesive:  Foam Squares.

Embellishments: Washi tape purchased from Le Box Boutique.  Bakers Twine was a gift with purchase.

Tools:  Paper trimmer, bone folder, scissors, Cuttlebug, Sizzix Tim Holtz Texture Fade Checkerboard.

Sunday, 29 April 2012

In a word 'Love'

For this card I wanted to try a technique that I had never tried before which is faux metal.  I watched Kristina Werner do this in one of her you tube videos:


For my card I thought it would be fun to use a new alphabet set I got from Michaels to make metal looking tags that spelled out a word.  Here is what I came up with:


I thought I would go for a look that is more grungy than usual, so I used a Tim Holtz embossing folder on a piece of kraft cardstock.  I made another crumpled paper flower out of the same script paper I used before, this time with 9 circles.  I inked the edges of the flower in gray to coordinate with everything.  A sparkly brad and some prima flowers added just enough sparkle.


Once I followed Kristina's technique with the alphabet stamp set I mentioned I used my nestabilities circles to cut the letters out out, and my Crop-a-dile to punch a hole in each. I attached them to the card front with black hemp twine and foam squares.  I love how they turned out, I even love the impression left behind by the dies.  My husband was even impressed (at least thats what he told me, lol).


On the inside of the card I used the same shades of cardstock as on the front and inked them to match and stamped a nice sentiment.


I think any loved one would enjoy receiving this card.  :)


I would like to enter this into the following challenges:
  1.  Simon Says Stamp and Show - Show your favourite word
  2. Fussy and Fancy Friday - Punches and dies
  3. Deep Ocean Challenge - Use punches and dies
  4. Ribbon Carousel Challenge - Anything goes
  5. Simon Says challenge - Anything goes
  6. Moving Along With the Times - Garden or Flowers

I used the following supplies:

Cardstock:  Stampin' Up!  Basic Gray, Whisper White, Crumb cake.  Bazzill Basics Antique Script.

Stamps:  Stampin' Up!  Petite Pairs, Recollections Rubber Stamp Set (alphabet)

Ink:  Color Box Fluid Chalk Ink Charcoal, Stampin' Up!  Going Gray.  Versamark Watermark ink.  Stampin' Up! Silver embossing powder. 

Adhesive:  Tombow Mono Permanent Adhesive Runner, Glue Dots, foam squares.

Embellishments:  Prima Flowers Melisse Nature Garden, Creative Charms brads, black hemp twine from stash.

Tools:  Paper trimmer, scissors, bone folder, tweezers, heat tool, Cuttlebug, Spellbinders Nestablities Standard Circles Small and Large, Sizzix Tim Holtz Texture fade Cracked,  Ranger Inkssentials blending tool, We R Memory Keepers brad setter, Crop-A-Dile

Sunday, 22 April 2012

Believe in yourself

For the first time I placed an order with Gina K designs recently, and it came in last week. I was really excited to get the stuff and I had to play with it right away.

While my first love is Stampin' Up! cardstock, I find their white and cream cardstocks to be a bit flimsy for card bases, so I ordered some 120# cardstock from Gina K in those colours.  I had also ordered the Spellbinders Small Standard circles Nestabilites to go with my Large set.  I placed a large enough order to get the free "Believe in yourself" stamp set so here I used all three.


I started with the base weight white, and decided to use patterned paper from one of my favourite My Mind's Eye 6x6 pads.  I thought black and white with a bit of red would be fun, so after layering the card front I heat embossed the sentiment and added black and red ribbon. 

I stamped the butterfly in red, then die cut the image to ensure I had the right size circle.  I die cut a slightly larger circle from the patterned paper to mat the image.  I decided the butterfly needed to be glittery so I coloured the blank spaces with my Sakura glitter pen and foam taped the circles over the ribbon and I was done. 

 Can you believe I made two cards in a row without any extra inking?  lol :)


I would like to enter this card into the following challenges:
  1. Really Reasonable Ribbon Challenge:  Black and white with accent colour 
  2. Pretty Little Ribbon:  To die for 
  3. Stampin' for the Weekend:  Sparkle and Shine 
  4. Simon Says Stamp & Show: Anything Goes 
  5. Craft Your Passion:  Die cuts and punches 
  6. The Paper Shelter:  Wings and things 
  7. Fussy and Fancy Friday: Punches and Dies 
  8. Pile it On: Sparkle and Shine
 
I used the following supplies:

Cardstock:   Gina K Designs Pure Luxury Heavy Base Weight 120# Pure white, Stampin' Up! Basic Black, Whisper White, My Mind's Eye Meadowlark 6x6 Designer Paper Pad.

Stamps:  Gina K Designs Believe in Yourself.

Ink:  Color Box Fluid Chalk ink Lipstick Red, Versamark Watermark ink pad.

Embossing powder:  Stampin' Up! Basic Black.

Pen:  Sakura Gelly Roll Clear Star

Ribbon:  Red and Black from my stash.

Adhesive:  Tombow Mono Permanent Adhesive Runner, foam squares.

Dies:  Spellbinders Nestabilities Standard Circles Small and Large.

Tools:  Paper Trimmer, Cuttlebug, scissors, Stampin' Up! heat tool, embossing buddy.

Sunday, 8 April 2012

Sentimental Birds on a Wire

If you looked out my window you would never know that it was Easter Sunday.  We had a snow storm last night and its still snowing!  It is supposed to turn to rain later today which means the roads aren't going to be great so I think we will leave our travels until tomorrow.  In the meantime here is another card:


I love little black birds and I have been wanting these stamps from the Sweet Stamp Shop for a while, and then Scrapbook steals included it in one of their daily 'steals' a few weeks ago.  I took advantage of the offer, and even after shipping I got a pretty good deal I think!

I wanted to so something fairly quick just to try these stamps out, and I hadn't done one of these water colour backgrounds in a while, so I thought I would try to make one that looked like a spring sunset.  I was a bit out of practice so it didn't turn out exactly as I had expected, but that is part of the fun!

I started with my Ranger craft sheet and coloured various shades of Stampin' Write markers, then spritzed it with water.  I then placed a piece of white cardstock on top and rubbed it into the ink.  I don't think I added enough water because it was a bit more streaky than I expected.  For this reason after it dried a bit I added a bit more ink to my craft sheet, just pale blue this time, with a lot more water.  The extra blue filled in some white spots and the extra water added a bit of splotchyness which I like. 

Once the background was dry (I helped it along with my heat tool) I stamped the birds in black and added the sentiment, then highlighted the love birds and sentiment with glitter pen.  After some ink around the edges, some matting of kraft cardstock, and some baker's twine I adhered the front of the card to my black card base.


I stamped the inside with one of the bird stamps, and added a sentiment at the top of the white panel leaving a large space for a note.  I really like how the sentiment is not even so it looks like an old typewriter.


This card was really quick to make, and the background is fun because you never know what you'll end up with.


I would like to enter this card in the following challenges:
  1. Deep Ocean - Use More Than One Stamp
  2. Papertake Weekly - Anything Goes
  3. Lets Ink It Up - Distressing
  4. Ribbon Carousel Challenge - Spring
  5. Creative Card Crew - Spring
  6. Pile it on - All about 's' 

I used the following supplies:

Cardstock:  Stampin' Up! Basic Black, Whisper White.  Recollections Kraft

Stamps:  Sweet Stamp Shop Sentimental Birds.

Ink: Memories Black.

Markers:  Stampin' Up!  Stampin' Write markers Dusty Durango, Rich Razzleberry, Crushed Curry, Melon Mambo, Bordering Blue, Brocade Blue.  Sakura Gelly roll Clear Star.

Baker's Twine:  Sew Easy Fancy Floss Baker's Twine Lemonade, Lollipop, Lilac

Adhesive:  Snake Tape Garter, Viper.  Scotch Quick Dry.

Tools:  Paper Trimmer, Sponge, Ranger Non-stick Craft Mat, Water Spritzer, Stampin' Up! heat tool.

Wednesday, 28 March 2012

Send a friend flowers.

When I made the Mother's Day card last week, I loved those little flowers and I decided I would do something similar, only more, on today's card.


I started with some papers from American Crafts Hello Sunshine collection - perfect for spring - and die cut two sizes of circles from my nestabilites set.  I also cut some circles out of plain white cardstock and sponged all of the circles with coordinating shades of ink.  I assembled the flowers with some cute little button shaped brads.  The brads were actually all white, but I wished that they were in colour, so I coloured them with my Bic markers.  Once the flowers were assembled I sprayed them with some Shimmerz spray so that they would sparkle a bit.


Once the flowers were finished I chose a green shade for the card base, but I decided that the background should be more neutral, so I chose some brown and kraft sheets from the same Hello Sunshine collection.  I put the darker shade in the background and drew a vase on the lighter shade.  Once I cut out the vase I attached some ribbon, and the cute sentiment, which I of course added some Sakura glitter pen to (what card would be complete without it these days, lol). 

My card was almost finished but I felt it needed something else, so I added some faux stitching with a white gel pen.  I thought it tied in nicely with the pattern on the darker brown background.

I decorated the inside with a space for a note and some tiny flower stamps in coordinating colours, Sakura glitter pen, and more faux stitching.


Its funny, but I think every new card I make is my new favourite, lol.  :)

I'm entering my card in the following challenges:

  1. Catered Crop - Quickfire in stitches
  2. Creative Stamp Friends - Spring
  3. Everybody Art - Friendship
  4. Simon Says Challenge - Bingo (Flowers, Glitter, Brads)
  5. Ribbon Carousel - Anything Goes
  6. Party Time Tuesdays - Anything Goes

I used the following supplies:

Cardstock:  Stampin' Up!  Certainly Celery, Whisper White.  American Crafts Hello Sunshine Collection - Fluttery, Dainty, Frolic, Gossamer

Stamps:  American Crafts Laughter, Fun.

Ink:  Colorbox Fluid Chalk Ink  Chestnut Roan, Lime Pastel, Dark Peony, Creamy Brown, Rouge, Yellow Citrus, French Blue, Alabaster.

Markers:  Bic Mark It Summer Melon, Margarita, Green, Blue Skies Blue, Fandango Pink.  Sakura Gelly Roll Clear Star.  Uniball Signo White Gel Pen.

Sprays:  Shimmerz Paints Baby's Breath, Goldie Lox.

Embellishments:  Recollections brads, American Crafts satin ribbon.

Adhesives:  Tombow Mono Permanent Adhesive runner, Glue Dots.

Tools:  Paper Trimmer, Scissors, Cuttlebug, Spellbinders Nestabilities Standard Circles Large, Craft Pick, sponge, We R Memory Keepers Corner Chomper.


Tuesday, 13 March 2012

Spring is in the Air, at least for now.

We have had a very springy last few days, and our snow bank out front is significantly smaller.  Alas, Spring is only visiting because Winter will be back tomorrow with snow for the next few days.  For now though, I thought I'd make a springy card.  :)


As per usual I started off with the patterned paper, a really cute little set - Fancy Pants Summer's End 6x6 pad.  I suppose technically it is a fall themed pad, but the colours are so bright and fun it could easily be adapted to spring.

I chose the small little sentiment "Bloom where you're planted" from a page of sentiments and journaling blocks in the pad.  Since the flowers will be blooming (relatively) soon I thought this was appropriate.  I then chose the doily background, and all of the coordinating cardstock.  I particularly love the bright green in the patterns so I chose a couple of green shades that would compliment it, and some matching Stampin' Up! ribbon I've had for ages.

I decided to go with an easel folded card, so once I decorated and assembled the card front, I decorated the part of the inside of the card that would be showing when the card was displayed.  I chose the little bird stamp and decided to colour it with my Bic markers.  I found the blue was very blue once it was coloured so I added some blue to the petals on the sentiment so it would coordinate a little better.


Once ribbon and jewels were added, I added a space for a handwritten note in the center and I was done!

This is the first easel card I've made, and because of that I think my measurements were a little off and it didn't pop up as much as I would have liked.  That said, I think this card is really pretty and makes me look forward to when Spring is here to stay!  :)

I've decided to enter this card into the following challenges:
  1. Allsorts - Say It With Flowers
  2. Catered Crop - Ravenous for Ribbon Quickfire
  3. Papertake Weekly - Anything Goes
  4. Craft Your Passion - Easel Cards
  5. Simon Says Stamp and Show - Anything Goes
  6. Lets Ink it Up - Show us Your Flowers
  7. The Pretty Little Ribbon - Spring Colours
  8. Pile it On - St. Patrick's Day and/or Shades of Green

Here are the supplies I used:

Cardstock - Stampin' Up! Old Olive, Certainly Celery, Very Vanilla.  Fancy Pants Designs Summer's End 6x6 pad.

Stamp Set - Fancy Pants Designs Little Star.

Ink -  Colorbox Fluid Chalk Ink Chestnut Roan.

Markers - Bic Mark It! Blue Skies Blue, Oceanview Blue.  Prismacolour Colourless Blender.

Adhesives - Tombo Mono Multi Liquid glue, Adhesive Runner permanent.  Mini Glue Dots.  Foam Squares.

Embellishments - Stampin' Up! Certainly Celery twill ribbon, Basic Rhinestones.

Tools - Paper trimmer, scissors, sponge, We R Memory Keepers Corner Chomper, bone folder.