Friday 28 September 2012

MFP September Stamp Release Day #4 Tweet That

Click HERE for the current Pause Dream Enjoy challenge.
Click HERE for the current Use it Tuesday challenge.
Click HERE for the current Craft Your Passions challenge. 


September Blog Hop!


This month's New Stamp Set Releases are
Buried Treasure - Featured September 25
Going Batty - Featured September 26 (That's today!)
Autumn Splendor - Featured September 27
Tweet That - Featured September 28


Please hop along with us!  You have a chance to win one of the above stamp sets!  Just comment on the following blogs (don't forget this one), each day for more chances to win! Scroll to the bottom for the DT list.  (You do NOT have to comment on all the blogs each day!  The names are drawn randomly!)  All four winners will be announced on September 29, 2012  on the Mark's Finest Papers blog.  You can go back and comment if you missed a day.  (HINT:  The more you comment, the more chances you have to win and comments on the MFP blog count twice!)  The deadline for commenting is 11PM EST (12AM ATL) on Friday September 28, 2012.


Its the final day of the blog hop and Tweet That is such a cute set to end with.  Here is what I came up with:


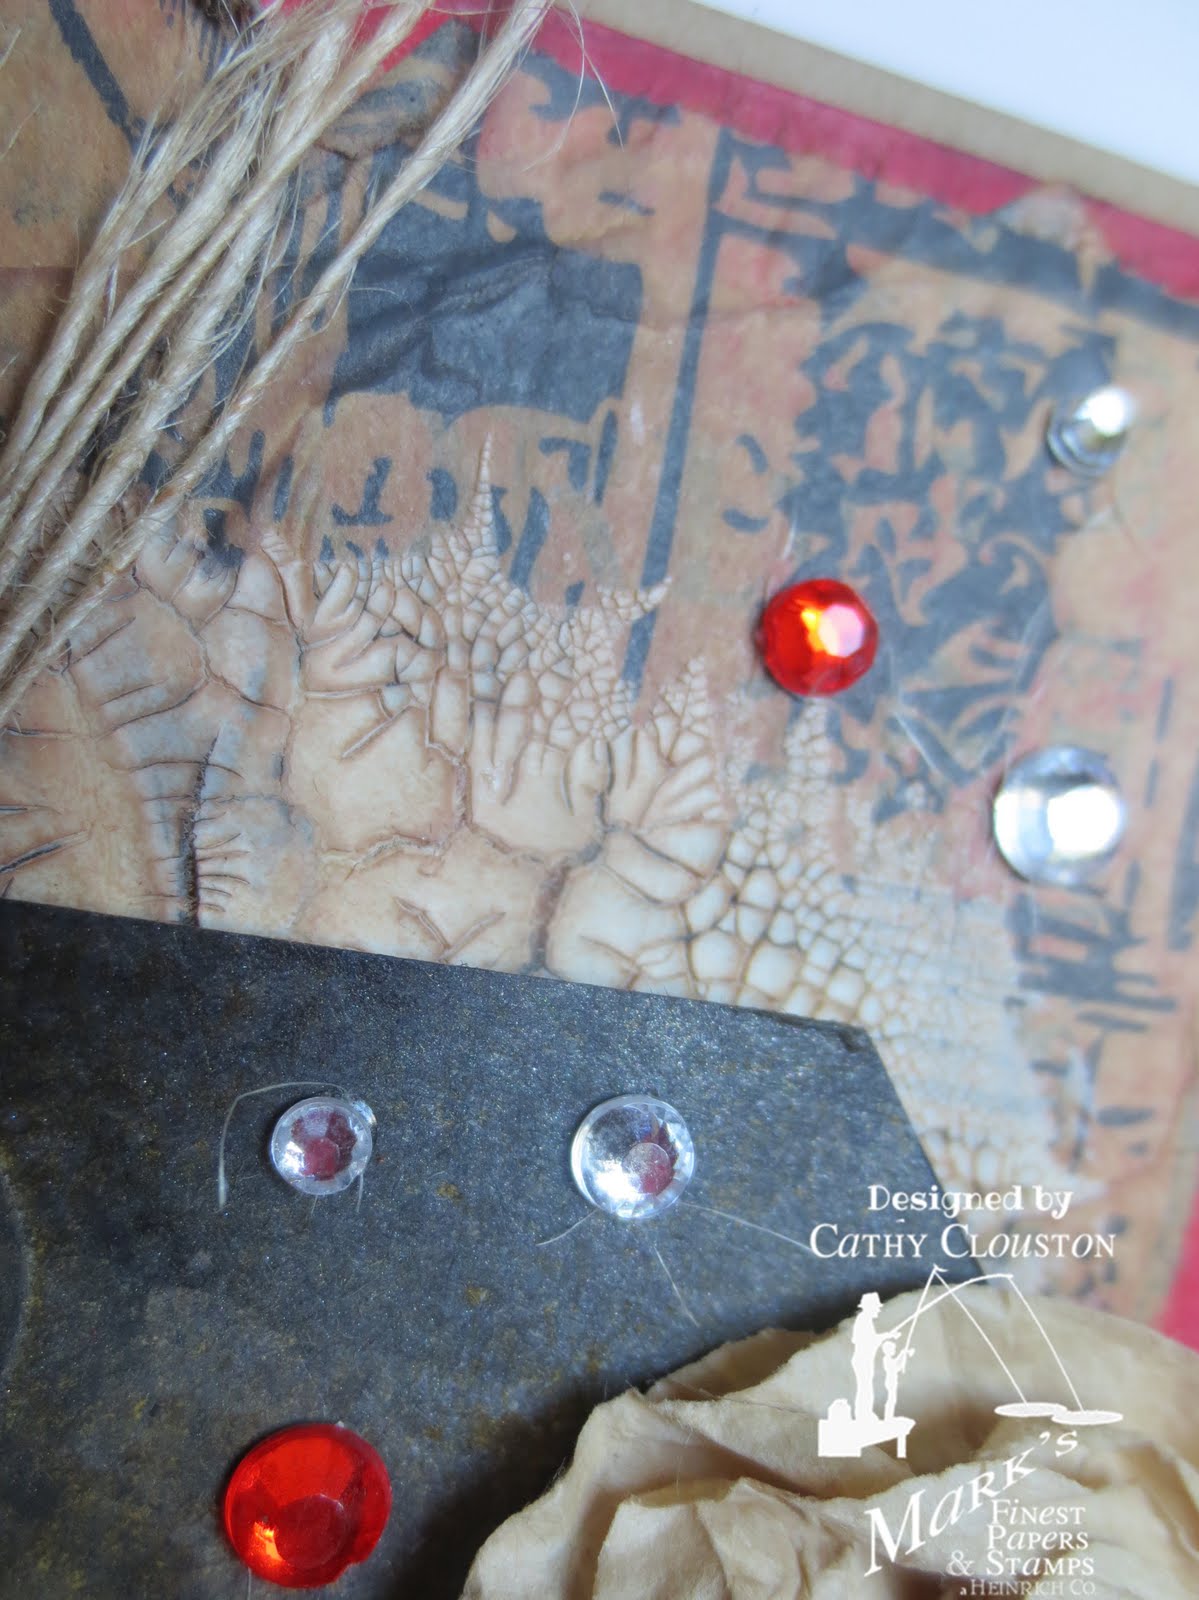
I love that little birdie!  I water coloured the image, blended some browns over the background,  then used the cracked glass technique, one of my favourites.  I added some creamy brown ink over the cracks to make them stand out a bit more.


I decided to go with a kraft, red, and black colour scheme, so I cut a kraft base and added some torn pieces of kraft collage tissue to a red piece of card stock. Once dry, I added some white crackle paint and dried it with my heat gun.  I added some more ink over the cracks to make them stand out, and inked the edges of the red.


I decided to use up the leftover part of the inked tag that I used on my halloween card, so I added some jute twine and heat embossed the sentiment in white.


 Due to the colour scheme I was going with I thought the white was too bright so I lightly sponged some light brown over the letters which helped tone the sentiment down to a creamy colour.


I added ribbon and twine to the panel, and after it was attached to the card base I foam taped the tag and the image to the card.


 I decided to add some red and clear gemstones in a random manner diagonally across the card, but I felt that the card was missing something.  I finally chose a couple of scrunchie flowers from my stash, this time made with kraft parcel paper.  Some gemstones in the middle finished the card front off.!

This set is really versatile with several cute images and lots of sentiments to choose from.  I can see myself going to this one over and over!

Thats it for me, why not visit the rest of the DT and see what awesome projects they've come up with?  They are a talented bunch and you won't regret taking the time to visit each one!  While your at it why not visit Mark's Finest Papers store and have a look at what they offer.  With such a wide selection of items, I'm sure you won't think its for the birds!  :)


I used the following products for my card:

Card Stock:  Recollections Kraft, Stampin' Up!  Real Red, water colour paper, 7 Gypsies Collage Tissue Paris, Gina K Designs Onyx Black.

Stamps:  Marks Finest Papers Tweet That 

Ink:  Staz On Jet Black, Versamark Watermark Ink, Colorbox Fluid Chalk Ink Chestnut Roan, Creamy Brown.

Markers:  Stampin' Up!  Real Red, Close to Cocoa, So Saffron.

Embossing Powder:  Martha Stewart White, Ranger Ultra Thick Embossing Enamel.

Embellishments:  May Arts Jute Twine, May Arts black seam binding, Scrappin' Supplies rhinestones, handmade flowers.

Adhesive:  Scotch ATG, Aileens Tacky Glue, foam squares, glue dots.

Tools:  Paper trimmer, scissors, bone folder, Ranger blending tool, water brush, heat tool.


I would like to enter into the following challenges:
  1. One Crazy Stamper - Red, Black, Kraft colour challenge.
  2. Catered Crop - Knot now
  3. Simon Says Stamp and Show - For the love of sparkle.
  4. Deep Ocean Challenge - Use more than 2 colours
  5. Simon Says Stamp - Anything goes
  6. Moving Along with the Times - Seeing red

Pause Dream Enjoy #39 Faces and Smiles

Well, I can't believe its been three months already!  This is the last post for the term, which marks my last challenge as design team member for Pause Dream Enjoy Challenges.  I've had such a great time. I'm so grateful to Janis for having me - I've learned so much from her and the rest of the DT!  You can be sure I'll be visiting the blog and joining in with the challenges from time to time.  :)

Now on to this week's challenge.  Have you ever noticed how when one person is smiling its hard not to smile back?  This week we are asking you to create a project with a face on it.  Here is what I came up with:


I use happy faces a lot.  I mean a lot!  :) Sometimes I think I should restrain myself from all of the happy faces.  Oh, and the lols too, lol.  After thinking on this weeks theme for a while I had the idea to use a big happy face on a card.  Perfect!


I used Microsoft Word to create the smiley, I used Arial at 72pt and changed the colour to dark brown.  Once printed I trimmed it down, corner rounded the piece and inked the edges.  I selected some patterned and regular papers to coordinate, cut everything down and inked the edges.  I adhered the main panel, added some orange washi tape and ribbons, and adhered the panel to the card base.  I heat embossed the sentiment strip and adhered it and the main image with foam tape.  The flowers and bow were added last.


By the way, the gems in the middle of the flowers were originally clear but I coloured them with an orange alcohol marker.  Such a great way to stretch your gemstones!


I decorated the inside of the card simply with just some inked white card stock matted with green and orange, and added some orange washi tape.


Now its your turn!  Create your project with faces and link it up here or at Pause Dream Enjoy Challenges.  The prize is a great one this week - 3 digis from Fresh Brewed Designs


Whether you link here or at Pause Dream Enjoy Challenges your project will be entered into the same draw. And don't forget to have a look at the happy creations that the other DT members have come up with.  You will not be dissapointed!


These are the supplies I've used:

Card Stock:  Stampin' Up! Chocolate Chip, Gina K Designs Jelly Bean Green, Echo Park Sweet Day 6x6 pad.

Stamps:  My Minds Eye Lost & Found Two Breeze "Dream"

Ink:  Stampin' Up!  Chocolate Chip, Versamark Watermark Ink.

Embossing Powder:  American Crafts Zing Florescent Neon Amber.

Embellishments:  Recollections rhinestones, American Crafts Premium Satin Ribbon, Really Reasonable Ribbon Burlap, washi tape.

Markers:  Bic Mark Its Sunset Orange.

Adhesive:  Scotch ATG, Artists Loft Mini Adhesive Dots, foam squares.

Tools:  Paper trimmer, bone folder, scissors, Ranger blending tool, We R Memory Keepers Corner Chomper.


I would like to enter into the following challenges:
  1. Really Reasonable Ribbon - Autumn colours and ribbon 
  2. Deep Ocean Challenges - Use more than 2 colours
  3. Simon Says Stamp - Anything goes

Thursday 27 September 2012

MFP September Stamp Release and Blog Hop Day #3 Autumn Splendor

Click HERE for the current Use it Tuesday challenge.
Click HERE for the current Craft Your Passions challenge. 


September Blog Hop!


This month's New Stamp Set Releases are
Buried Treasure - Featured September 25
Going Batty - Featured September 26
Autumn Splendor - Featured September 27 (That's today!)
Tweet That - Featured September 28


Please hop along with us!  You have a chance to win one of the above stamp sets!  Just comment on the following blogs (don't forget this one), each day for more chances to win! Scroll to the bottom for the DT list. (You do NOT have to comment on all the blogs each day!  The names are drawn randomly!)  All four winners will be announced on September 29, 2012  on the Mark's Finest Papers blog.  You can go back and comment if you missed a day.  (HINT:  The more you comment, the more chances you have to win and comments on the MFP blog count twice!)  The deadline for commenting is 11PM EST (12AM ATL) on Friday September 28, 2012.


For day 3 of the hop we have this lovely set called Autumn Splendor.  So pretty!  Here is what I came up with:


I started with the owl image.  Isn't he cute?  I decided to water colour the image using my Stampin' Up! markers.  I love water colouring!  I find it so much easier to blend than with alcohol markers.  Once the image was coloured and dry, I masked it and sprayed the background with various shades.  I like the darker background as it makes the image pop.  I inked the edges with brown and green for a bit more depth.


I chose a card base, and some coordinating papers from October Afternoon.   I cut down the sheets I wanted, rounded the corners, and inked everything in green.  I adhered the patterns together and added some ribbon.  Once adhered to the card base I added a bow and foam taped the image over the ribbon.


I stamped the sentiment on a small scrap of white with banner cut ends, inked the edges, and adhered it with a glue dot underneath the raised image.  The final embellishment consists of some layered Mark's Finest Papers paper flowers with my last gemstone brad.  I need to get more of those!  I foam taped the resulting flower in place.


For the center I stamped a sentiment on white, inked the edges and matted with more patterns. A couple of banner cut strips finished it off!

Autumn is my favourite season, so this is a great set to have in my collection.  So cute!  :)

That's it for me, why not visit the rest of the DT and see what awesome projects they've come up with?  They are a talented bunch and you won't regret taking the time to visit each one!  While your at it why not visit Mark's Finest Papers store and have a look at what they offer.  They have such a great selection of items, I'm sure you'll 'fall' in love with everything!  :)


I used the following products to make my card:

Card Stock:  Stampin' Up!  Garden Green, Neenah Solar White, October Afternoon Woodland Park 8x8 pad.

Stamps:  Marks Finest Papers Autumn Splendor

Inks:  Stampin' Up!  Garden Green, Colorbox Fluid Chalk Ink Chestnut Roan.

Mists:  October Afternoon Woodland Park Grove, Lagoon.  Mister Huey Pinstripe, Manilla.

Embellishments:  Marks Finest Papers paper flowers, May Arts seam binding, gemstone brad from stash.

Adhesive:  Scotch ATG, glue dots, foam squares.

Tools:  Paper trimmer, bone folder, scissors, Martha Stewart score board, Ranger blending tool


I would like to enter my project into the following challenges:
  1. Creative Stamp Friends - New Stamps
  2. Deep Ocean - Use more than 2 colours.
  3. Everybody Art - Autumn
  4. Party Time Tuesday - Anything Goes
  5. Simon Says Stamp - Anything Goes

Wednesday 26 September 2012

MFP September Stamp Release and Blog Hop Day #2 Going Batty

Click HERE for the current Use it Tuesday challenge.
Click HERE for the current Craft Your Passions challenge. 

Welcome to Mark's Finest Papers a Heinrich Company's 
September Blog Hop!


This month's New Stamp Set Releases are
Buried Treasure - Featured September 25
Going Batty - Featured September 26 (That's today!)
Autumn Splendor - Featured September 27
Tweet That - Featured September 28


Please hop along with us!  You have a chance to win one of the above stamp sets!  Just comment on the following blogs (don't forget this one), each day for more chances to win! Scroll to the bottom of the post to find the DT list.   (You do NOT have to comment on all the blogs each day!  The names are drawn randomly!)  All four winners will be announced on September 29, 2012  on the Mark's Finest Papers blog.  You can go back and comment if you missed a day.  (HINT:  The more you comment, the more chances you have to win and comments on the MFP blog count twice!)  The deadline for commenting is 11PM EST (12AM ATL) on Friday September 28, 2012.


Its day 2 of the blog hop and Halloween is right around the corner!  Today's set Going Batty has so many options for your Halloween projects with several cute images and lots of sentiments.  I already showed you a sneak peak from this set and today I have two more cards to show you.  Here is my card #1:


I had a fun time with this one, getting inky and messy!  I started with the background paper.  The original piece was white and I sprayed it with some Sherbet Mister Huey.  I used my hexagon mask and added some Inky Black Mister Huey - perfect for Halloween!  I wanted a bit of sparkle too so I added a bit of plum shimmer mist.  Its difficult to see in the picture but its there! 


Several months ago I made a big batch of homemade scrunchie flowers with white poster paper, and so I dyed two of these with the same inky black spray. I love this stuff! Once dry I added purple gemstones and a touch of silver pigment ink and set them aside.  I matted my background piece with distressed black, and added some pieces cut out from a sheet of Tim Holtz seasonal paper stash, then distressed with a distressing tool and some ink.  Burlap ribbon that had alreadly been spritzed with some black ink was layered over this, then some black seam binding then my black flowers.


The sentiment was stamped on white and coloured, then inked with light brown.  I added some glitter pen to the letters and the image,  then foam taped the piece over the ribbon. 


The final touches to the card front were some die cut bats that were inked with silver.  I added some tiny purple gemstones as eyes which makes for the perfect amount of creepiness!


I use an old boots-sized shoe box for misting, and there was a ton of ink at the bottom of the box once I misted the flowers from  the card front,  so in true Tim Holtz style I used a tag to soak all of the ink up.  Since I use shimmer mist so much in that box it actually transferred some to the tag, so the paper has a subtle shimmer that I love. I used part of the tag to mat a small piece of white. I inked the edges of the white with  the same puddle of leftover black spray, kind of scraping the edges along the inside of the box to make those scratches.  I added some spare bats, some glitter pen to make the letters stand out and the eyes glow and my card was finished!


I used the following products for this card:

Card Stock:  Stampin' Up!  Only Orange, Neena Solar White, Ranger #8 Manilla tag, Tim Holtz Seasonal Paper Stash.

Stamps:  Marks Finest Papers Going Batty

Ink:  Memento Tuxedo Black, Colorbox Fluid Chalk Ink Creamy Brown, Brilliance Starlight Silver Pigment Ink.

Mists:  Mister Huey Sherbet, Inky Black.  Shimmerz Paints Spritz Plum Pudding.

Markers:  Bic Mark Its Cloud Nine Gray, Copic W3, Sakura Glitter Pen Clear Star.

Embellishments:  Really Reasonable Ribbon Burlap, May Arts Seam Binding, homemade flowers, Scrappin' Supplies gemstones.

Adhesive:  Scotch ATG, Scotch Quick Dry, foam squares.

Tools:  Paper trimmer, bone folder, scissors, Cuttlebug, Cottage Cuts Curly Bat Mini die, Tonic Tim Holtz distressing tool, Ranger Blending tool.


I would like to enter into the following challenges:
  1. Really Reasonable Ribbon - Autumn colours and ribbon.
  2. Songbird Challenges - Defying Gravity
  3. Charisma Cardz - Things with wings
  4. Hiding in My Craft Room - Halloween
  5. Stampin' for the Weekend - Feeling Floral
  6. The Pink Elephant - Chevron or Hexagon

For card #2 I came up with the following:


Isn't it purrrtty?  :)  You may have seen this card included with projects on the main blog.  I started with the image with this one, stamping and colouring on white, then using my blending tool to ink the background with gray.  I inked the edges with black, then matted with a distressed piece of black. 


The main panel was put together with some pieces of patterned paper, more distressed black card stock, and black seam binding.  I foam taped the image over the ribbon, and the main panel was adhered to a black card base.  I added glitter pen to the cat's eyes as an afterthought and they really look creepy!


The center was decorated with another inked piece of white, and I added a strip of witchy portraits from the left over patterned paper.  I stamped the broom and the sentiment, added some glitter pen and the card was complete.  :)

What a fun set this is!  I love Halloween and there are so many options with this set.  I still have some ideas left so I'm sure you'll see a few more stamps before the end of October rolls around. :)


I used the following products on my project:

Card Stock: Gina K Designs Onyx Black, Teresa Collins Haunted Hallows.

Stamps:  Marks Finest Papers Going Batty

Ink:  Memento Tuxedo Black, Stampin' Up!  Going Gray

Markers:  Bic Mark Its Cloud Nine Gray, Tuxedo Black. Copic W3, YG03

Embellishments:  May Arts black Seam Binding, Sakura Glitter Pen.

Adhesive:  Scotch ATG, foam squares.

Tools: Paper trimmer, bone folder, Ranger blending tool, Tonic Tim Holtz distressing tool.


I am entering the following challenges:
  1. Twisted Tuesdays - Back to basics
  2. Deep Ocean Challenges - Use more than two colours  (black, white, orange, gray, and a hint of green)
  3. Everybody Art - Autumn
  4. Party Time Tuesday - Anything Goes

So that's it for me, why not visit the rest of the DT and see what awesome projects they've come up with?  They are a talented bunch and you won't regret taking the time to visit each one!  While your at it why not visit Mark's Finest Papers store and have a look at what they offer.  They have so many great things I'm sure you'll 'go batty' with excitement!  :)


Tuesday 25 September 2012

MFP September Stamp Release and Blog Hop Day #1 Buried Treasure

Click HERE for the current Use it Tuesday challenge.
Click HERE for the current Craft Your Passions challenge.  

Welcome to Mark's Finest Papers a Heinrich Company's 
September Blog Hop!

 
This month's New Stamp Set Releases are
Buried Treasure - Featured September 25 (Thats today!)
Going Batty - Featured September 26
Autumn Splendor - Featured September 27
Tweet That - Featured September 28


Please hop along with us!  You have a chance to win one of the above stamp sets!  Just comment on the following blogs (don't forget this one), each day for more chances to win!  (You do NOT have to comment on all the blogs each day!  The names are drawn randomly!)  All four winners will be announced on September 29, 2012  on the Mark's Finest Papers blog.  You can go back and comment if you missed a day.  (HINT:  The more you comment, the more chances you have to win and comments on the MFP blog count twice!)  The deadline for commenting is 11PM EST (12AM ATL) on Friday September 28, 2012.


Yayyy, its finally here!! This is my first hop with this talented bunch of designers and I am sooooo excited!  Buried Treasure is such a fun set to start out with!  Did you know that Talk Like a Pirate Day was on September 19th?  Aye, it was matey, arrrgh!!  A few days late but better late than never!  Here is what I came up with:


I love this set!  When I was trying to decide what to do for this card I was flipping through my patterend papers and I found this map sheet and I immediately had the idea of what I wanted to do.  I cut the piece down to fit my card, inked it, and cut the mat and card base to coordinate.  I frayed the edges of the black piece with a distressing tool.


I stamped the boat and coloured it, then fussy-cut it out.  I was going to leave the edges white, but I just couldn't do it so I added a bit of creamy brown ink so that it would blend in with the rest of the card.  I adhered it in place with some foam tape, and added some glitter pen to the skulls.  Because every pirate needs glittery Jolly Roger flags, lol.


I drew a curvy dash line with a black felt tip marker, and drew a large red 'x' to mark the spot.  More glitter pen was added for more sparkle. :)


The sentiment was stamped on a strip of cream,more glitter pen added, and the ends of the strip were banner cut.  I inked the edges with more creamy brown, and folded the opposite end around a hat pin and glued it in place,  I used my bone folder to add a curve to the strip, and stuck the pin into the center of the 'x'.  I taped the sharp end of the pin to the back before adhering the panel to the mat, then the card front.  A glue dot holds the part of the banner that is touching the map.


For the center I inked a piece of cream and stamped another sentiment, of course adding more glitter, and I decided to stamp a bit of the map from the set along the bottom.  I matted the cream piece with another distressed piece of black, which was adhered to the card.

All done! This card seemed to take longer to explain than usual, but it was actually a pretty quick card.  This was a great set to work with and I foresee using it for some kid birthday cards, invitations, and maybe grown up birthday cards too!  

So that's it for me, why not visit the rest of the DT and see what awesome projects they've come up with?  As I've said before they are a talented bunch and you won't regret taking the time to visit each one!  And while your at it why not visit Mark's Finest Papers store and have a look at what they offer.  I have no doubt you'll find a few buried treasures of your own! :)


I used the following products to make my card:

Card Stock:  Stampin' Up! Certainly Celery, Gina K Designs Pure Luxury Pure Ivory, Onyx Black, Studio Calico Abroad 6x6 pad.

Stamps:  Marks Finest Papers Buried Treasure.

Ink:  Memento Tuxedo Black, Colorbox Fluid Chalk Ink Creamy Brown.

Markers:  Bic Mark Its Cloud Nine Gray, Tiki Hut Tan, Honey Brown, Rambunctious Red. Zig Millenium 0.5 Marker Pure Black.  Copic 00, W3, W5. Sakura Glitter Pen Clear Star.

Embellishments:  Marks Finest Papers hat pin.

Adhesive:  Scotch ATG, foam squares, glue dots.

Tools:  Paper trimmer, bone folder, scissors, Tonic Tim Holtz distressing tool, Ranger blending tool, Martha Stewart Score Board.


I would like to enter into to the Fussy and Fancy Friday challenge - Trip around the world.

Use it Tuesday #40 Scraps

We've made it to another Use it Tuesday challenge and this week is a good one.  We are asking you to dig into your scraps which I know all of you have tons of!  Here is what I came up with:


I've developed my own method of organizing scraps over the years.  Regular card stock is organized by colour, and I always look in these folders first if I need something smaller than a full sheet.  Scraps from collections and 6x6 packs are kept with the collection until there isn't enough of the collection left to keep together.  These patterned scraps are all kept together.  This is the folder that I don't go into this often and I had a ton of stuff in there just waiting to be used.  All of the papers on this card are from that stash except for the card base.  And I now have ideas for more!  Stay tuned for that. :)


For this card I actually dumped my scrap folder on my table and went through everything.  I had a bunch of Christmas scraps so I decided to go with that and make a Christmas card.  The text pattern is the last of a sheet I had from the Girls Paperie.  I love this sheet so I have been using it sparingly and I really like it as a background here.  The kraft with the polka dots is actually from some packaging that I got ribbon sent in a few months ago.  The green dots are from Eco Park Dots and Stripes Christmas edition, and the little strip with the sentiment is from Stampin' Up!  The larger green pieces are Pink Paislee mistables and I love this stuff! Now when I use it I usually cut it to the size I need before I ink it, but the first few times I used it I would ink a whole sheet - particularly when making multiple cards. These pieces were left over from Christmas cards last year and I love how the green inks turned out.


Once I chose all of the papers I was going to use I cut everything down to size and inked everything with some light brown.  I adhered the strips to the text background and added some twine and a button.  Once the panel was adhered to the card base I added the sentiment strip which I had heat embossed, a wooden snowflake and some random pearls.


 I'm in love with this card which makes me think I should shop my scraps more often!

Now its your turn!!  Create a project (it doesn't have to be a card - whatever you can think of!)  and go to Use it Tuesday. Add your project using the inlinkz by Friday October 5th, and make sure to tell us in your post what you used that was hoarded! One lucky crafter who joins in will be randomly chosen as featured guest designer in an upcoming challenge!!

Don't forget to got to Use it Tuesday and see what the DT has come up with.  They have some wonderful inspiration for you!  Now go use your scraps!  :)

I used the following supplies:

Card Stock:  Stampin' Up!  Crumb Cake, Pink Paislee Mistables, Girls Paperie, Echo Park Dots and Stripes, Stampin' Up!, ribbon packaging.

Stamps:  Stampin' Up!  Many Merry Messages.

Ink:  Versamark Watermark Ink, Colorbox Fluid Chalk Ink Creamy Brown.  Various mists (I don't remember which)

Embellishments:  May Arts Jute twine, Recollections pearls, Maya Road snowflake from Vintage Embellishment Pack, button from stash.

Adhesive:  Scotch ATG, Tombow Mono Multi liquid glue, Artists Loft Mini Adhesive Dots, foam squares.

Tools:  Paper trimmer, bone folder, scissors, Ranger blending tool.


I would like to enter the following challenges:
  1. Catered Crop - Knot now
  2. Simon Says Stamp - Emboss it

Monday 24 September 2012

MFP Sneak Peek! Boo!

Welcome to my 100th post!  And what better way to celebrate than a sneak peak!! :)

Tomorrow is the big event when you get to see what the new Mark's Finest Papers stamp sets for September, and as its my first hop with the DT I am so excited! In the meantime, however, I'm allowed to show you some projects I've made with the new stamps.  Yesterday I showed you a card with a fun harvest pumpkin, today the fun continues Halloween card!!


Spooooky!  I love this little ghost!  I decided to keep things pretty monochromatic with black, white, and gray.  I first stamped my little ghost and coloured the image - basically I just added some shading to the ghost part and coloured the hands and feet - then fussy cut the image. 


I started with the front panel, a black piece matted with white.  I placed the image where I wanted then chose a pattern that I knew I wanted to mat with black. I figured out where my image would be, used my Cuttlebug and Spellbinders dies to cut the first circle, then marked where the circle was on the pattern.  I used the die that was the next size up to cut the circle from the pattern.  This ensures the circle is matted evenly.  Before adhering all of the pieces I inked all black pieces with white, and all white pieces with black - except for the image of course. I added some twine to the patterned panel and adhered it with foam tape.


The center was just an inked piece of white, a spare bat I had die cut for another project (spoiler alert!) and the sentiment.  I also carefully inked the edges of the card base with white.  Its Boo-tiful, don't you think!  ;)

Don't forget, the blog hop starts tomorrow mornng bright and early, and will continue until Friday. We members of the DT will be creating new projects each day with one of the new stamp sets.  Some stamp sets are up for grabs so make sure you stop by here or at the blog to find out the details.  I promise you won't be disappointed, the stamps are so cute!  See you then. :)


I used the following products for my project:

Card Stock:  Gina K Designs Onyx Black, Neenah Solar White, Teresa Collins Haunted Hallows.

Stamps:  Mark's Finest Papers I'm Going Batty.

Ink:  Memento Tuxedo Black, Stampin' Up!  Whisper White.

Markers:  Copic 00, W3, W5, E00

Twine:  Twinery Charcoal

Adhesive:  Scotch ATG, Scotch Quick Dry, foam squares, glue dots.

Tools:  Paper trimmer, bone folder, scissors, Cuttlebug, Spellbinders Nestabilities Standard Circles Large and Small, Cottage Cuts Curly Bat Mini, sponge,.


I would like to enter into the following challenges:
  1. Creative Stamp Friends - New Stamps
  2. Hiding in My Craft Room - Halloween

Craft Your Passion #129 Buttons and Bows

Its time for another challenge at Craft Your Passion Challenges.  This week we're asking you to use buttons and bows on your project.  This is what I came up with:


I started with the image from our sponsor Stamp Fairy.  She's cute isn't she!  Once I had her coloured I masked the image and sprayed with various mists, with the intent to give the background a bit of interest without being too dark.  I trimmed the piece down, corner rounded the edges, and inked the edges with light brown.


Once the image was complete it was time for the rest of the card.  I wanted to make something a bit more simple than usual and I had an idea for a fun background.  I had gotten some handmade japanese paper at a local art store and I cut it down to be slightly smaller than my card front.  I first folded the sheet in quarters lengthwise, then folded the resulting strip back and forth diagonally.  I used my bone folder during this step to make sure that the fold went through all of the layers.  Once I unfolded I had a faux-embossed chevron background!  I love how the handmade paper looks, and this technique is really fun!  I definitely will be trying this again. 

 
I decided on a white card base, and before adhering the chevron piece to the base I added the image on some foam tape, some bakers twine and a wood button.  I love these embellishments but once the panel was adhered to the base I decided that it was too white.  I really tried to hold myself back but I couldn't help it!  I used a scratch piece of paper to cover the image and embellishments and added some bronze mist to the top left and the bottom right corners.  I think it was the perfect thing to tie it all together. 


Won't you join us?  Simply create your project with buttons and bows and add it to the Inlinkz at Craft Your Passion Challenges by September 30th.  Also visit the site to see what great prizes you can win this week, and for some great inspiration from our talented DT!  :)


I used the following supplies for my project:

Card Stock:  Gina K Designs Pure White, Japanese handmade paper.

Stamp:  Stamp Fairy Betsy

Ink:  Colorbox Fluid Chalk Ink Creamy Brown

Mists:  Shimmerz Paints Chick-a-dee, Heavy Metal, Bronze Bombshell

Markers:  Neopiko 2 Y548, Bic Mark Its Tiki Hut Tan, Pink Flamingo, Yellow Blaze, Forest Green.

Embellishments:  Maya Road button from Vintage Embellishment Pack, Twinery Buttercream bakers twine.

Adhesive:  Foam squares, Artists Loft Adhesive Mini Dots, Scotch Quick Dry, Dotto repositionable adhesive.

Tools:  Paper trimmer, bone folder, scissors, We R Memory Keepers Corner Chomper, Ranger Blending Tool.