
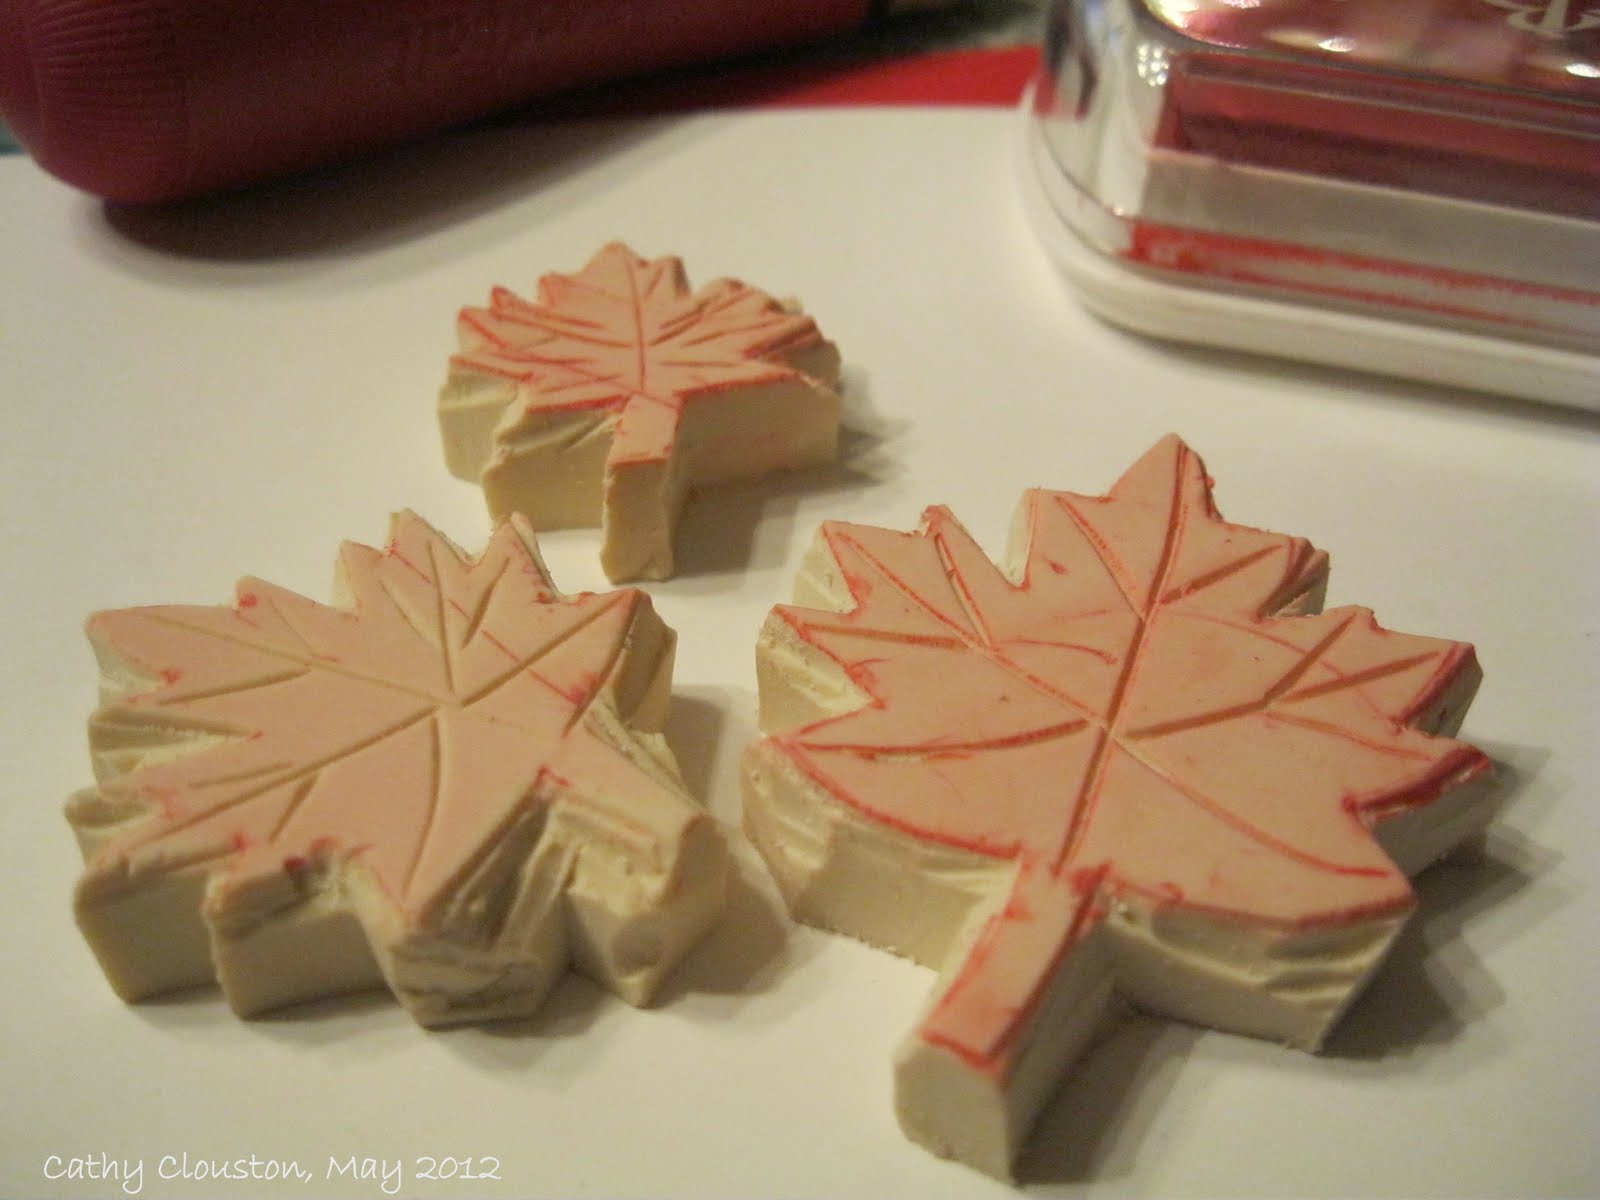
Once I decided on red and white I thought I should probably use a maple leaf image as well, but after searching through my stamps I realized I didn't have one. And I call myself Canadian! So I decided to carve my own. I made three sizes, but only two made it on to this project. Thats OK, Canada Day is coming soon so I can use the larger one then.
Since my last few cards were birthday cards I decided to make a thank you card this time. I started with a red cardstock base, cut and folded to the A2 size. I chose some Bazzill dictionary print (which I love!!), and although I usually mat patterns I decided not to for this one as I like the contrast of the gray hue against the red. I used a distress tool around the edges of the pattern (lightly as the paper is very thin) and adhered it to the card base. I added a piece of black ribbon around the middle of the card, making sure the ends were adhered underneath where the main panel would go so that they don't show on the inside of the card. A second piece of ribbon was tied around the first piece to make the bow.
I decided to make some handmade scrunchy flowers since the thin dictionary paper works so well with this technique. You can read about the first ones I made here. I used four circles for each flower, and since I didn't have any jewel brads left I just used simple mini-brads for the flower centers, to which I adhered rhinestones later. Once put together I sponged the 'petals' with red ink, and sprayed the flowers with red, white, and gold shimmer sprays for sparkle. Adhering the jewels was the last step.

I cut the main focal panel out of white cardstock and stamped a swirly flourish stamp several times on one side. I stamped three leaves (one medium, two small) on the other side of the panel, turning the stamps each time for interest, and allowing the images to go off the edge. I chose the sentiment from one of my new My Minds Eye sets, and I thought it worked because it is the same font that is on the dictionary paper. I chose to stamp it in black to make it stand out from all of the red. Once the sentiment was added to the center of the panel, I added some Sakura glitter pen to the images, used a distressing tool on all four sides of the panel, and added the flowers with Zots. The panel was adhered over the ribbon with foam squares.
For the inside of the card I stamped the sentiment on a small piece of white. The sentiment is actually inside of an oval. Since the white scrap I used wasn't very big I positioned the stamp so that the sentiment was nestled into the corner and the oval went off the edge of the piece. Once stamped I added some Sakura glitter pen and distressed the edges with a distressing tool. I matted the white with more dictionary paper and added this to the inside of the card.

Red and white is not a colour combination I usually turn to, but I'm thinking I should more often. I also like the idea of keeping things simple by using one bright colour along with black, white, and some neutrals. This card has given me some ideas for future cards which I am sure you will see soon! I love how this card turned out, it's patriotic without being obvious about it, and I keep trying to think of someone I need to thank just so I can give it to them! :)
I would like to enter this card into the following challenges:
- Lets Ink It Up - Bling
- Creative Craft Challenges - Distressing
- Party Time Tuesdays - Vintage or Shabby Chic
- Deep Ocean - Swirls
- Creative Card Crew - Dimension
- Papertake Weekly - True Colours
- Ribbon Carousel - Fancy Flowers
I used the following supplies:
Cardstock: Stampin' Up! Real Red, Whisper White, Bazzill Basics Antique Dictionary Page.
Stamps: My Mind's Eye Fine & Dandy True Blue Stamps, Lost & Found Two Breeze Dream, Lost & Found Two Rosy Everything. Hand carved maple leaves.
Ink: Color Box Fluid Chalk Ink Lipstick Red. Memories Black. Smooch Spritz Cherry Ice, Shimmerz Paints Shimmerings Goldie Lox, Babies Breath. Sakura Gelly Roll Clear Star pen.
Embellishments: Recollections Mini Brads, Stampin' Up Jewels Basic Rhinestones, black satin ribbon from stash.
Adhesives: Tombo Mono Permanent Adhesive Runner, Zots, foam squares.
Tools: Paper trimmer, scissors, Tonic distressing tool, Cuttlebug, Spellbinders Nestabilities Standard Circles Small, We R Memory Keepers brad setter, bone folder.
Oh love your card its stunning. My Folks came to Canada over Christmas doing a great train journey, they fell in love with the country, Stunning, Thanks for playing on Papertake Weekly Hazel (GDT)
ReplyDeleteFab design, great flowers. Thanks for sharing with us at LIIU, good luck with the challenge. Hugz Suzanne
ReplyDeleteThis is great and unusual. Love those flowers. Thank you for joining us at Creative Card Crew this time and good luck.
ReplyDeleteHugs
Cathy
xxxxx
Lovely card :) Thanks for playing along with the treu colour challenge at Papertake Weekly - Jane x
DeleteWOW carved your own stamp and all! Great card. Thanks for entering this in the Lets Ink It Up Bling challenge!
ReplyDelete